sewing

Overall tote bags

I had the pleasure recently of making some fun tote bags for the sweetest woman. We ‘met’ through one of the Facebook groups in my community and she contacted me asking me to make these as Christmas gifts for her daughters. They had lost their beloved grandpa in early 2020, and just from talking to her, I could tell how amazing this man was. It was such an honor to turn his overalls and bandanas into keepsakes for his granddaughters.

⠀⠀⠀⠀⠀⠀⠀⠀⠀⠀⠀⠀⠀⠀⠀⠀⠀⠀
The job started with a consultation where Marta brought the overalls and an inspiration photo and we discussed our ideas for the bags. The overalls were cut and appliquéd to the bag exterior pieces before sewing everything together. I used Decor-bond on both the interior and exterior panels for a very structured bag. The interior has a double pocket using the featured fabric as well as a back pocket from the overalls. I wanted the bandanas to be removable, but secure while being used, so they are attached to the front pocket interiors with some hidden Velcro. Lastly, I added the patches to represent his military service.

⠀⠀⠀⠀⠀⠀⠀⠀⠀


I was so happy to help this vision come to life! I got to make a new friend, and she even sent me a picture of her daughters with their bags on Christmas morning! The smiles on their faces really made my day.

Happy Sewing, ~L⠀⠀⠀⠀⠀⠀⠀⠀⠀
⠀⠀⠀⠀⠀⠀⠀⠀⠀⠀⠀⠀⠀⠀⠀⠀⠀⠀

Scrappy Rainbow BYS Quilt

I am so happy to FINALLY be sharing this By Your Side quilt with you! I feel like I have been making this quilt forever, and just finished working on it last week.

I finished the top years ago and then it lingered in my studio closet waiting to be quilted.

The quilting stage gave me some trouble, as I had my batting flipped and was getting all sorts of looping and thread breakage. For more about batting ‘sides’, visit  Suzy Quilts for a fabulous post on the subject!

It sat in my closet again for months waiting for me to remove all the bad lines of quilting.

Finally, last week, I sat out in the beautiful sunshine and finished the job!

It was nice to finally see it done and Phin gave his kitty seal of approval!

Happy quilting! ~L

Jeans Repair

I don’t know if it’s the summer or what, but I feel like lately I’ve been doing so many repairs on my family’s jeans collections.

I love that a quick fix can save a pair of well-loved jeans from the donate pile or scrap bin.

There are lots of great resources out there to learn mending techniques and get inspiration, but these two books are my favorites. If you haven’t tried mending your own clothes yet, I suggest starting here. (These are not affiliate links; I just love these books!)

Happy Sewing!

~L

“Gertie Sews” Garments for Lauren

You may have noticed I’ve been posting a lot the last couple of weeks. I’ve finished a lot of projects recently and am trying to catch up on writing my posts!

For years, I’ve been wanting to spend some focused time learning how to sew garments really well. I decided a great place to start would be sewing some cute vintage-style clothes for my daughter from the Gertie Sews Vintage Casual guidebook by Gretchen Hirsch.

I love how this book lays out so much information in a way that is totally understandable before giving you some amazing patterns that can be adapted and adjusted to fit your style.

My first pattern from the book was the Short and Chic A-line skirt. Honestly, this one was really just about me getting to play with my serger settings! I had this fabric on hand, and although the heavy weight wouldn’t be my first pick for a short skirt, I think it’ll look really cute in fall with some dark tights.

Next up was the Flared Shorts. I kept the pockets in the pattern because who doesn’t love pockets?! This black pair was my test run.

Once we had the pattern as we wanted it, I told my daughter the yardage she would need to buy if she found fabric she liked. Well, she works at a craft store that sells fabric, so it took her all of a day before she came home with this adorable blue and white stripe with embroidered flowers.

I really love this book and now that I’ve made a few garments for my daughter, I think I’ll venture into making some things for myself. My goal is to get a pattern drafted for a perfect-fit cigarette pant. My husband is also already asking for dress shirts, so I’ll have lots of things to keep me busy!

Happy Sewing! ~Lorinda

How-To: Back-to-School Book Bag

I love this time of year. Foggy mornings, cool nights, apple spice…

After the wonderful chaos of summer play and lack of scheduling, fall is the time to get back on a routine. Days in the sun make way for lovely evenings filled with family time, crafts, and reading.

There is something so nostalgic about fall. Call me crazy, but going back-to-school was one of my favorite things as a kid.

The excitement of a new start.

New school supplies.

And lots and lots of books from the library carried in my favorite book bag.

Remember book bags?

I loved my book bag when I was little. A little tote to carry all my books around everywhere I went? Perfection!

Since the onset of fall has me feeling nostalgic, I decided to make some sewn book bags for a friend’s kids. There are seven children in her family and they home school, so you can imagine that there are plenty of books in their world! And for a little extra fun, I decided the bags should be personalized, so I let each of them color their own picture for the front panel of the bag.

If you have little ones in your world who might like a fun tote that they get to customize, read on to find out how!


Making the colored panel:

 Making the colored panels for this project is so easy and so much fun!

 Cut white fabric and freezer paper slightly larger than the intended cut size of your panel (in our bag, that will be an 8 ½” x 8 ½” square). Press the shiny side of the freezer paper to the wrong side of the fabric. Outline the area you will be cutting and tell whoever is coloring the panel to stay within those lines. Keep your seam allowance in mind and make sure they don’t put important details of their picture within that seam allowance.

Now the fun begins! Let your little ones color to their heart’s content! Encourage them to press hard with their crayons to get lots of vivid color on their panels.

Once the coloring is done, remove the freezer paper. Put several layers of paper towels on your ironing surface before laying your colored panel face down. Place another paper towel on top of your colored panel to protect your iron. With your iron on the ‘Cotton’ setting, firmly press your panel to melt the crayon wax.

The wax of the crayon will transfer onto the paper towels leaving the crayon’s color in your fabric. Keep putting new paper towels under your panel until there is no more wax or color transferring to them.

Trim up your panel to the specified cut dimensions in your pattern. For us, that’s  an 8 ½” x 8 ½” square

Note: Many people choose to pre-wash their fabric to fully prepare it to take in the color from the crayons. I did a test swatch both pre-washed and unwashed. The unwashed swatch (on the right) did lose just a little more color on the ironing step, so if you want really vivid color, pre-washing is best.


To cut:

For colored panel:

     (1) 8 ½” x 8 ½” square

For straps:

     (2) 4″ x 27″ strips (your may adjust strap length to best fit your child)

For Exterior front border and back:

     (2) 4” x 8 ½” rectangle

     (2) 4” x 15 ½” rectangle

     (1) 15 ½” x 15 ½” square

For interior:

     (2) 15 ½” x 15 ½” square


Sew the straps:

Fold your strip in half along the length and press to mark center point.


Fold the edges into the center and press along the length of the strap. Once this is done, you can fold again along that center line to make the final width of your strap.

Sew the strap along the open edge to secure.

Sew along the length of the opposite edge to give our strap a nice, finished look.


Sew the front panel:

Sew your 4” x 8 ½” rectangles to the top and bottom of your colored square. Add your 4” x 15 ½” rectangles to each side. This panel unit should finish at 15 ½” x 15 ½”.


Cut out squares for the boxed edges:

To give your book bag some depth, you’ll want to add some boxed corners. We’ll cut out for them now and sew them later. Cut a 1 ½” square from the two bottom corners of the following:  your (2) 15 ½” x 15 ½” interior squares, your (1) 15 ½” x 15 ½” exterior back square, and your 15 ½” x 15 ½” front panel unit with the colored square.


Assembly:

Put front panel of your bag on your work surface face up. Place a strap on top of the panel with the ends two inches from the edge as shown. You may adjust this measurement as desired, but it must be the same measurement on each side. It’s also important to make sure the strap isn’t twisted.

Place an interior fabric piece on top of your front panel and strap with right sides together. The loop of the strap will be between the front panel and interior piece. Pin and sew along the top, making sure the strap doesn’t shift.

Use the same technique to attach the back exterior to the second interior piece.


Open the two sewn sections and pin them along all the edges with right sides together, making sure to line up the seams where the exterior of the bag meets the interior.

Sew along both sides and the bottom of the bag exterior, leaving the cutouts for the boxed corners unsewn.

Next, sew a few inches on each side of the bottom of the lining, leaving an opening for turning the bag.

To sew the boxed corners, separate the layers of fabric and fold them back together as shown. Nestle and pin together the seams of the sides and bottom before sewing along the cut edge.

Turn the bag inside out using the opening left in the bottom of the bag interior. Make sure to fully turn the boxed corners for nice, clean lines!

Fold in the edges of the opening used for turning the bag and machine sew close to the edge. You can also stitch by hand for a less visible seam.

Push the interior inside the bag. Press and sew along the top opening.


Enjoy!

The kids were so excited when I arrived with their bags, so we did a fun little photo shoot to show off their artwork. They’ve also decided I need to make a tiny book bag for their baby sister!

Happy Sewing!  ~L

How to: Turning WIPs into FOs

It’s hard making time to make.

Often, it seems like our pile of WIPs (Works in Progress) far outweighs our FOs (Finished Objects). Quilt tops linger in closets and orphan blocks crowd our design walls. But taming the beast is possible! Here are a few tips for whipping those WIPs into shape:

1- List all your projects. Every. last. one. Go through every closet, shelf and drawer. Pull out every WIP at any stage, even if it’s just a pile of fabric that you have a vague plan for. Now list them out one by one. This is quite the reality check, but it gives you a very clear picture of what you have and helps you to prioritize and plan.

img_4064

2- Edit out what you’re no longer in love with. Maybe the fabric is dated. Maybe the intended recipient has changed their style. Maybe you’ve just fallen out of love. You might be surprised with how many projects you decide aren’t worth more of your precious time.  Find a friend or local charity that will take them off your hands. Some Project Linus chapters will take quilts at various stages of completion. Call your local coordinator to check.

img_2451

3- Prioritize. You can choose whatever criteria works for you to prioritize your WIPs. Maybe you want to get oldest projects done first, or those that are closest to completion. Or you could prioritize by the intended recipients… who has a birthday coming up? It’s really up to you. Just to remember that not everything matters equally. Your time is finite, and you should be spending that time on the things that are most important to YOU.

img_4060

4- Limit new projects. I know, I know… don’t yell at me! This one is so hard! I love shiny new things and starting projects is one of my very favorite things to do. I get it. But now that you have a handle on what needs completed, it’s a good idea to look at that list you made before starting something new.

Prioritize your potential project against that list… how does it compare? If it really is something important (like you just found out your best friend is expecting), yes, definitely add it in! But keep in mind that for everything you say yes to, you will say no to something else. Your other WIPs will move down the list, so make sure it’s worth it!

Often, we start a new project simply because we’re bored with what we’re currently working on. Instead, maybe we can add some excitement to our WIPs list by moving a current project one step closer to completion. I find that helps my need for something ‘new’ and novel without adding to my workload.

img_1782

5- Join a UFO completion group. Many local shops will have groups you can join that help keep you accountable to finishing a specific list of WIPs that you’ve chosen. Sometimes, there’s prizes to be won! If you don’t have a local group, there are several online ones. A popular challenge group is the All People Quilt UFO Challenge.  The 2019 Finish-a-Long is hosted by several quilty bloggers and is another great place to start. And The Crafty Quilter has a monthly UFO & WIP Challenge. There are lots more; find a group that you like and join in!

img_3620

6- Make the time. There is simply no way around it- if you want to finish projects, you have to set aside time to work on them. You’ll have to decide for yourself how that looks. You could block out 20 or 30 minutes a day, or set aside an entire day a few times a month. Look into registering for an open sew at a local shop if you want to socialize while you sew. Put sewing time on you calendar or add a reminder to your phone. Once you get a little momentum going, you’ll be surprised at how addicting it can be to advance your projects just one step further. And once you complete a project and get to cross that WIP off your ‘to do’ list, you’ll definitely be looking forward to your next FO!  

img_4961

7- Speaking of Finished Objects, track them! Keeping a record of the quilts you’ve completed and looking through it periodically is a really nice way to keep your motivation up. No doubt there are projects on your FO list that lingered. That you thought you’d never actually complete. Looking through the projects you’ve already completed gives you HOPE that yes, someday the WIP that’s driving you crazy will be done. There is light at the end of the creative tunnel. You are fully capable of getting those WIPs out into the world as FOs. You’ve got this.

Now let’s all finish some beautiful stuff!

Happy Sewing! ~L

Champions Quilt

Last month, I shared a quilt finish with you. I have another one to share that’s been done for quite some time.

DSC_0065 (3)

The pattern for the appliqued sphere is by Geta Grama and is called Windows into my  World.

This was one of the very first quilts I ever started. I wanted to try EPP, and this pattern was so visually striking. As I got further along, It also became the project that I used to learn hand applique and hand quilting (more on that later). It spent a lot of time being set aside. Like… a LOT lot. In the time I took to finish it, the intended recipient went from being a teenager to a married adult. I felt like it was too small to gift to a couple, so we decided to keep it. I will make them a quilt as a couple (hopefully before Christmas!) that reflects both of their styles.

I loved this pattern, but if I did it again I would probably use a fusible applique technique instead of EPP and hand applique. It would make for a much faster finish! 

dsc_0670

And for the hand quilting- you may have noticed that there is none on my finished quilt! When I started it, I was doing the hand quilting on the sphere section with embroidery thread. Turns out, I hate hand quilting with embroidery thread. I got about a third of the way done with the sphere and had to make a decision: keep going, or pick it out and machine quilt it. So I got out my seam ripper and scissors, because I honestly just couldn’t do it anymore!

I love the way the heavily quilted areas paired with unquilted spots creates fun little puffy bits in the sphere.

DSC_0074 (2)

It was so great to FINALLY finish this one and get another thing crossed off my WIPS list.

Happy Sewing,

~L

What I’m reading now

Here’s what’s been on my nightstand lately:

The One Thing

Ever had a book change your life? And then you apply the principles in the book and go around annoying everyone around you with the information? This is that book for me!

I first read through this a little over a year ago, and it totally rocked my world. I then skimmed through it one more time the same weekend underlining and taking more notes.

I am a super-distractable person, but the information presented here is really helping me to focus on what I want, define my priorities, and work on the most important things. I have spent a lot of time in the last year and a half reflecting and planning what I want my life to be. This book has really helped me take baby steps towards those goals.

I am reading it again to refresh and to learn things I may have missed a year ago. And it’s rocking my world all over again.

Ultimate Quilt Block Collection

A co-worker of mine bought this book and was saying how great it was, so of course I had to check it out! And I was not disappointed. Written by Lynne Goldsworthy, this baby has a ton of unique and beautiful skill-building blocks to choose from. It’s great for learning techniques as well as getting amazing inspiration.

I’ve only made one block from it so far, as I’m TRYING to finish WIPs before starting anything new. But I am looking forward to a possible sampler made with some of the blocks.

20,000 Leagues Under the Sea

I am a nerd; I admit it. I love classic literature and classic Sci-fi is really fun! I had read this on my kindle before, but then my daughter brought this copy home from school. Her English teacher was giving away old books…. yes, please! I like always having some fiction nearby as a diversion before going to sleep, so this ended up on my bedside table. Reading the paper copy is so much better- there’s something amazing about that old book smell!

Now that I’ve finished it- I need a new fiction novel to read! Any suggestions?

I’d also love to hear about your favorite sewing books- I’m always looking for new techniques or inspiration!

Happy Sewing, ~L

Buttercup Gown

Hello friends! I’ve been sewing up a storm lately, and am really excited to show you some things in the next couple of weeks, but first I really need to catch up!

file_001

If you follow me in Instagram, you’ve seen some pictures of this already, but I wanted to do a blog post to show some final pictures and share a bit about my experience of making it.

My two older kids are just one grade apart and are part of the same ‘squad’. (For my fellow non-teenagers, your ‘squad’ is your closest group of friends). Sometime in late September, they all decided that a group Princess Bride costume would be a ton of fun. Since my daughter is the only girl in the group (and given the fact that the boy dressing as Wesley was her Homecoming date), it was quickly decided that she would be Buttercup.

(Incidentally, my son was the six-fingered man. I made a tunic and gloves for him which I may share later… It was not nearly as fun as this dress, though!)

I love designing costumes, and had made a few things along those lines, but up until I did this dress, didn’t consider myself a garment sewist. I suppose I figured since I had never made sleeves, I couldn’t say I could sew a garment. So I chose to see this as an opportunity to stretch my garment-sewing skills. Because if I could figure out those Buttercup sleeves, I could do anything!file_000file_009

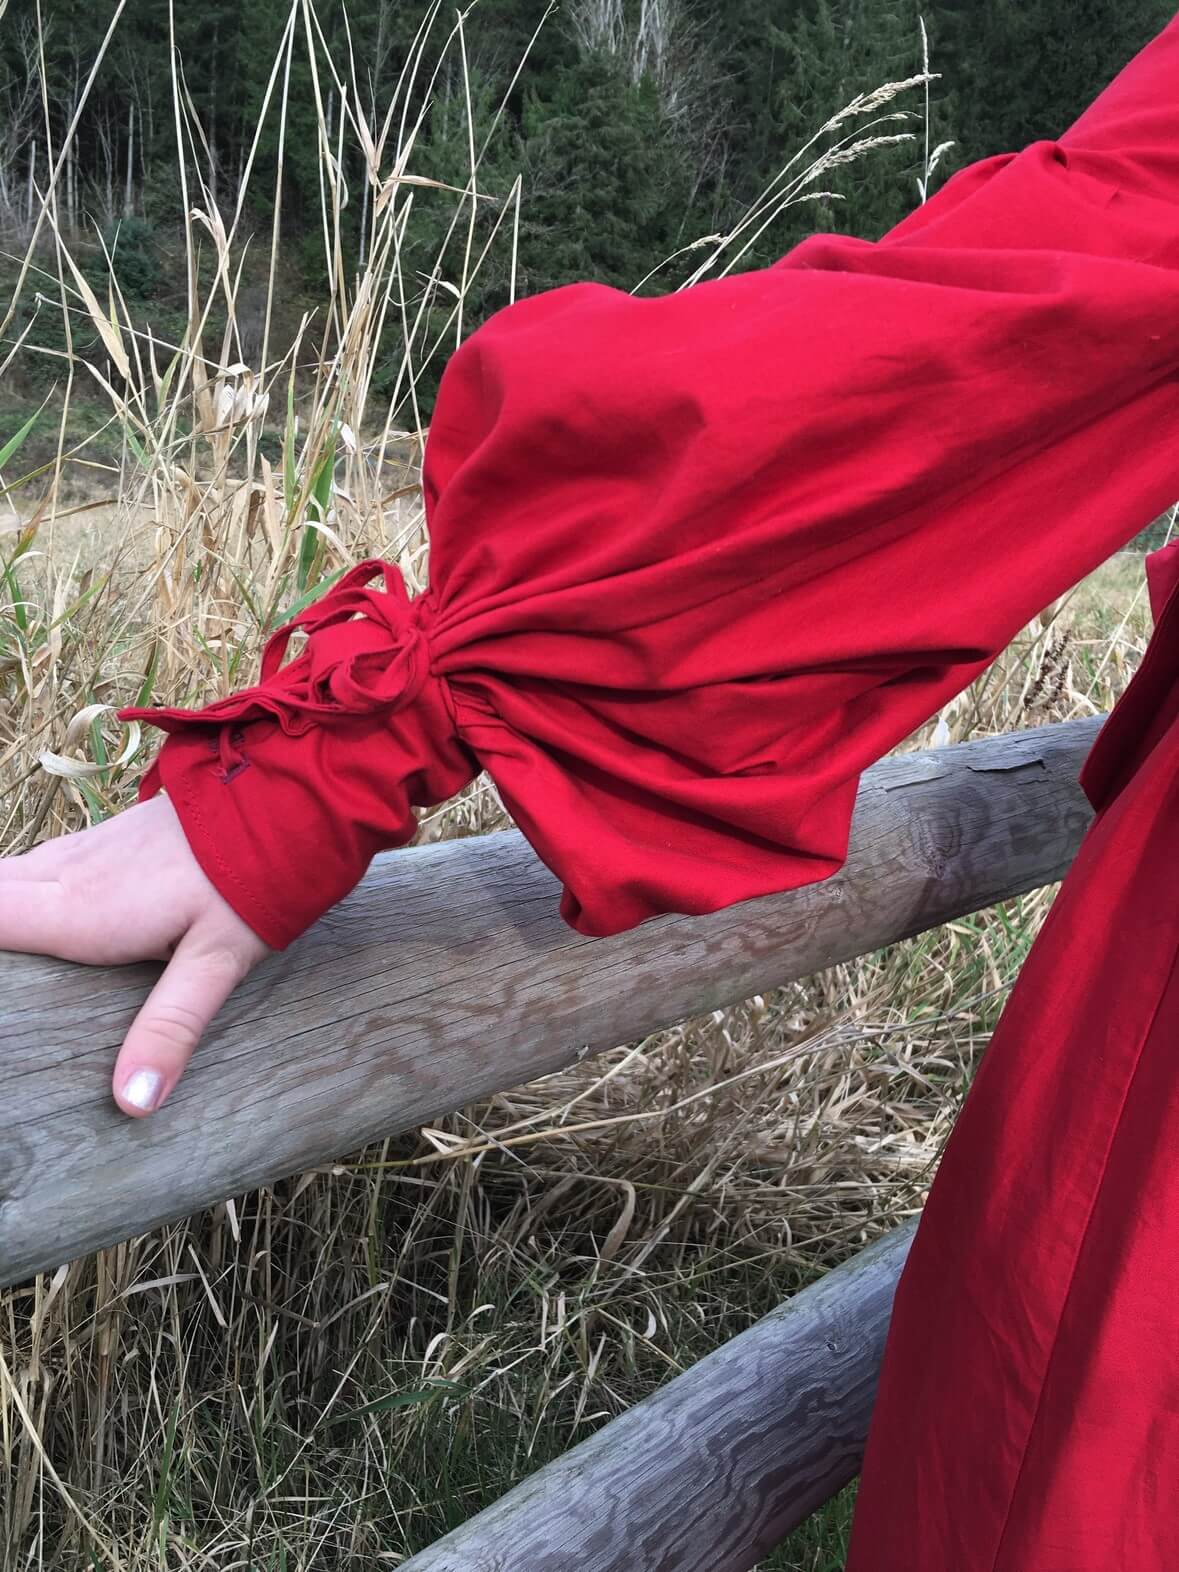
My first step was to check just in case someone had done the hard work for me and made a pattern for this dress…. no luck.  I didn’t figure there was a pattern out there, but I was hoping!

Next step- start figuring out how in the world I was going to reverse-engineer the thing. I found The Costumer’s Guide to Movie Costumes to be VERY helpful. I was able to get a good, close look at the dress and start to assemble it in my head.

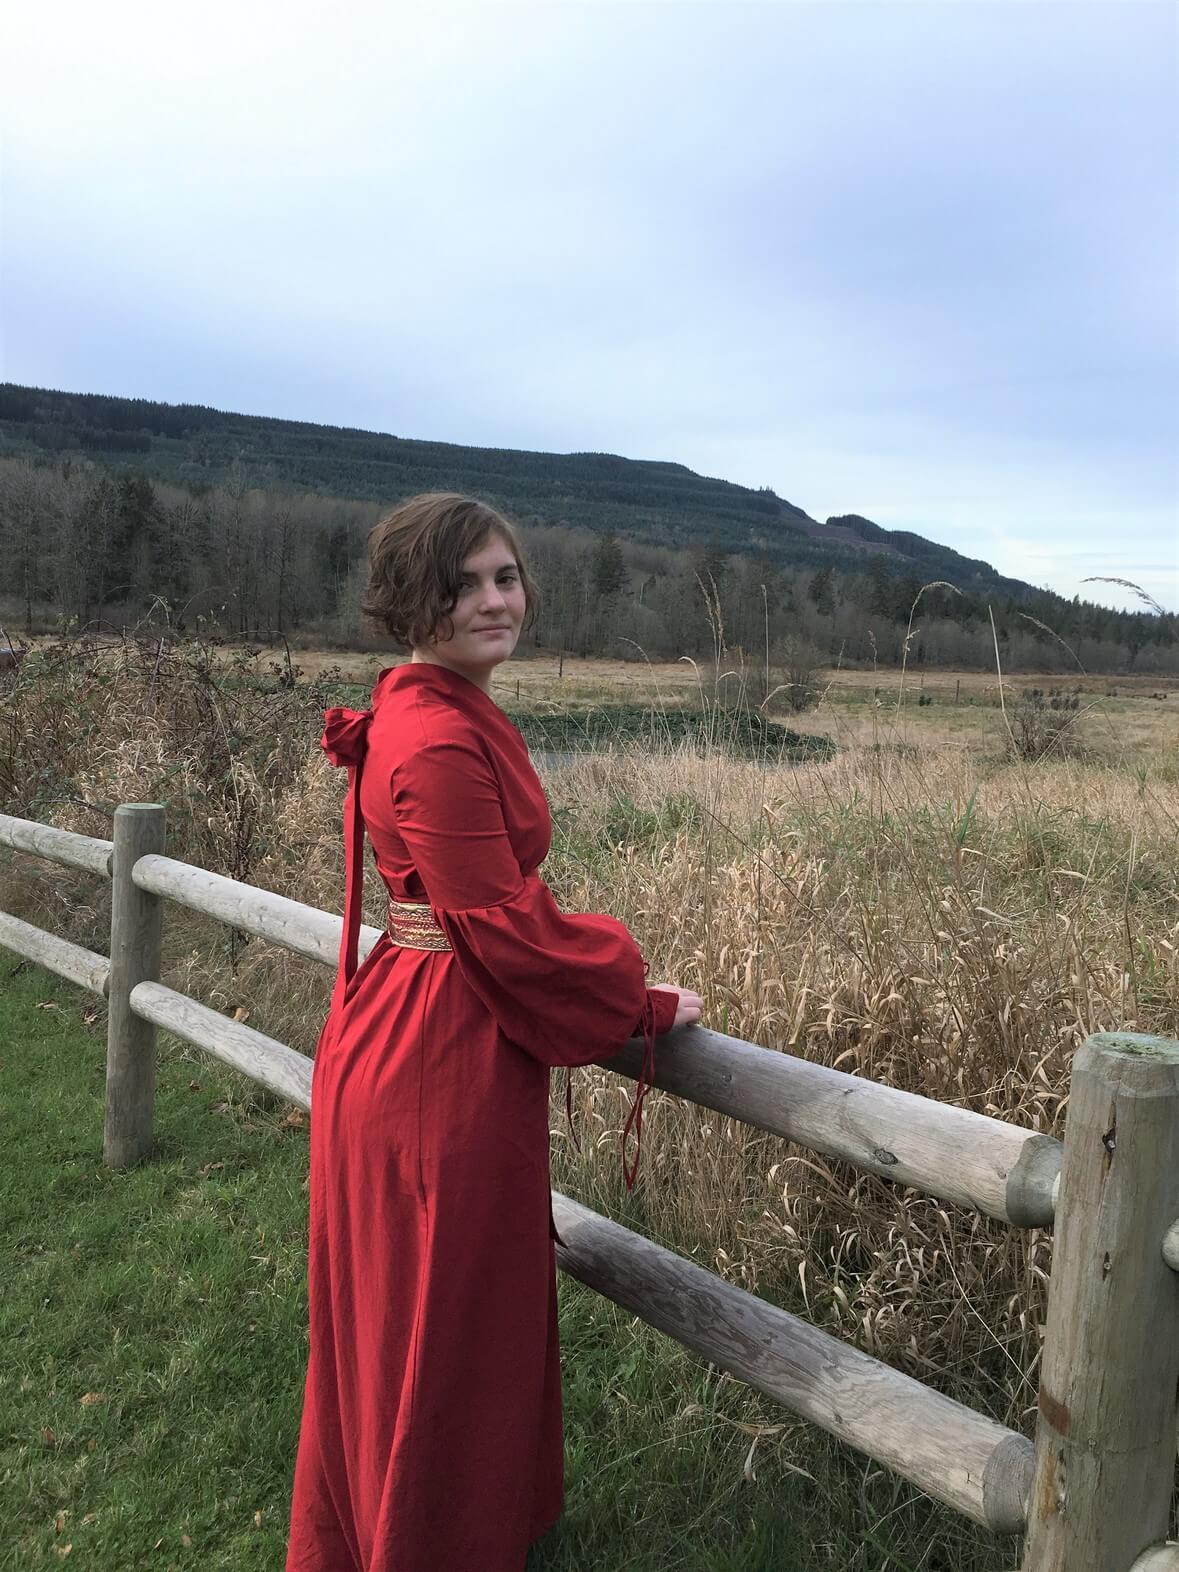
I chose Kona Solid in Rich Red for this dress. It’s much less expensive than most apparel fabric, and it was readily available at my local box-fabric store (hello, 50% off coupon!).

file_000-2

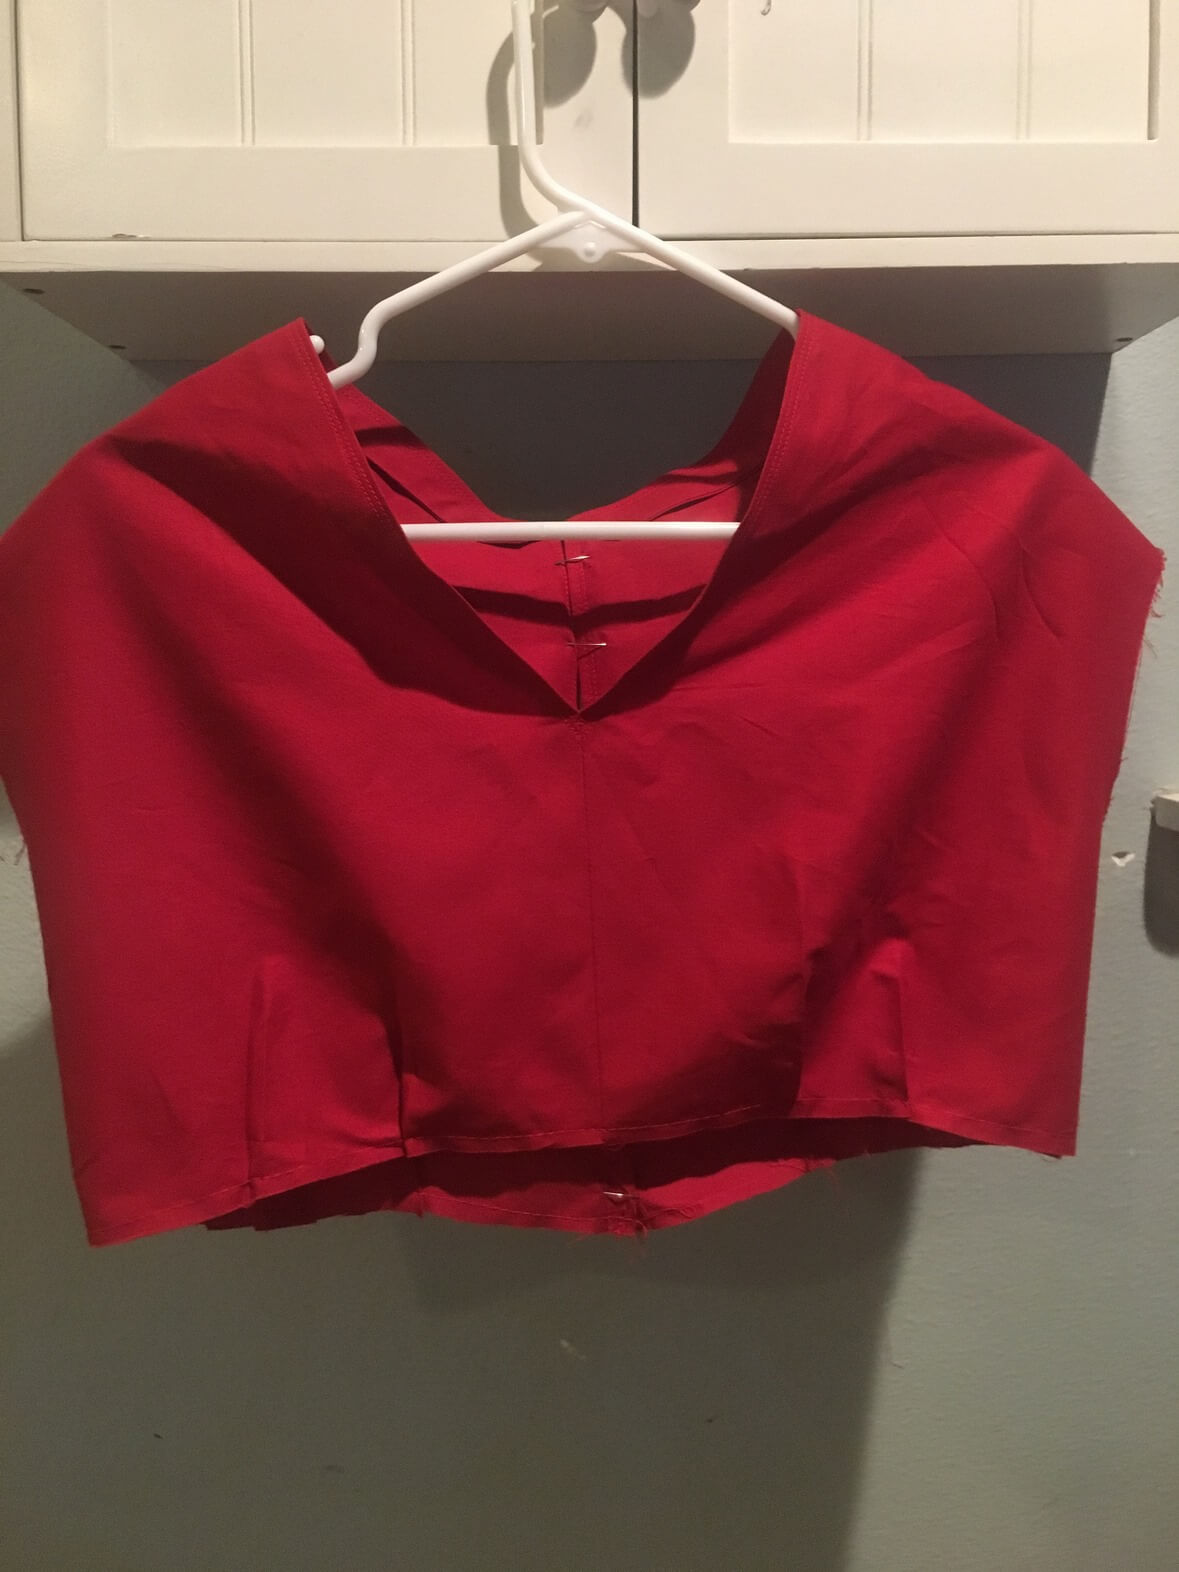
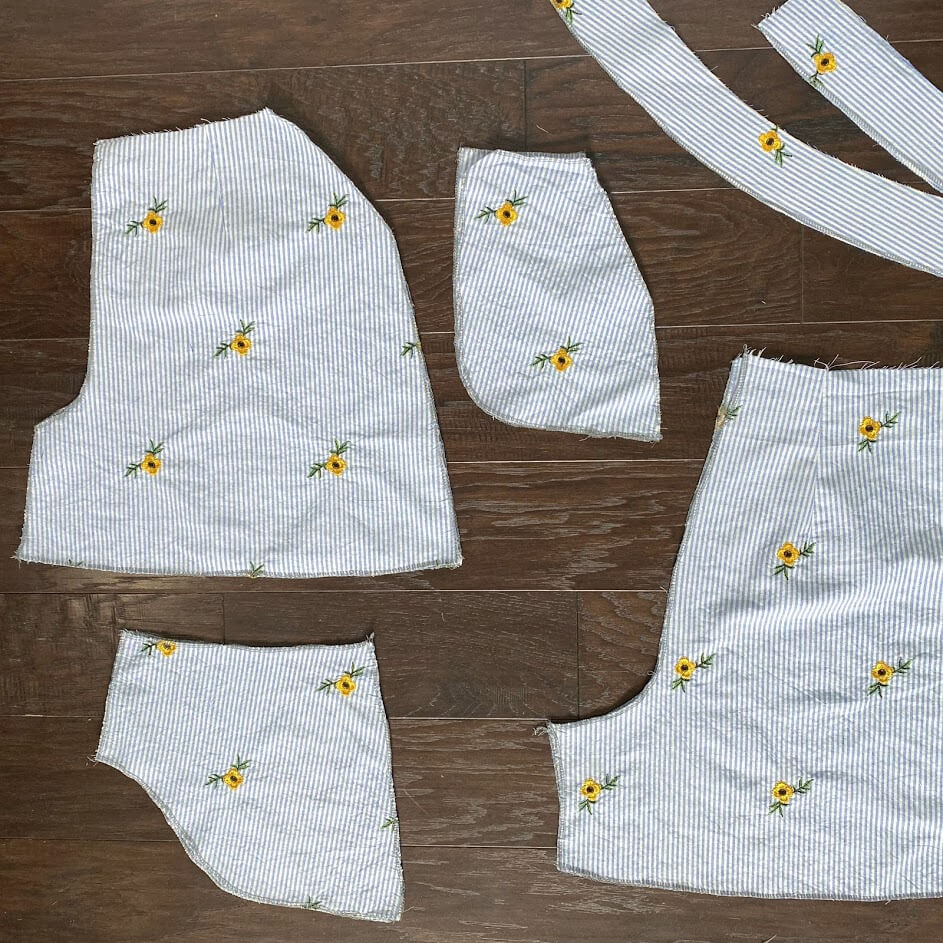
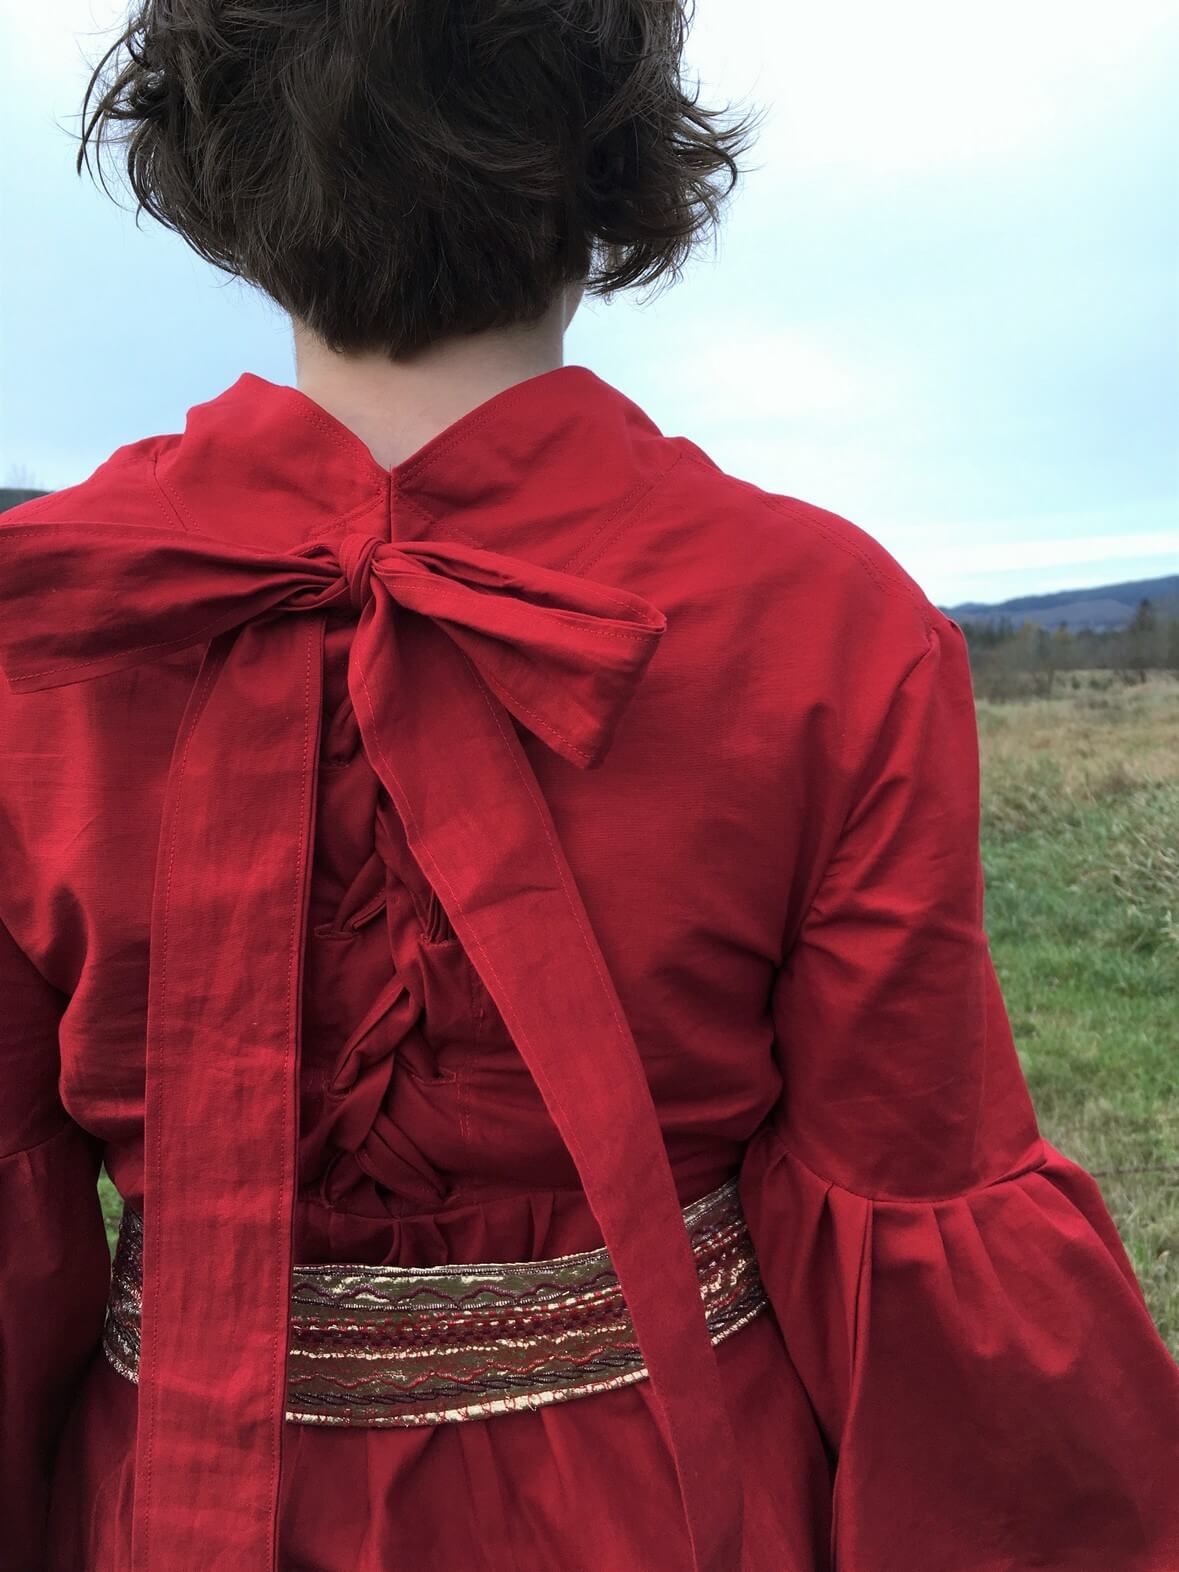
First up was the bodice. Honestly, this was a lot of trial and error with paper and muslin. I’ve done simple bodices before, but on this one I really wanted to stay true to the original, which had really unique neckline. The front part of the v-neck collar line extends around the top of the shoulder and meets in the back in a deep V, forming a good portion of the back of the bodice. I wish I could tell you I was a good blogger and took pictures of this whole trial-and-error process, but I was too focused on the task at hand. My only advice is to use a muslin and start big. That way, you can continue to make adjustments to the muslin as needed and use that as your pattern.

One more bit of advice when reverse-engineering a costume: pay attention to the details. On the bodice for this dress, it was the height of the collar, the depth of the neckline, the dropped shoulder sleeve, and the waistline being higher in the front than in the back. Those little details really add up!

file_001

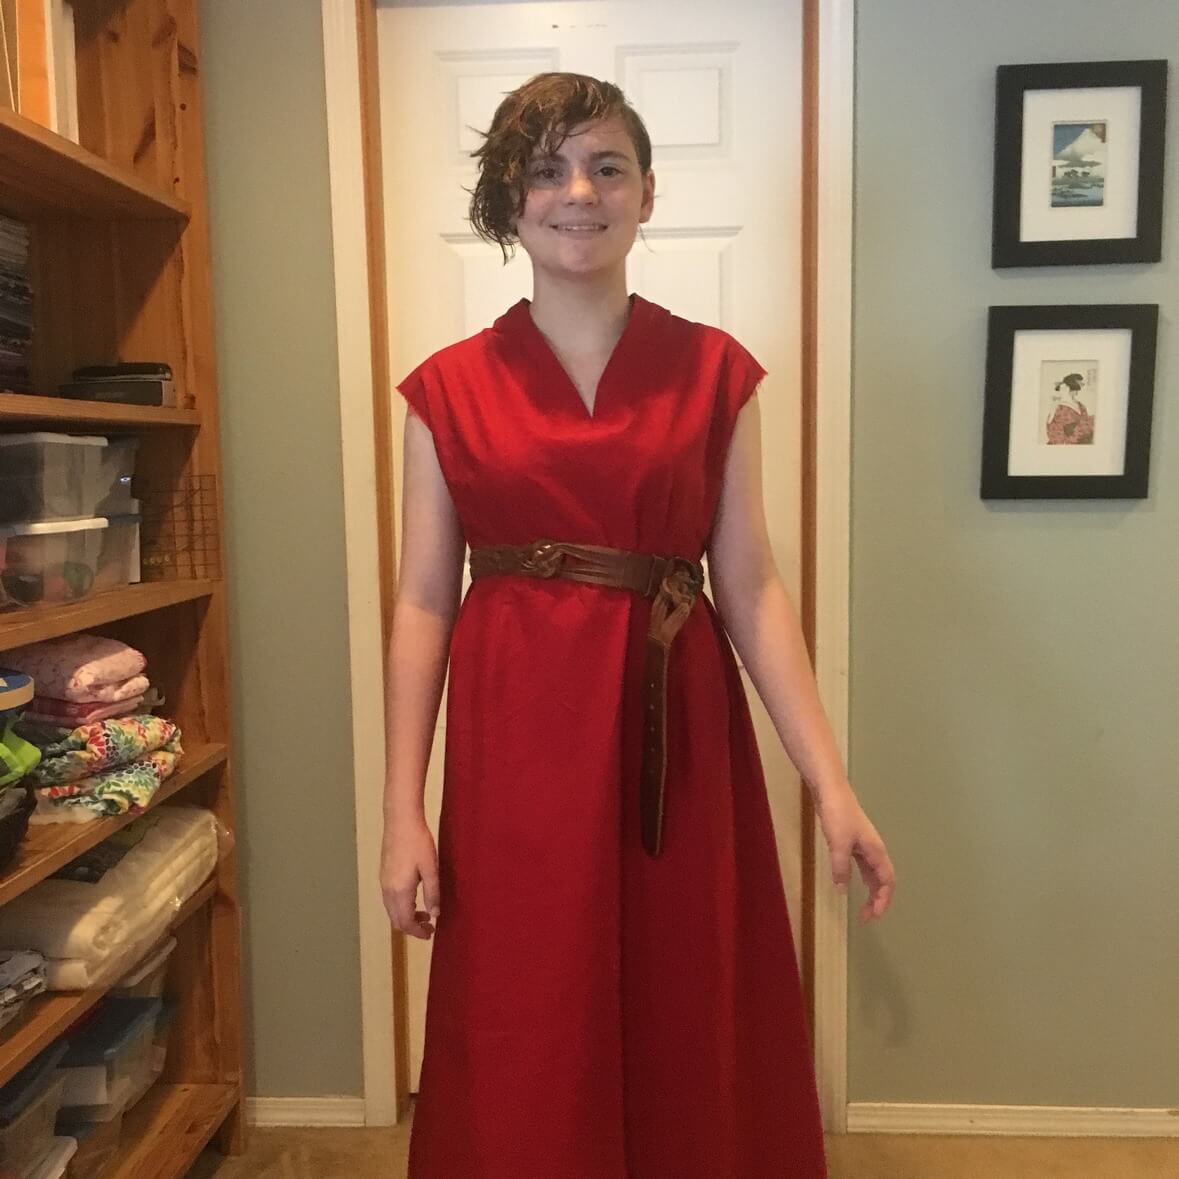
Once the bodice was done, adding the skirt was quite simple. I started with giving her enough room along the hemline to comfortably walk, and then calculated a measurement for the waistline that would give her some pleating without adding too much bulk. I divided by two and cut two wedges from my yardage to make the skirt front and back.  Sewing those together down each side, I had my skirt! Note that the front pleats are closer to the sides of the dress, further out than the bust pleats. This is part of the original design and helps keep the front of the dress fairly flat. file_002-1

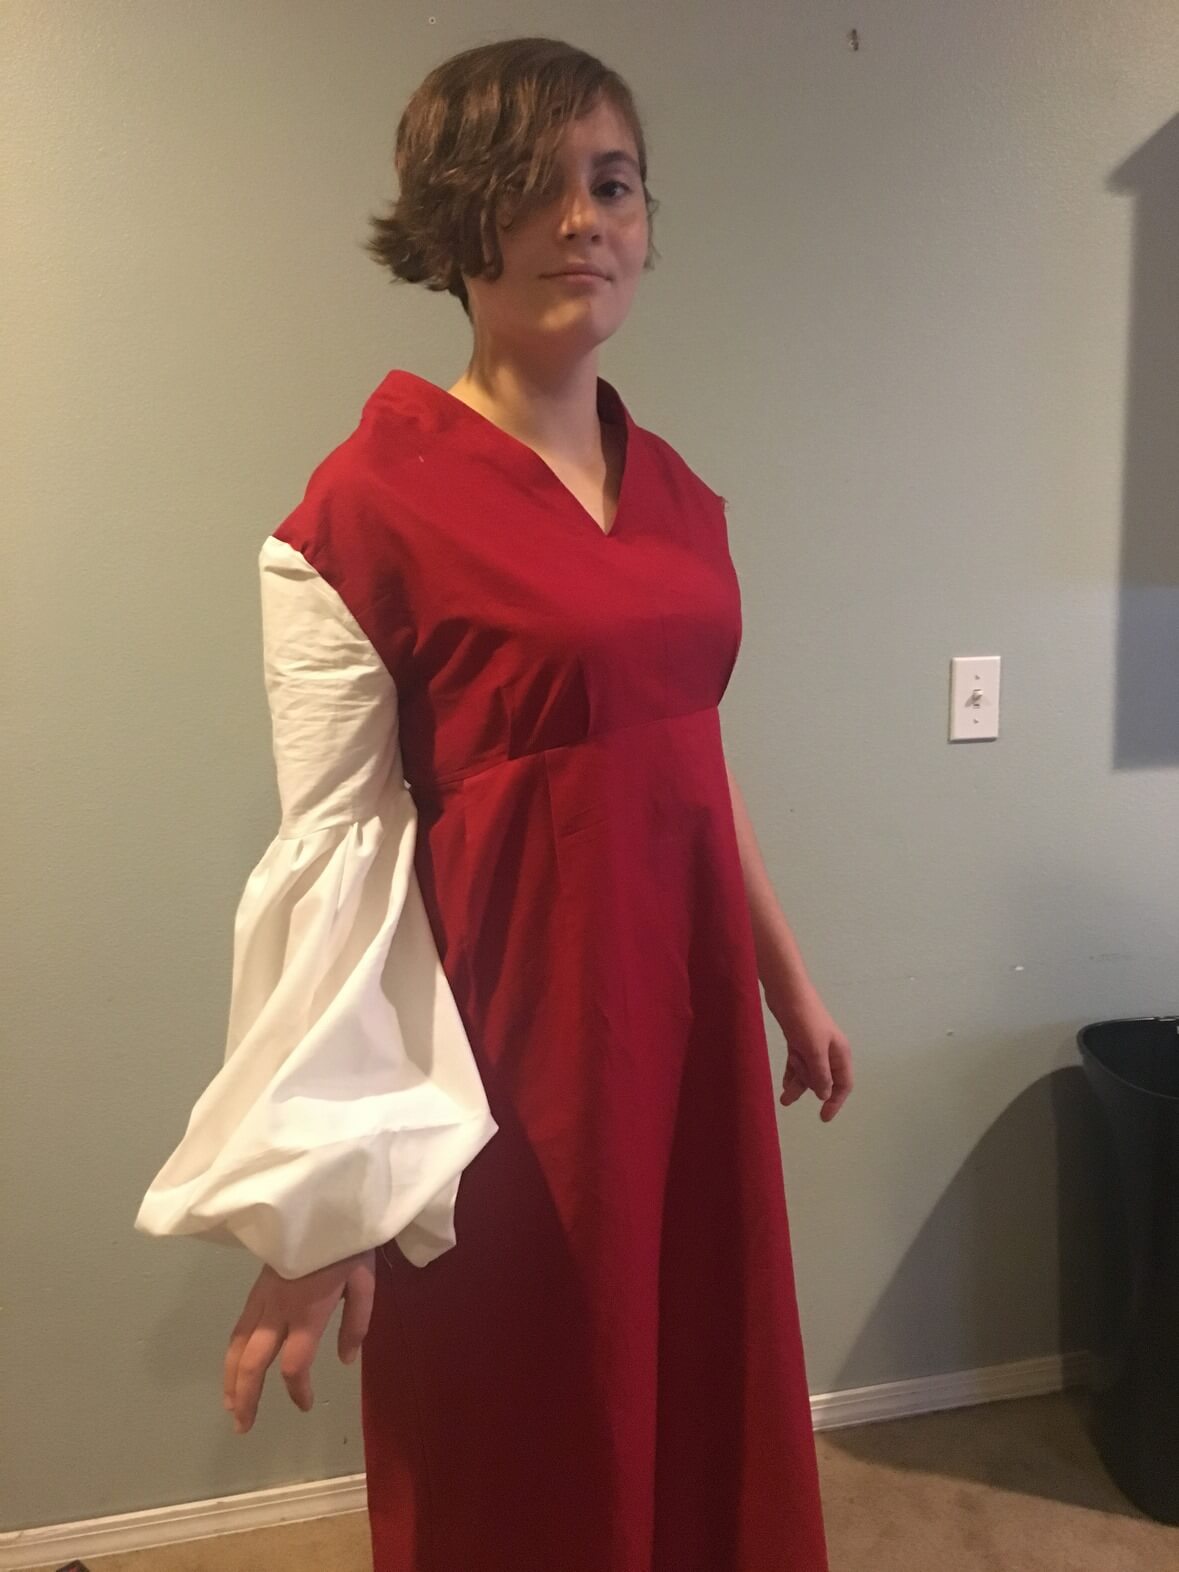
Next up were those fabulous sleeves. At this point, I took a pause from this costume to focus on learning how to draft inset sleeves and practicing my skills on my son’s Six-Fingered Man tunic.  I also needed to finish up some work on the Wesley costume (oh, did I not mention that I was doing that too?!).

There are three portions to these sleeves: The upper part which is fitted, the lower portion that billows out and has lots of bulk, and then the cuff. The upper portion was easy, but the lower section took a bit more trial and error. Again, the muslin was helpful for this step.

First, I created bulk at the hem of the upper and lower sleeves by making the lower sleeve top twice and wide as the upper sleeve bottom and working that bulk into the seam using pleats. Second, I made those lower sleeves the same way I did the skirt, with two wedges that were wider along the bottom (in this case, the wrists) than the top (mid-arm). This created those gorgeously huge sleeves. Once I was happy with the muslin, I felt comfortable cutting into my remaining red yardage.

file_003-5

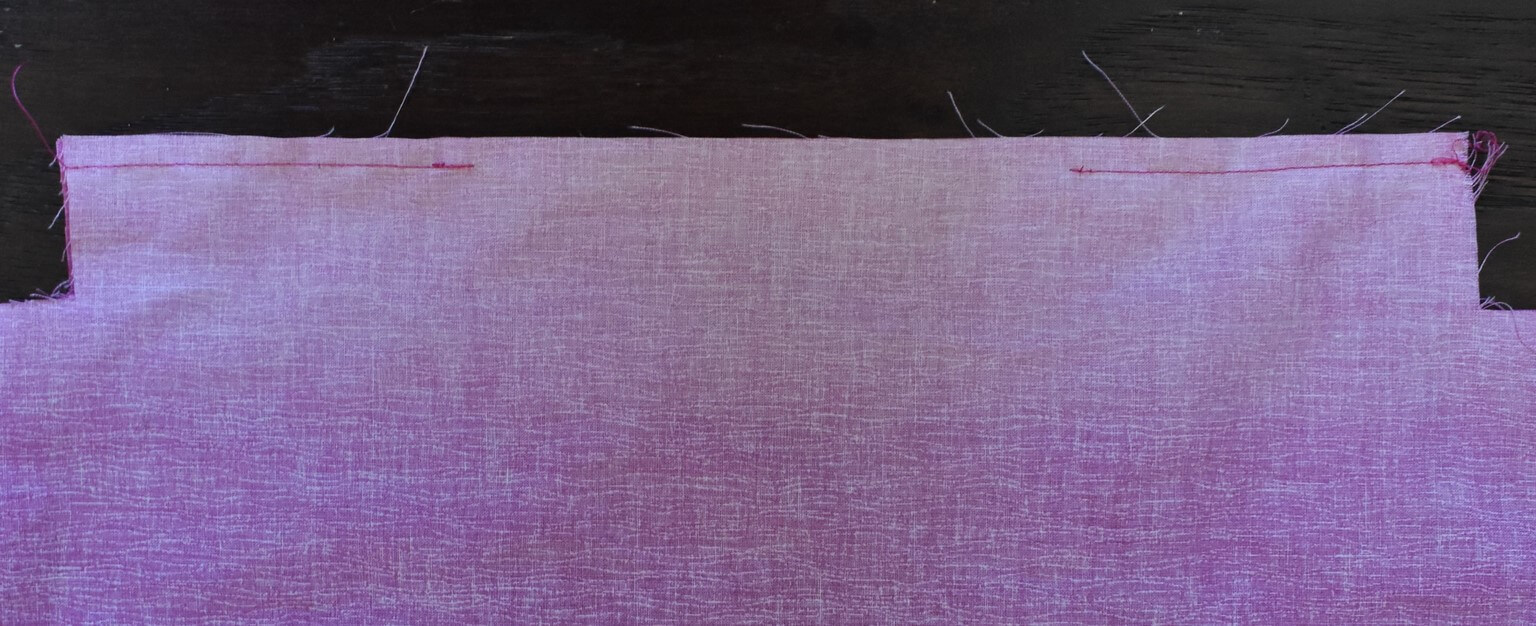
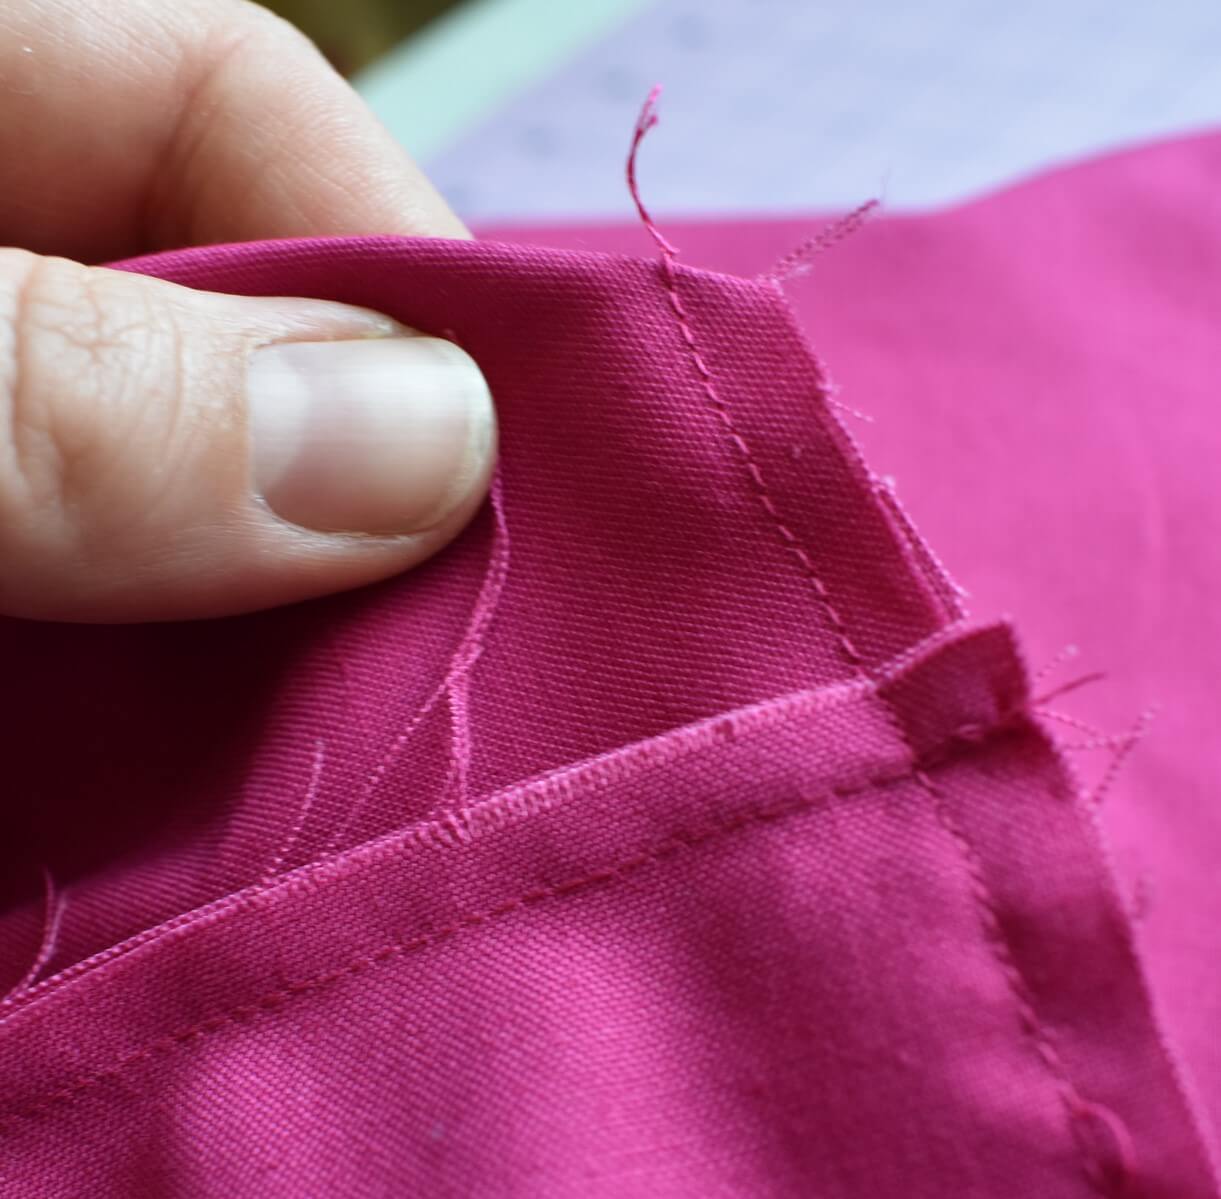
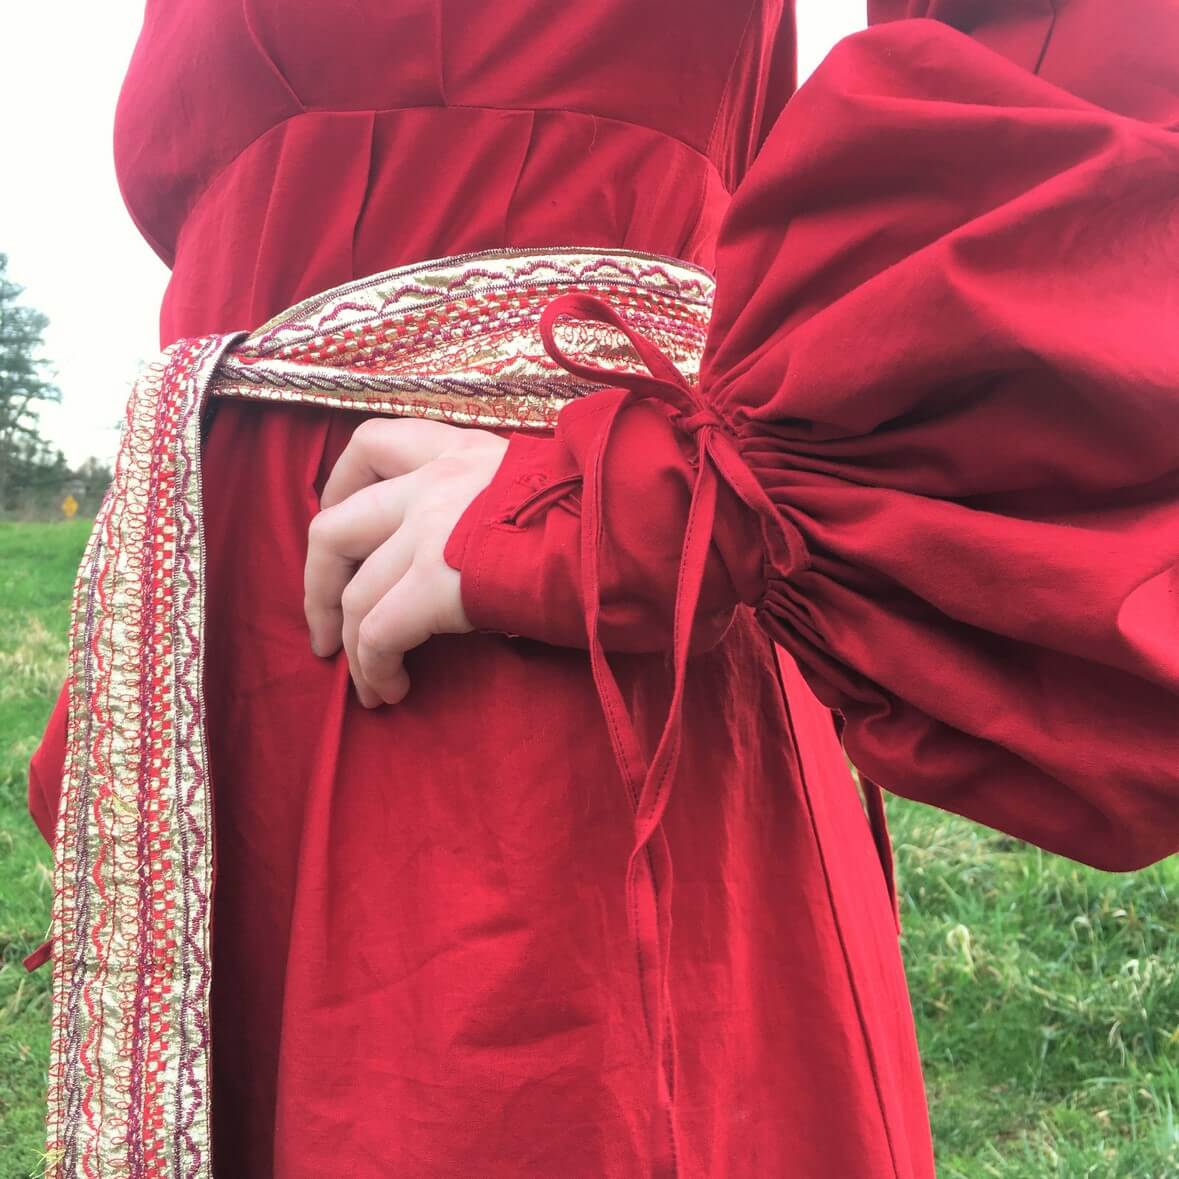
Here you can see the lower sleeve portion sewn to the cuff on the left arm.

At the point the above picture was taken, I started to feel a little unhappy with the way the sleeves were looking. As you can see, I had the pleating of one sleeve done, and the other sleeve is still ungathered. I noticed on the gathered sleeve that there was a bit too much fabric hanging over the front part of the wrist hiding the pleating detail and creating a strange twisting in the fabric. There was just so much bulk that the fabric didn’t know where to go.

At this point, I had to make a choice: Take out my work and course-correct, or go ahead with what I was doing. Knowing that I would never be happy if I didn’t at least TRY to correct the sleeves, I started the unhappy task of picking out the pleat stitches.

It really didn’t take all that long, and I’m glad I did it.

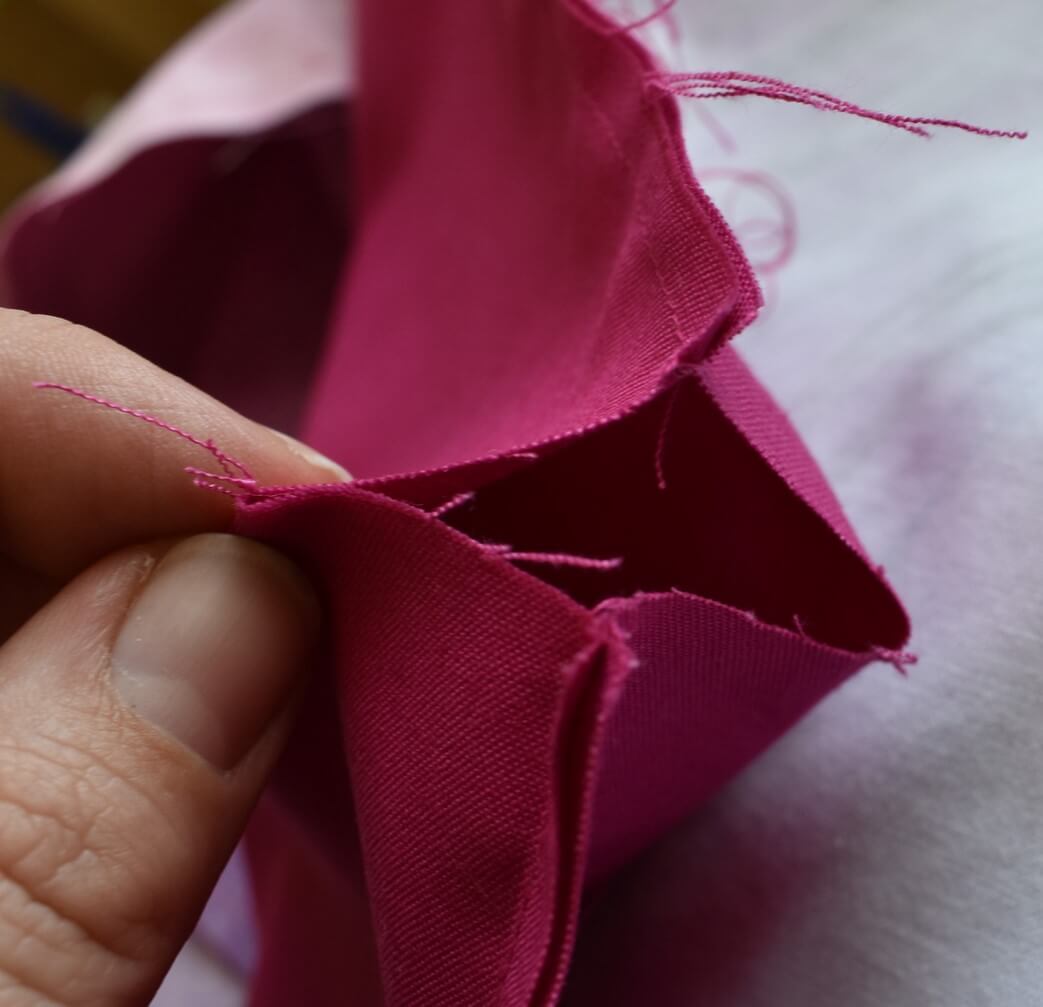
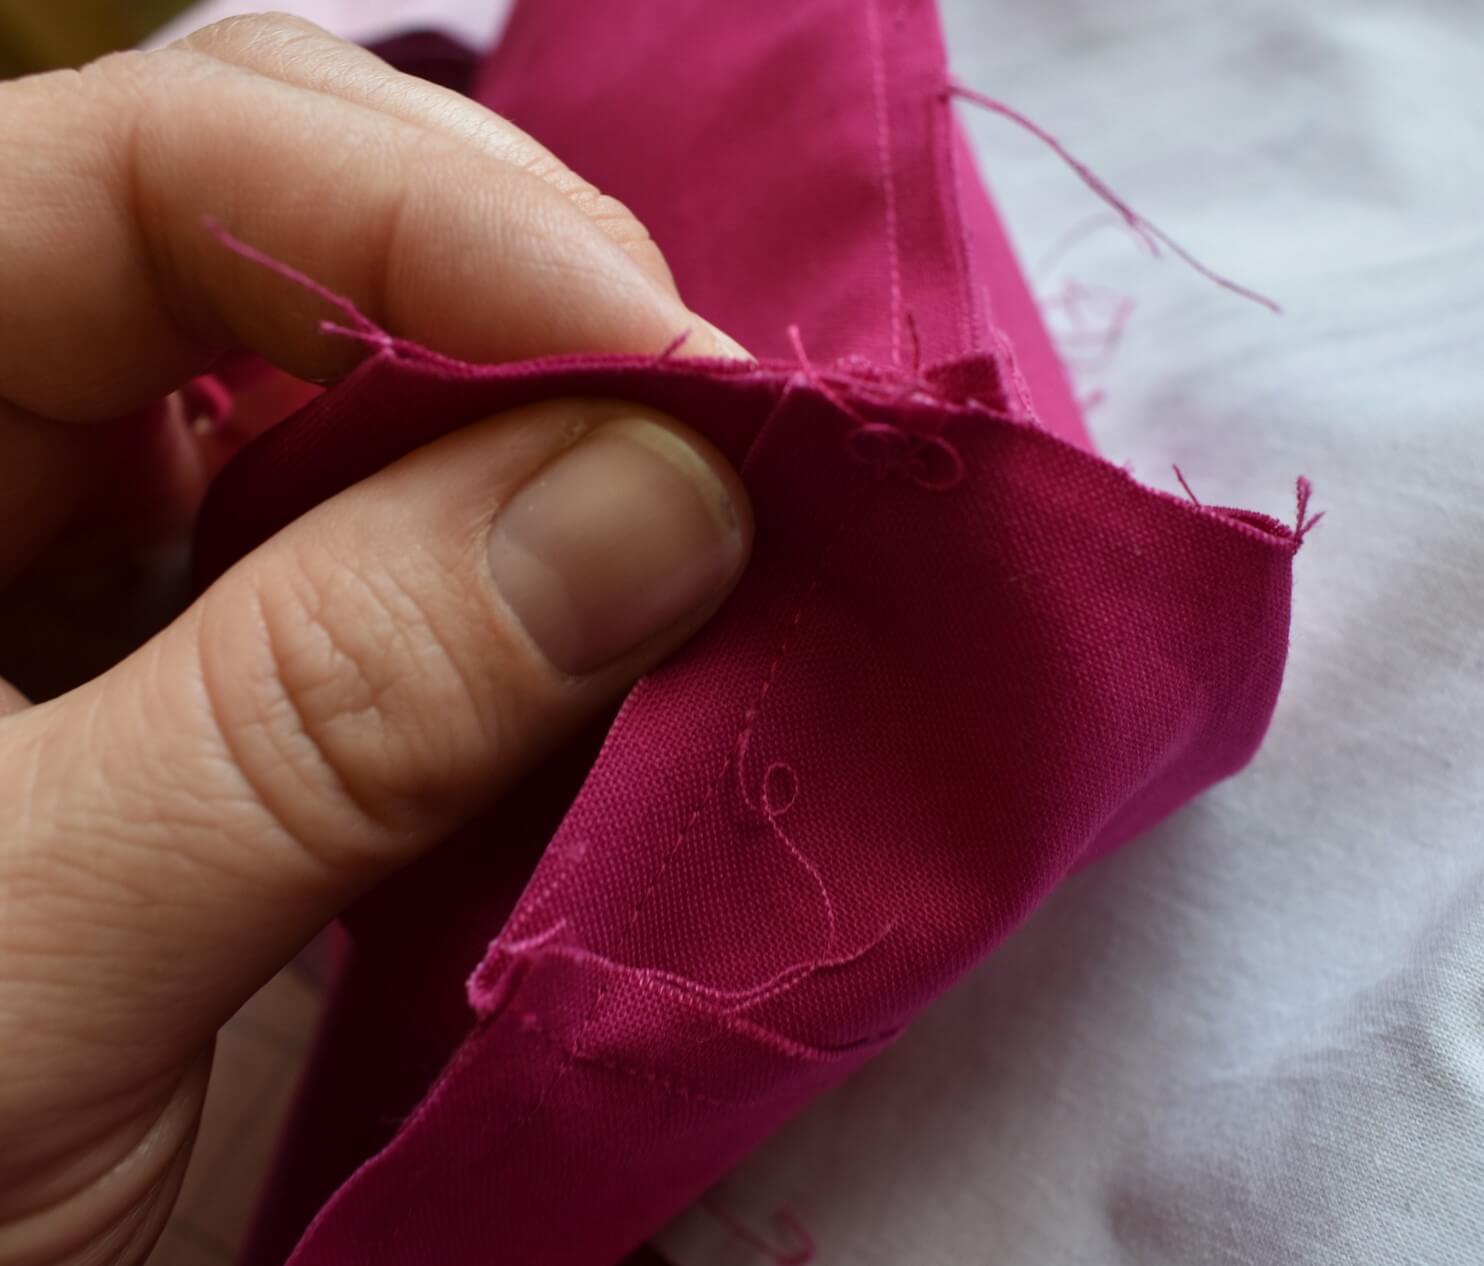
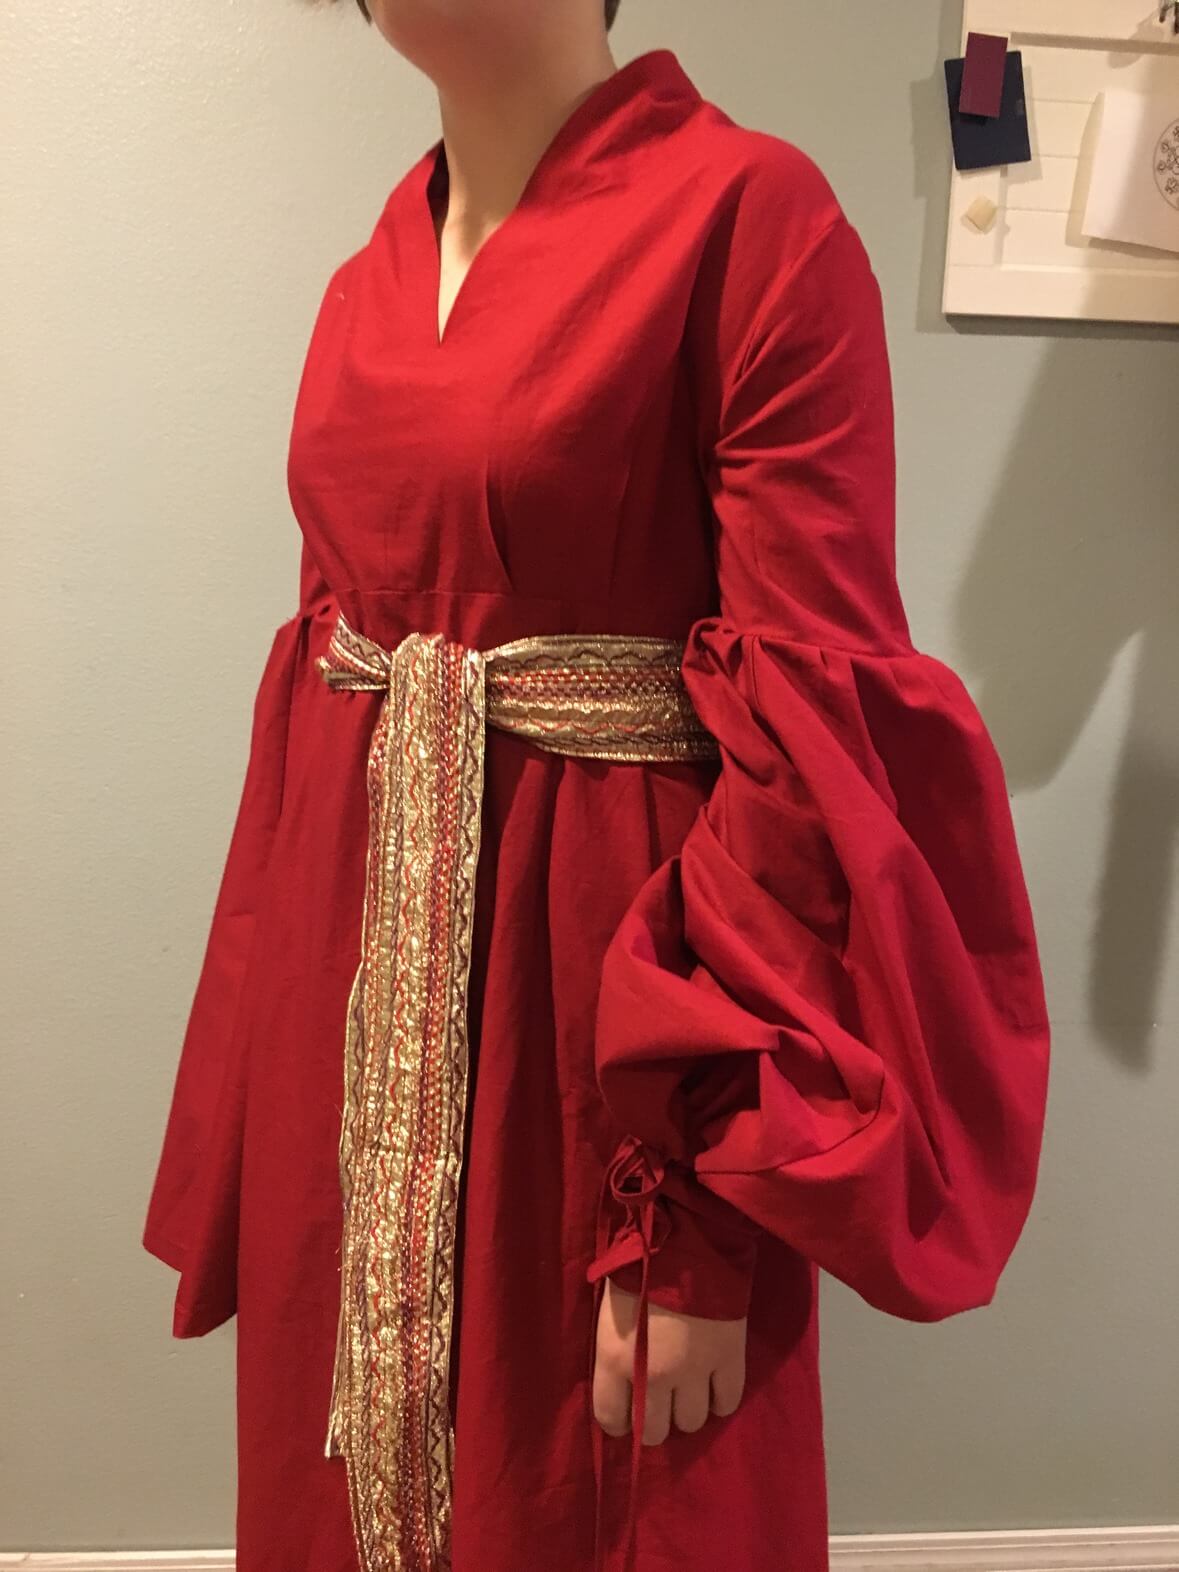
Because the problem was too much length in the front, I folded and pressed (because I was too scared to cut anything at this point) the fabric to the inside of the sleeve, starting at a high point at the sleeve front down to the original sleeve length in the back. Essentially, I made the front of the sleeve about a foot shorter than the back. I was thrilled to pin the sleeves to the cuff and realize that my plan worked!

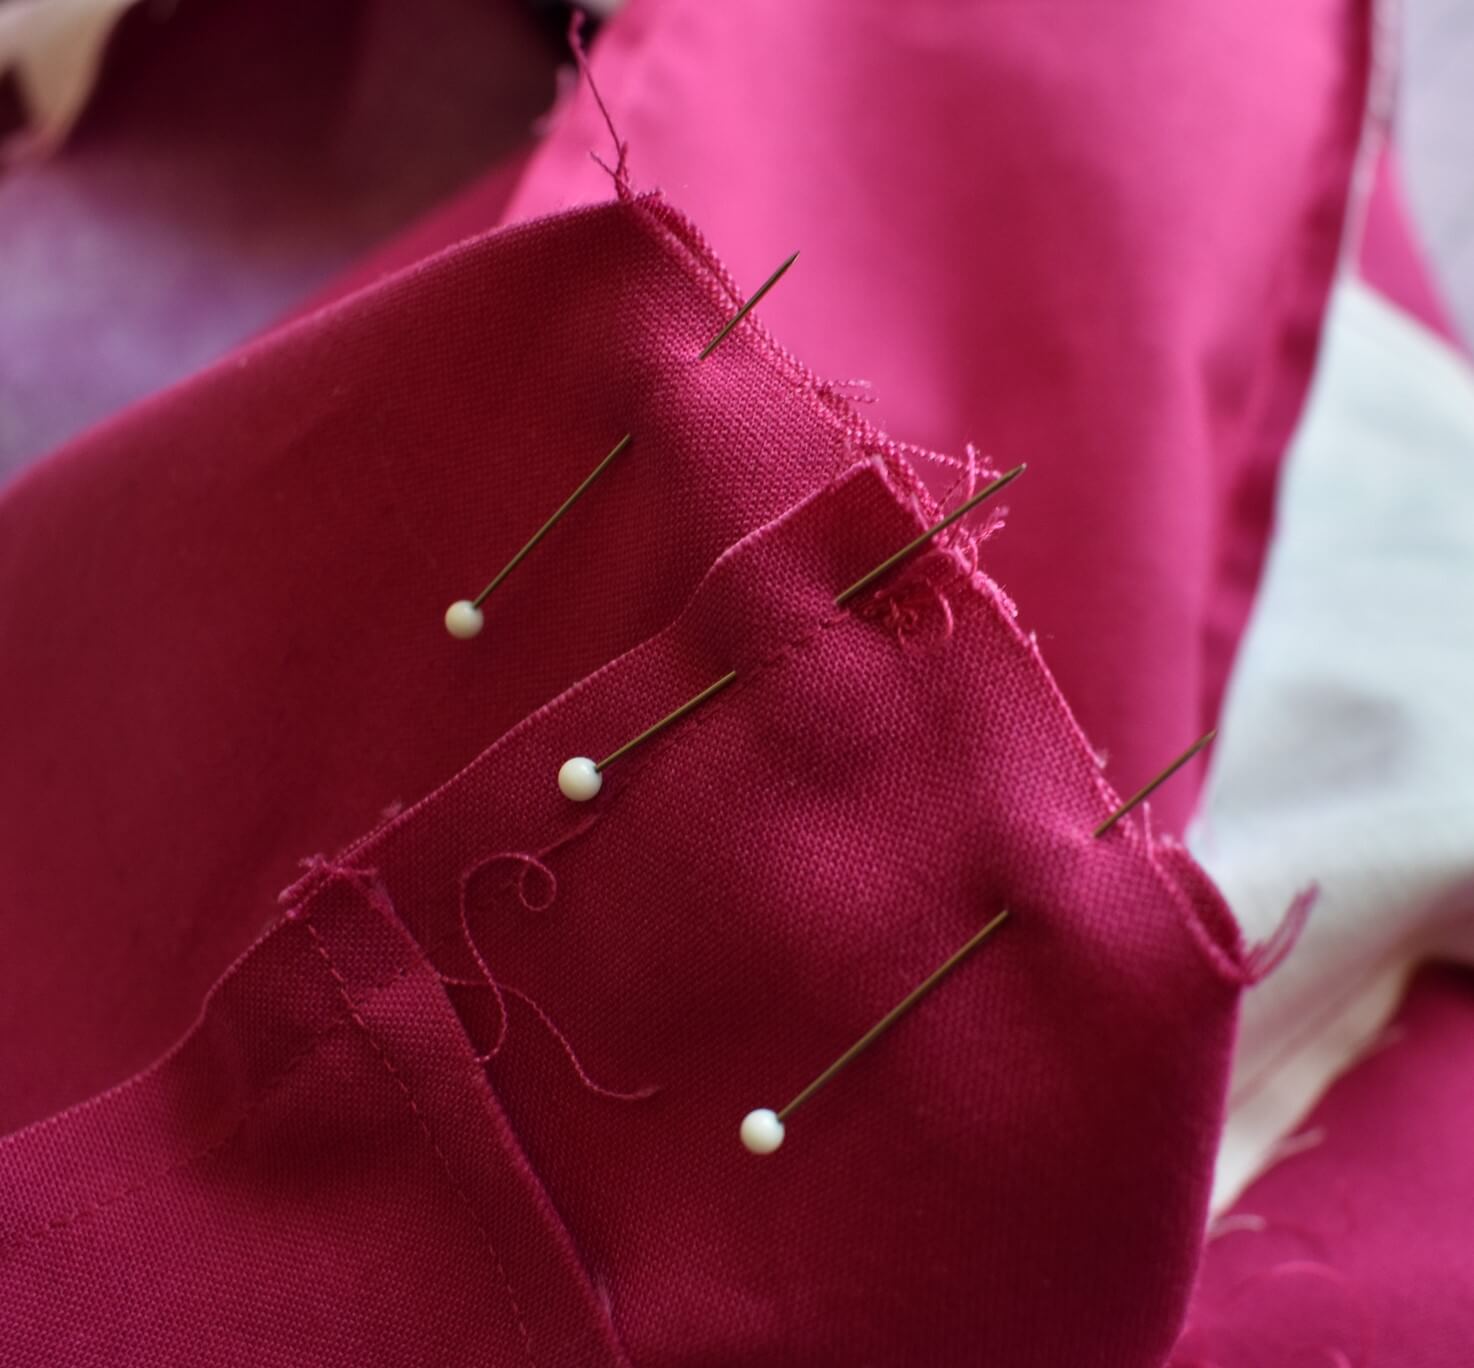
My final task on this dress was a big one- I had to take those giant sleeves and pleat them WAY down to fit on the wrist cuffs.
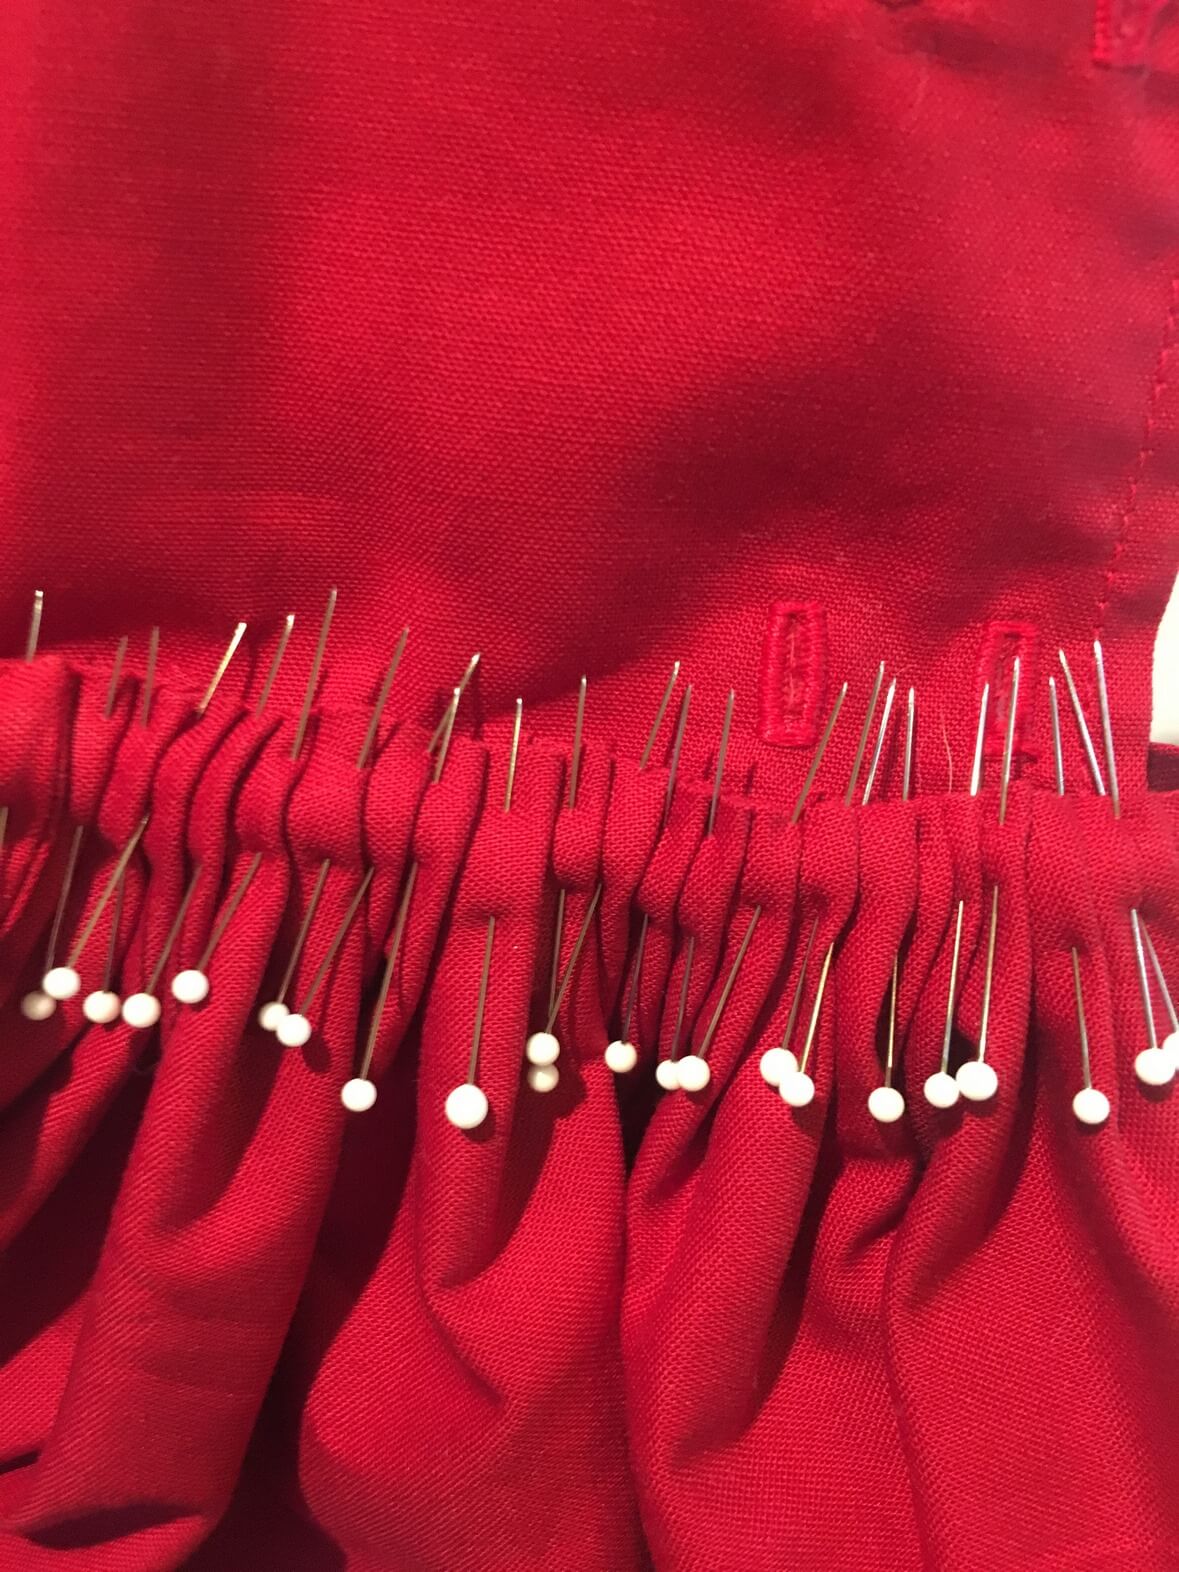
file_005-1

PINSANITY!

There was a lot of finger stabbing happening that afternoon.  Mind you, this was also only a few hours before my daughter was scheduled to wear this costume for a party in which they were entering a group costume contest. But I just tried to stay calm and focus on the task at hand! The work was going relatively fast, so I took the time for a 20 minute nap between sleeves so I didn’t go crazy.

file_006-5

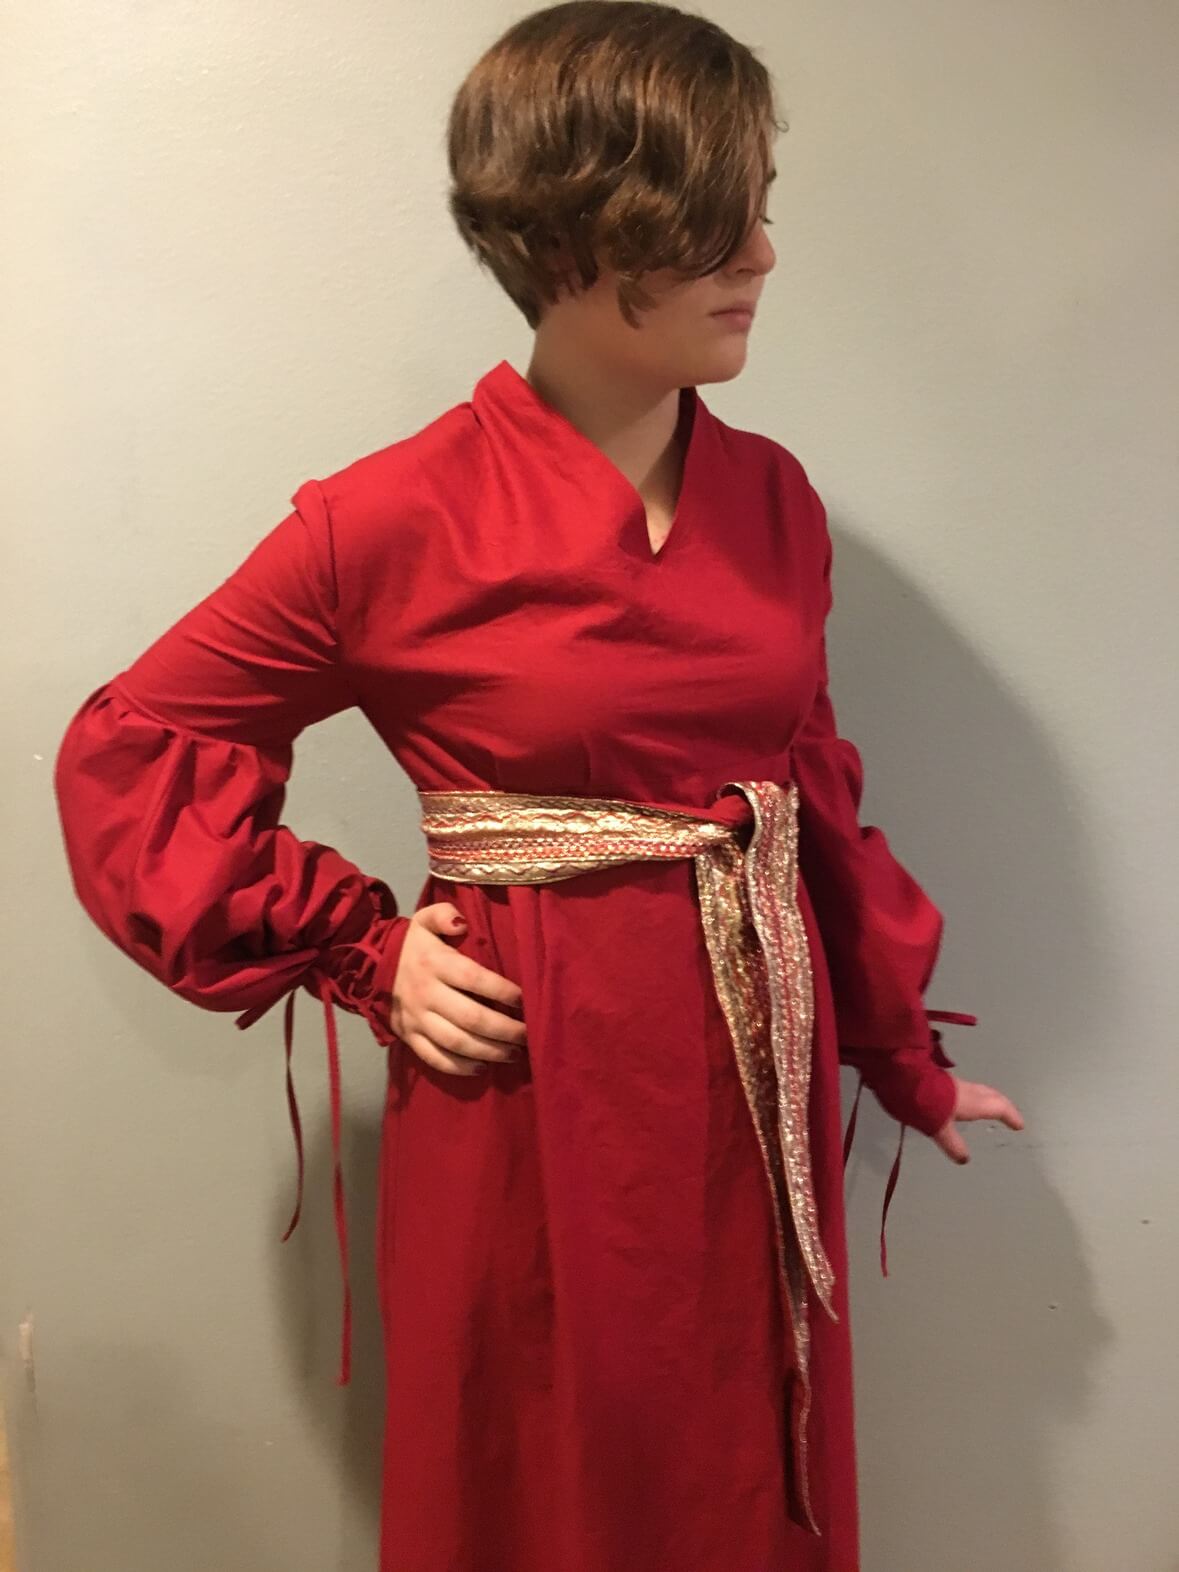
Here she is in the dress shortly after completion. I had to sew stitches at the back neckline, the back waist, and at each wrist to keep everything lined up nicely.

file_000-7

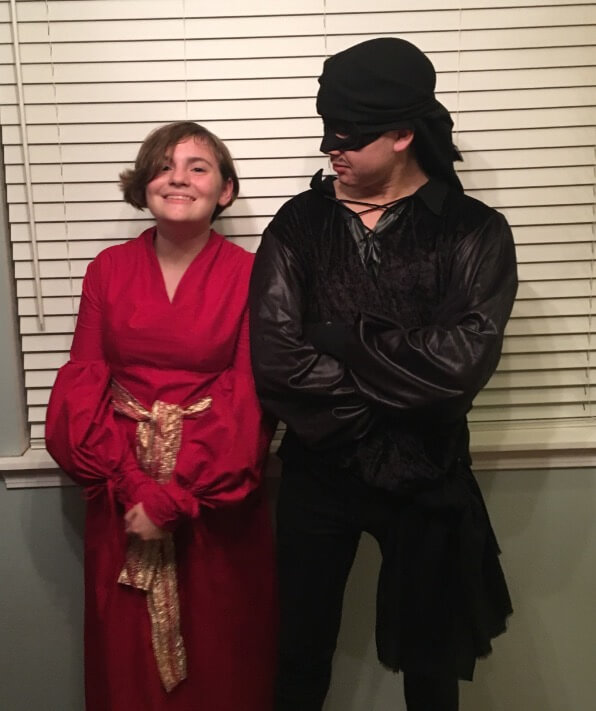
A blurry Buttercup and Wesley picture right before leaving for our party.


At the very end of the day on Halloween, she stretched her arm too far forward and got a tear on the seam line where the inset sleeve met the bodice (not much stretch room with this dress!). It was at the point that I realized in all the rush to finish the sleeve pleats, I forgot to reinforce the stitches around the arms and waist…. oops! Fortunately, it was along the seam and an easy fix.

file_008file_002

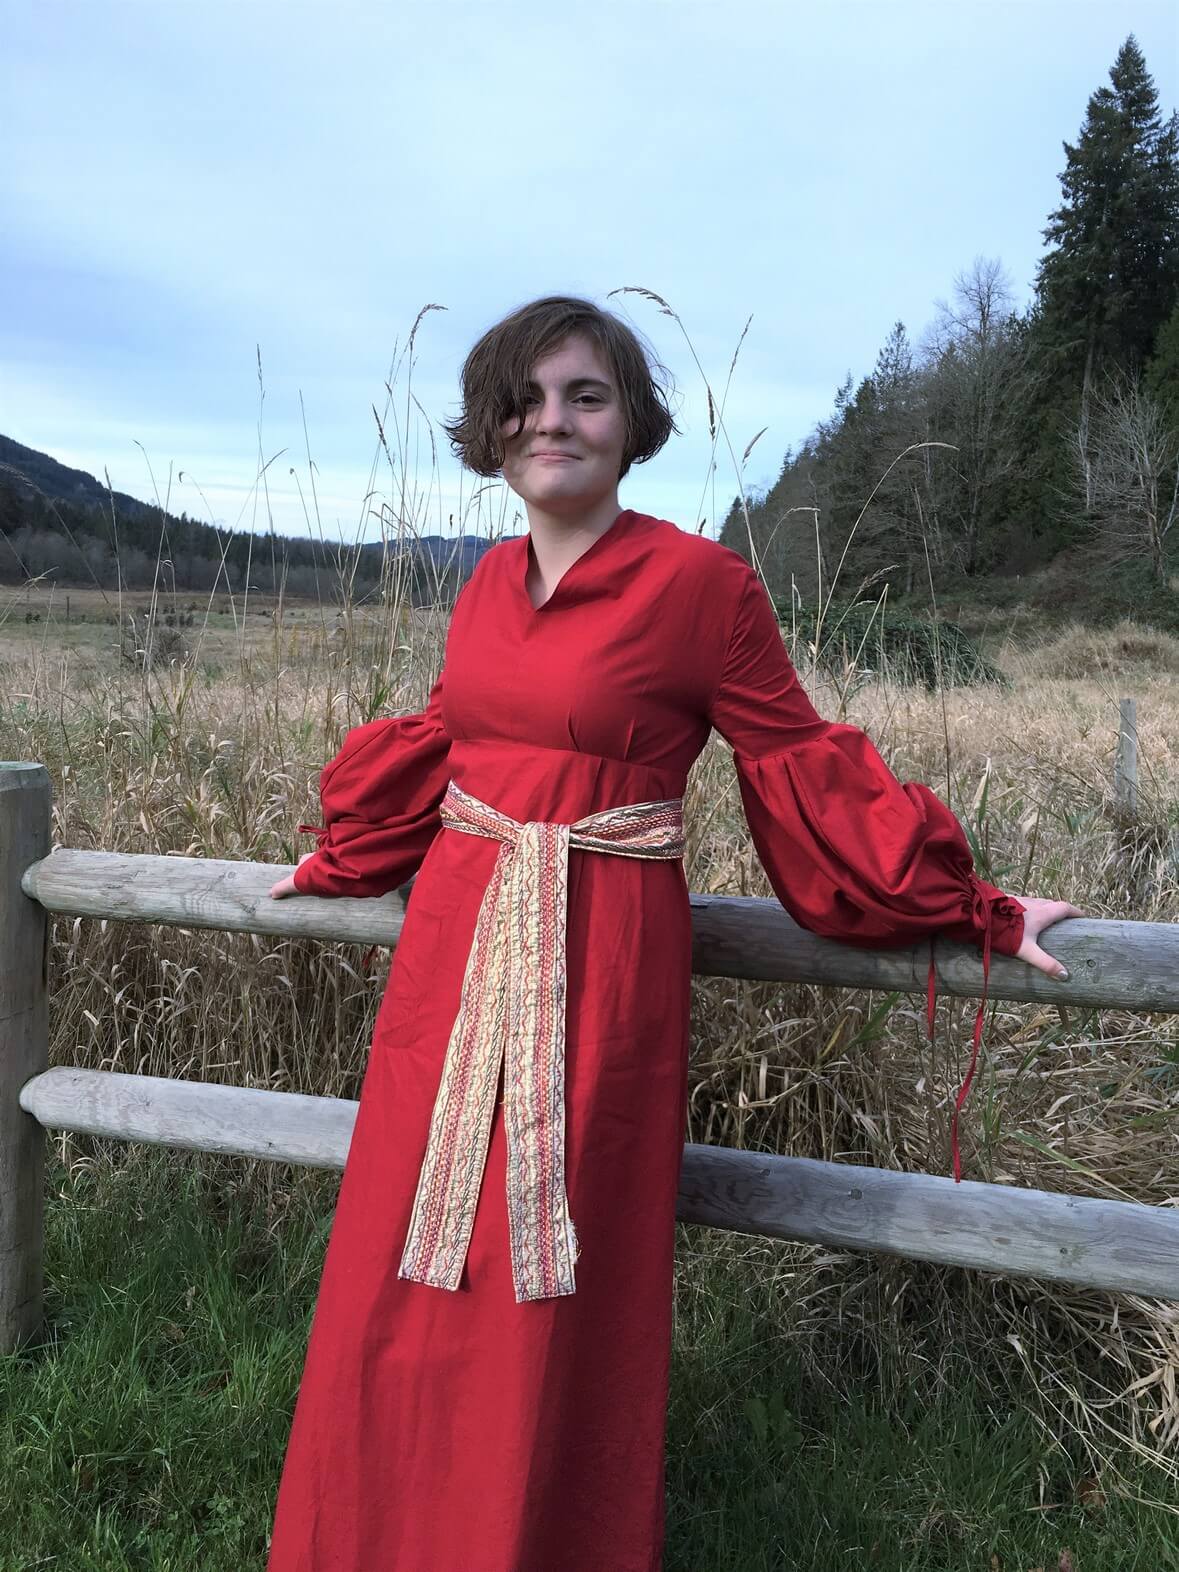
This dress was a lot of work…. and so worth it. Being able to make my daughter a costume that fit her perfectly was nice, but the SKILLS I gained along the way were the real reason behind me wanting to do this.

I’ve always been pretty brave about trying new skills and sewing techniques, but now I really do feel like I can figure out how to make anything I want. Sometimes you just have to jump in and TRY.

Happy Sewing! ~L


Color Play Friday: Kla Ha Ya Days

Hi Guys! Thank Goodness it’s (Color Play) Friday!

More about Color Play Friday:

Trina from In An Otter Life and I created Color Play Friday one day after a nice trip to the fabric store together.

 Here are the rules:

  1. Each week, Trina or I will select a picture from our joint Pinterest board. These are all pictures that one of us has taken on our adventures.
  2. We each create a palette using colors from that picture
  3. We then create a bundle of 5-8 fabrics that is inspired by that palette. They don’t have to be an exact match to our palette, and we can throw in contrasting or accent colors, but the bundle should look inspired by the palette.
  4. We don’t see anyone else’s palette or bundle before we post on Friday.
  5. That’s it! It’s going to be so fun to see what we each come up with.

I took this week’s photo at Kla Ha Ya Days, a festival held each summer in my hometown of Snohomish, Washington. There’s normal festival entertainment: carnival, parade, icecream eating contest… Then you have the more quirky events: hot air balloon glow, bed races (yes, real beds on wheels), a baby crawling race, and the classic frog jump contest. You can’t make this stuff up.

  8061e351dd217cdccdff8206b2265bbb

A couple of summers ago, my family went to watch the balloon glow and stopped at the carnival beforehand so the kids could go on some rides. This photo was a failed attempt at trying to get a picture of my son on the ride, but I liked how the movement created a blur. It almost gives you the same sort of dizzy feeling you get when you are on a carnival ride with lights whizzing by.

 Laurel and Pine The Kiddos

It was a bit of a magical night watching the rides and dancing with my kids in a field while waiting for the balloons to fill up. It ended up being too windy and the balloon glow was a bust, but the time together as a family is one of the best memories!

 Laurel and Pine Balloon Glow Dancing

So, here’s my palette and bundle!

Kla Ha Ya Days Palette and Bundle

I loved in this picture how the bright colors of the swings contrasted with the slate grey of the sky at sunset.

Here are the fabrics I chose:

Alison Glass, Ex Libris, Grey Panel

Zen Chic, Figures, Daisy in Ocean

Micheal Miller, Dumb Dot in Lilac

Karen Lewis, Blueberry Park, Allotments in Coral

Me and My Sister Designs, Ticklish, Joking Around in Yellow

Bari J, Petals and Plume, Rumpled Sour

A note about scale:

  • While I believe scale is a very important part of fabric selection, the fabrics shown in my Color Play images are not always perfectly to scale. I do my best, by you should always double check scale before ordering!

Don’t forget to head over to In an Otter Life to see what Trina came up with and to Shimmy and More to see Steph’s bundle!

You can also head over to my Color Play Friday page to see my palettes and bundles from previous weeks.

Here’s the photo I chose for next week:

 Gummy Bears pic

Are you enjoying Color Play Friday? We’d love for you to get in on the fun and create your own Color Play post! You can create a bundle of fabric, select yarns or embroidery threads, or create a project inspired by our photo. Be sure to let Trina or I know so we can link up to you. You can get in contact with me via email, or by tagging me on Instagram.  

I hope you can join us next week!

Happy Sewing, ~L