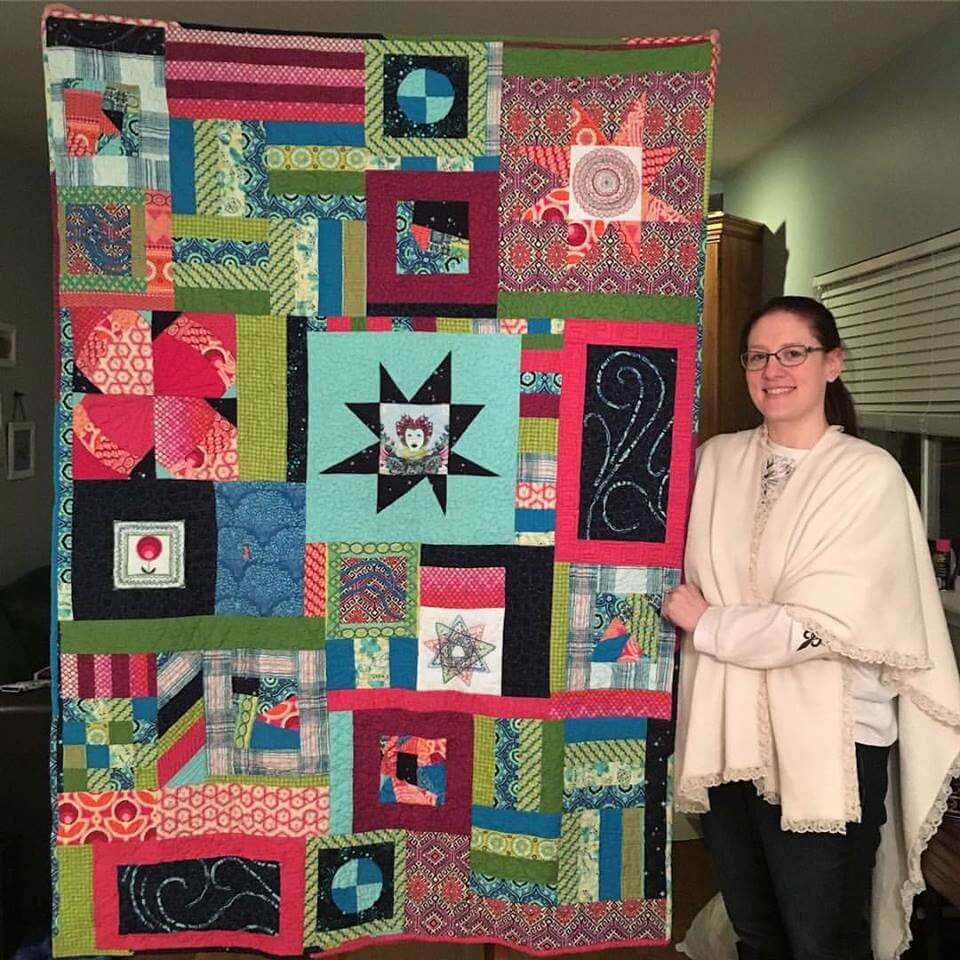
Uncategorized

Project Update

Hi friends!

At the beginning of the year, I went through my entire studio and created a list of all my WIPs and upcoming projects and set a goal to finish as much as I could this year. But, as I shared recently, my sewing took a back seat to life for a little while. Now I’m back in the saddle doing my best to knock out those projects! So, I thought I would give you a little project update and let you know what’s on the top of my list at the moment.

DSC_0992 (2)

Pink wonky quilt- This is a comfort quilt to be donated to Dawson Place Child Advocacy Center through my guild. I just finished it yesterday and will be sharing some more info on it tomorrow!

DSC_1001

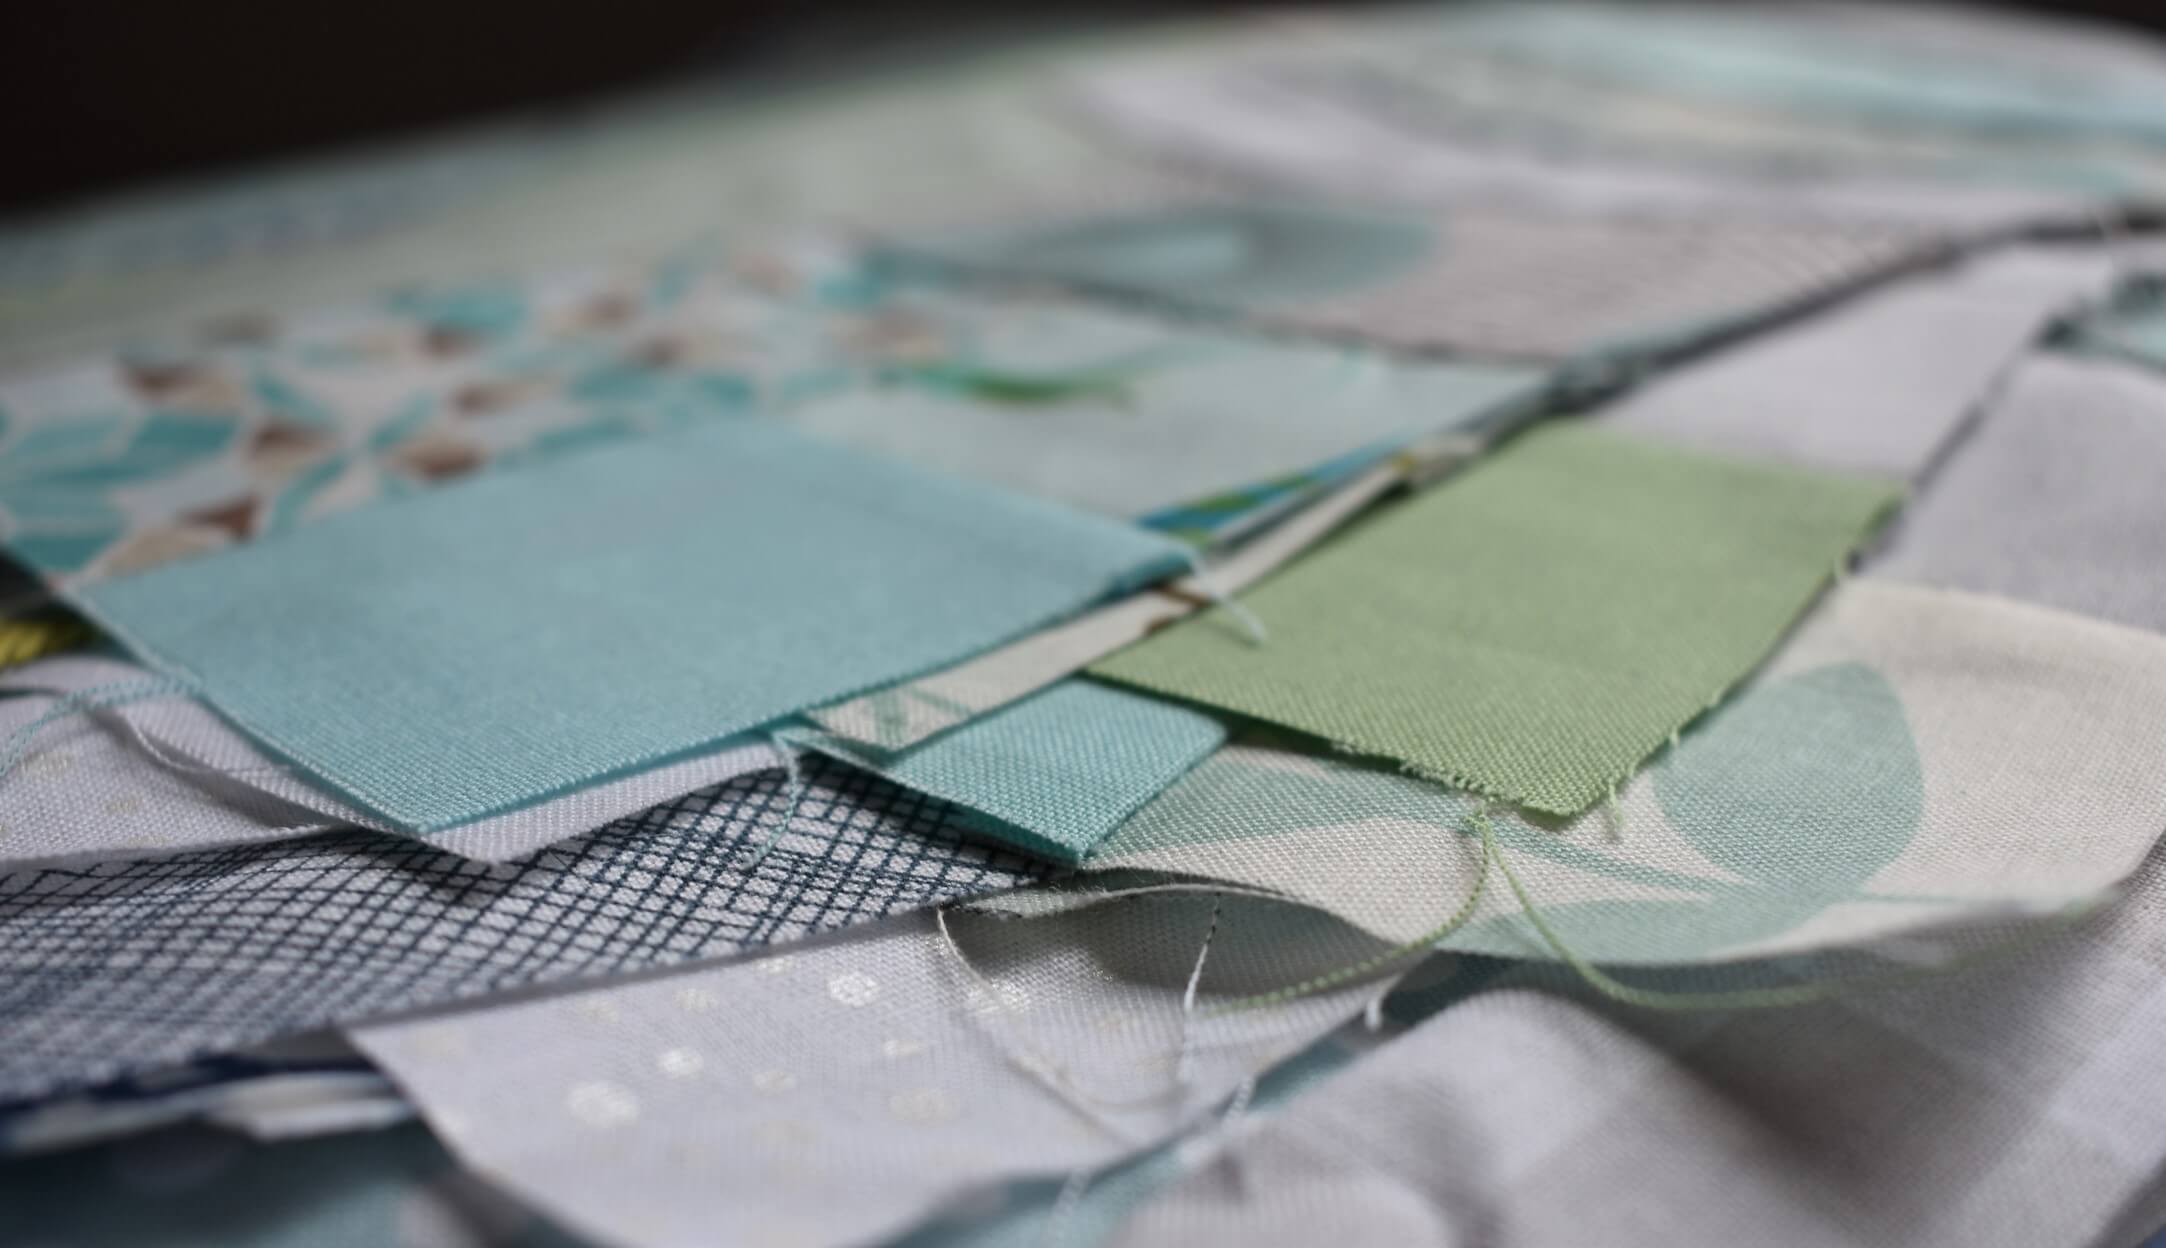
Blue low-volume quilt- Also for Dawson Place, I worked on these blocks with my daughter. It was a fun tag-team project: she would select fabrics and decide placement while I did the sewing. The blocks seemed to be taking forever, though, and we just lost steam and haven’t touched it again. I really want to get this one finished up and donated in the next couple of months.

DSC_0741

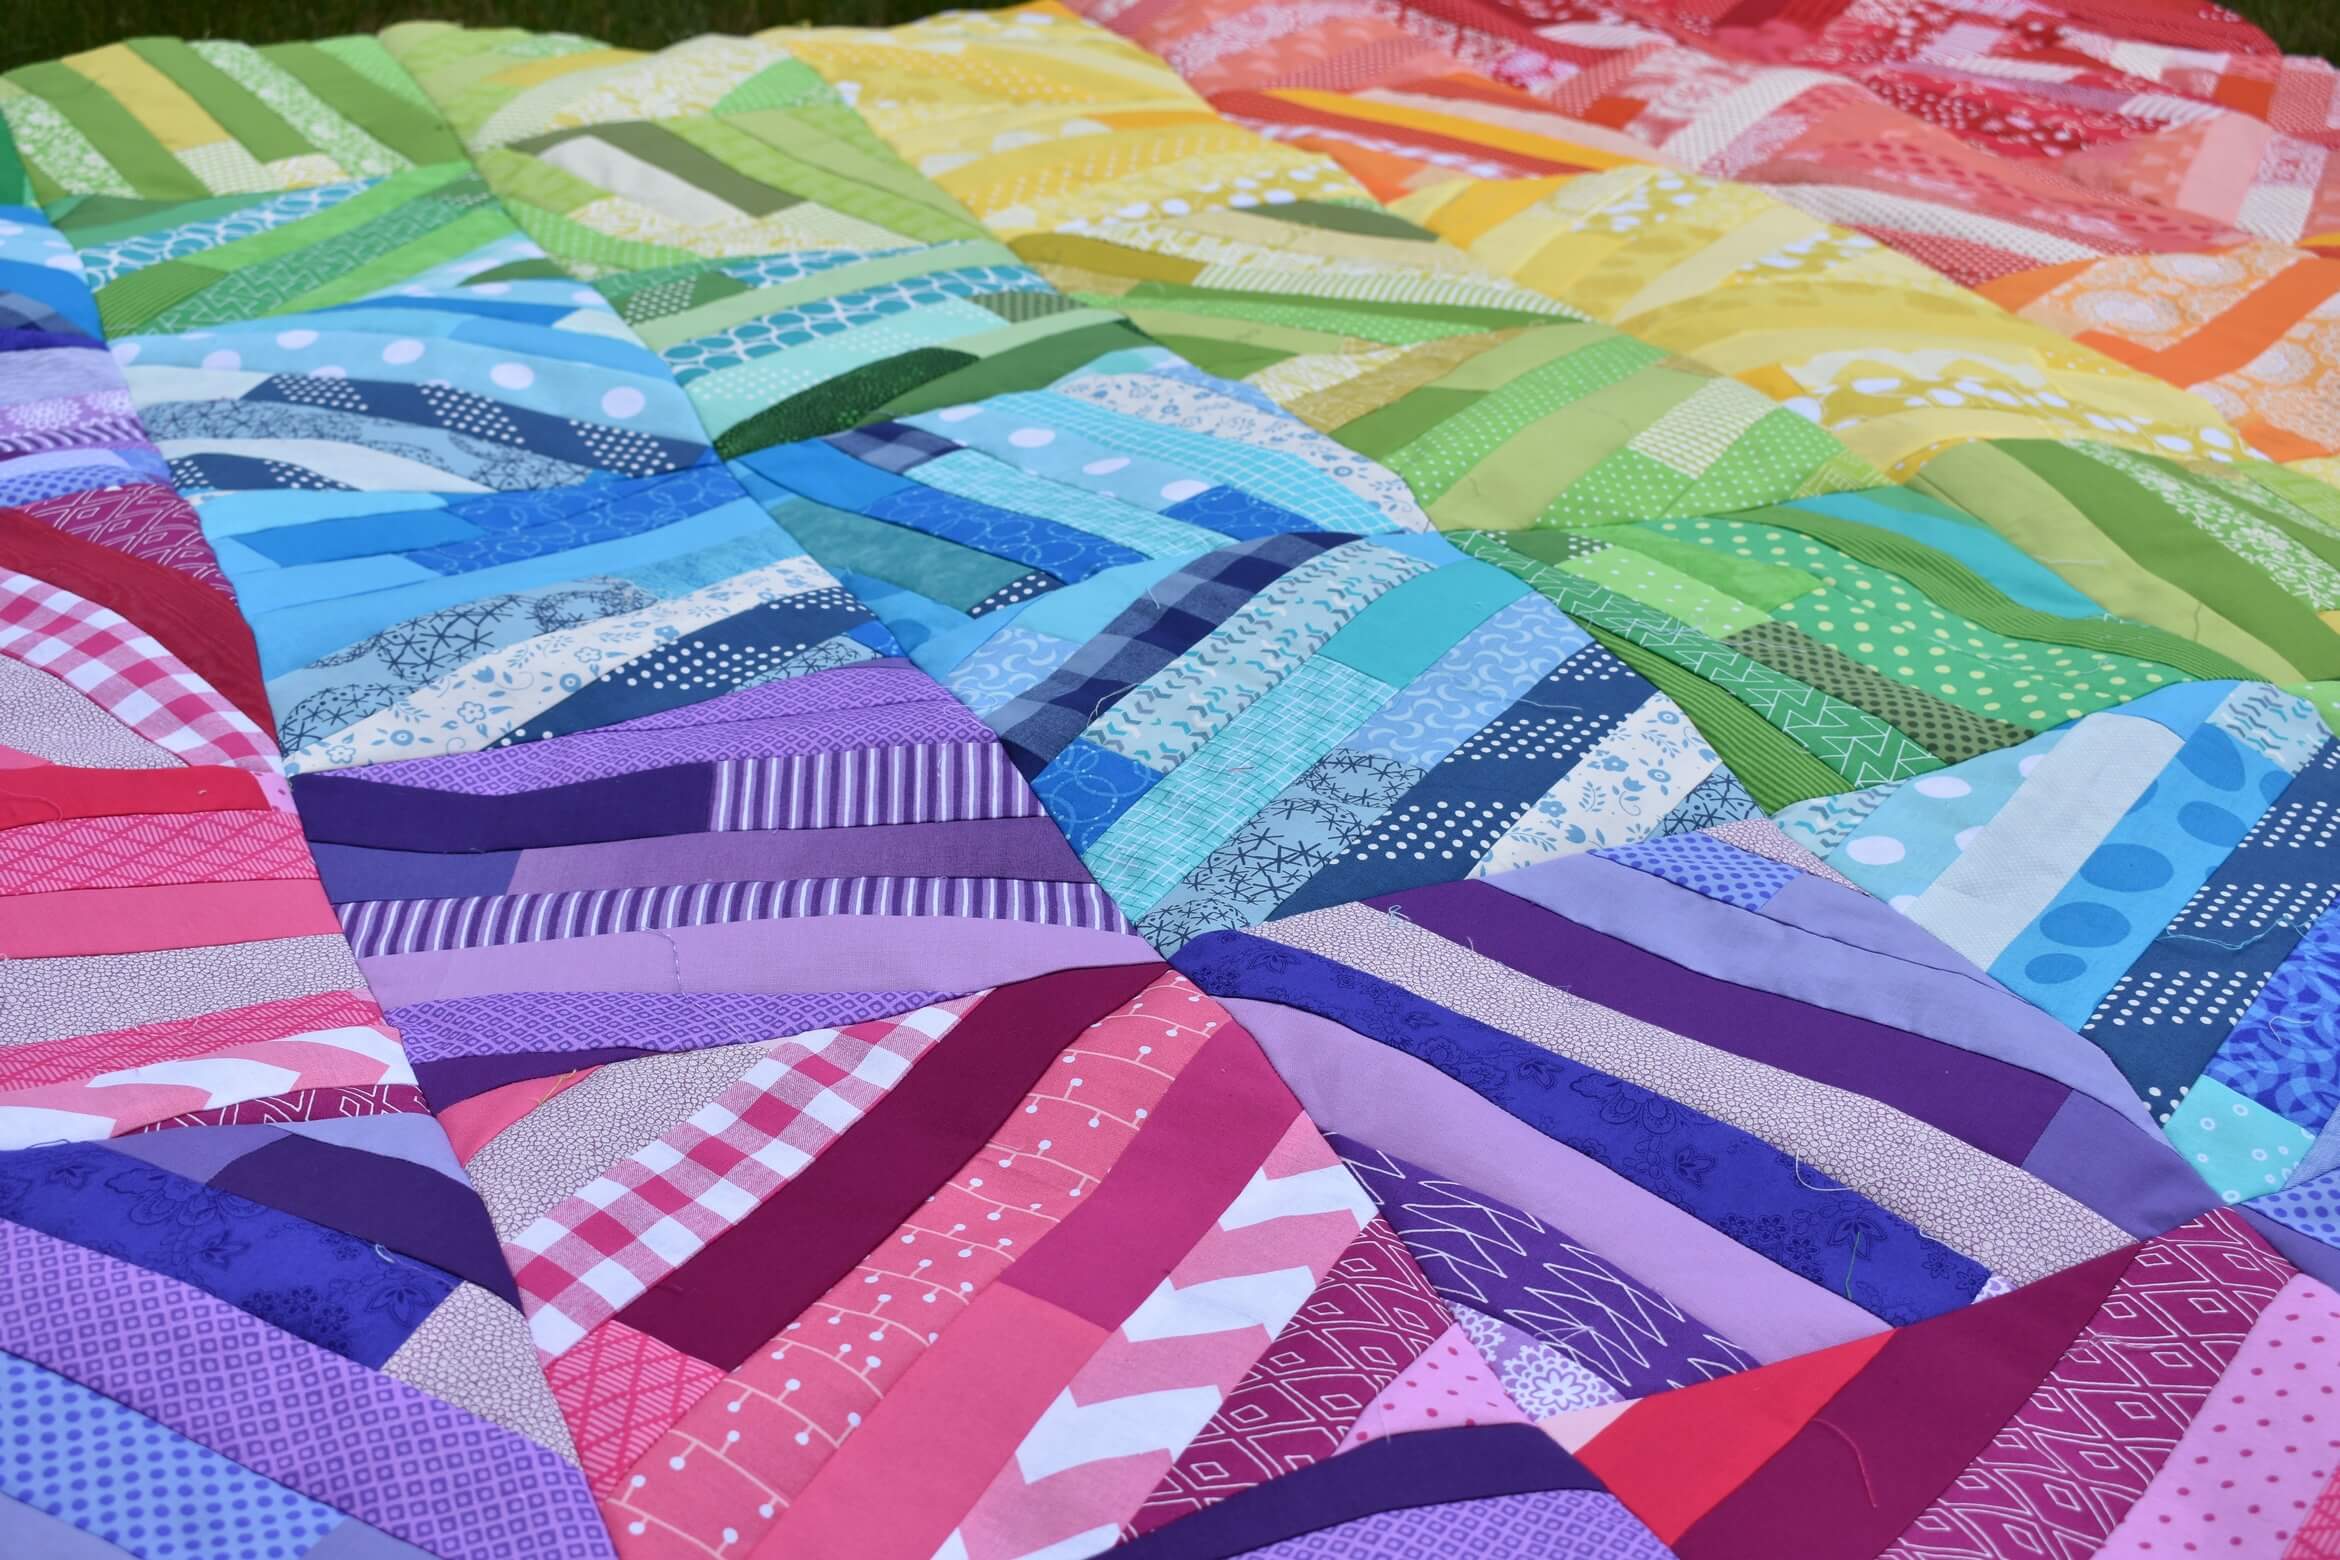
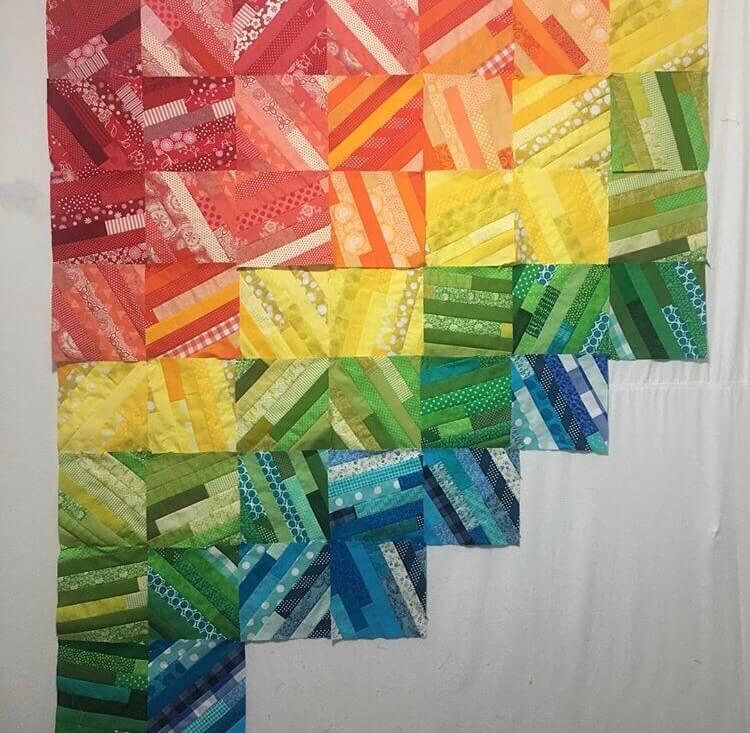
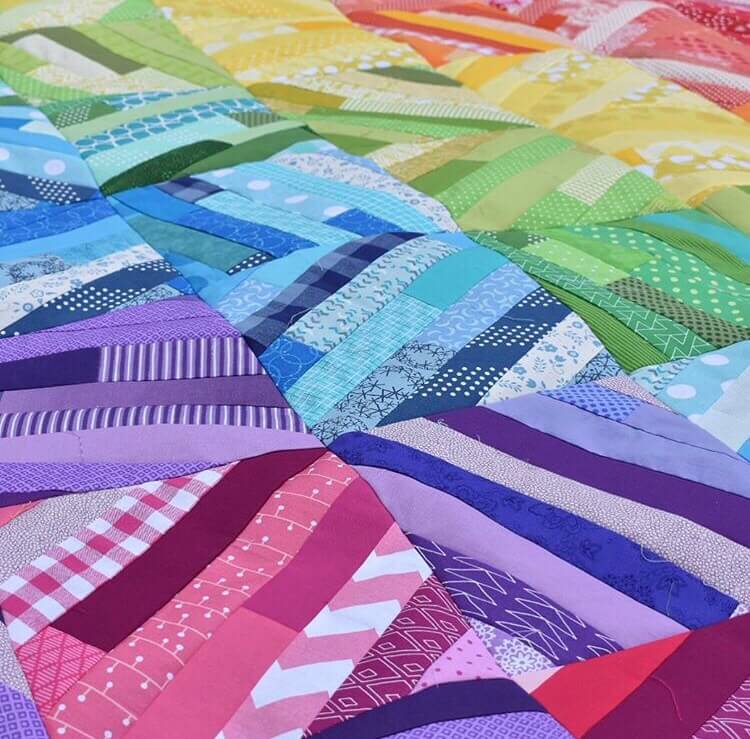
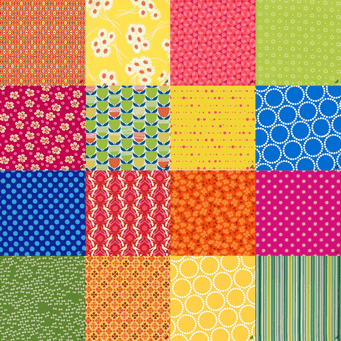
Scrappy Rainbow strip quilt- This one got designed on a whim and, although I had plenty of other things I should have been working on, I just had to get it off the page and bring it to life. I haven’t decided yet on backing or how I want to quilt it. When it is done, it will live at my house and be a backyard picnic quilt. I love this one- it’s very bright and happy!

DSC_0946 (2)

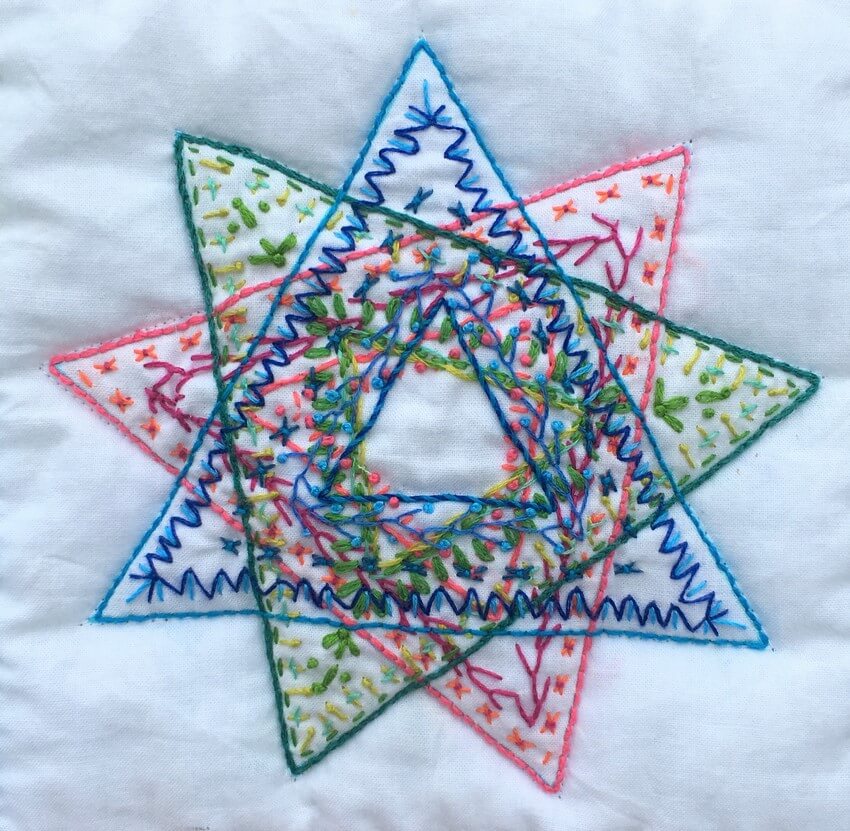
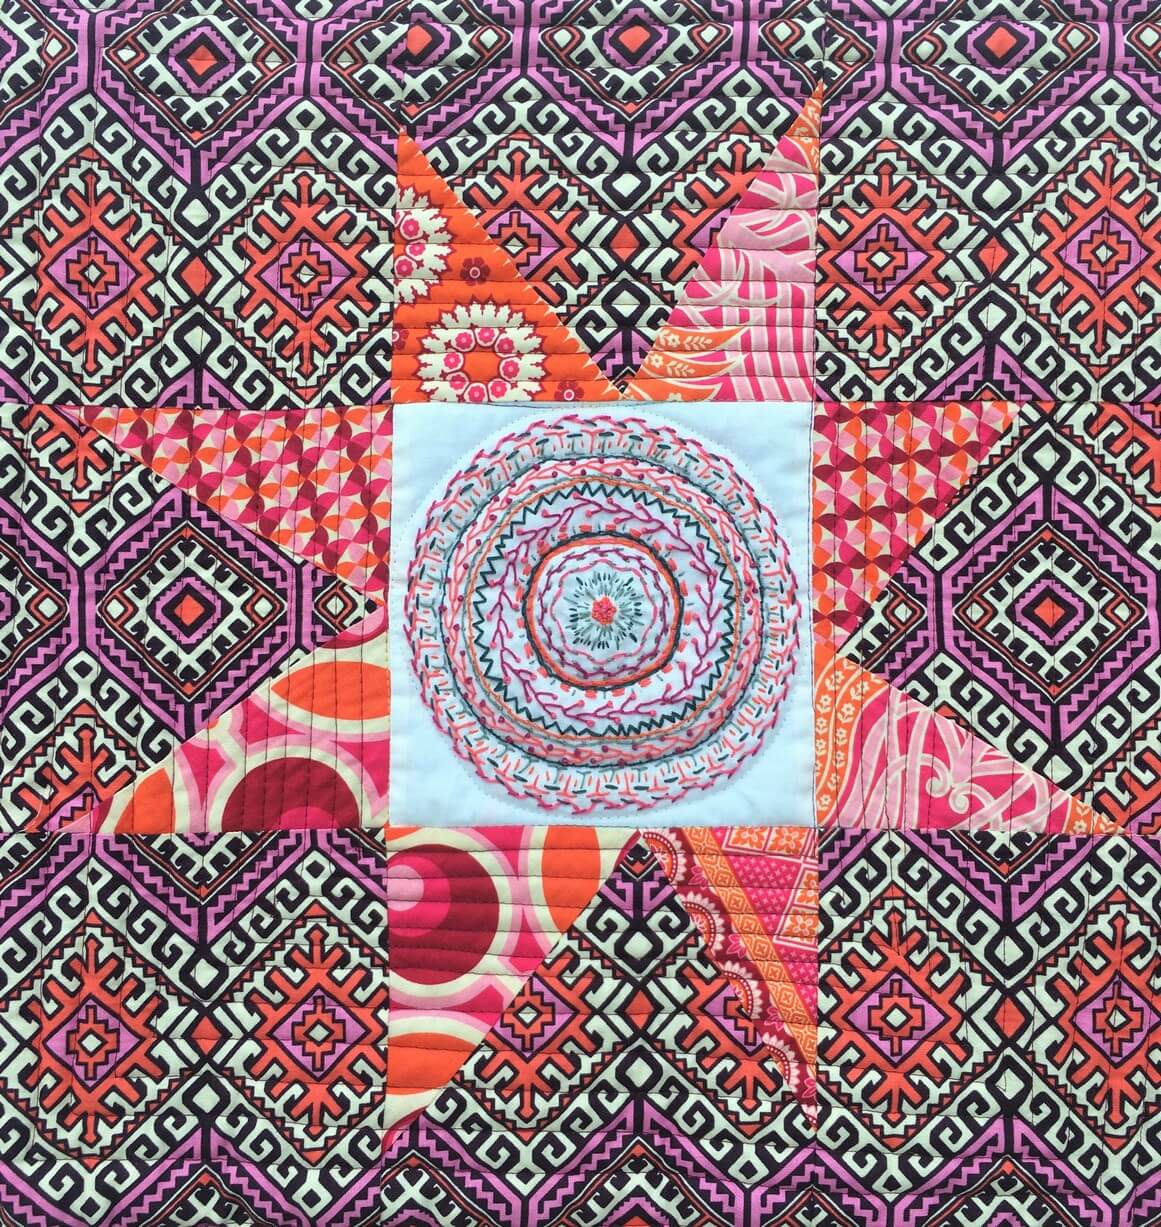
Champions’ quilt- I have been working on this one FOREVER! Like for real- this is one of the first quilts I started. I tried out a bunch of (at the time) new-to-me techniques on this one- EPP, applique, and hand quilting. There is a combination of hand and machine quilting in this, and I only need to finish the hand quilting. Unfortunately, when I started, I just didn’t know much and used cheaper fabrics and embroidery floss to hand quilt, making the quilting more difficult than it needed to be. Now I just need to muster up the motivation to finish that process. It is top of my priority list right now.

DSC_0939 (2)

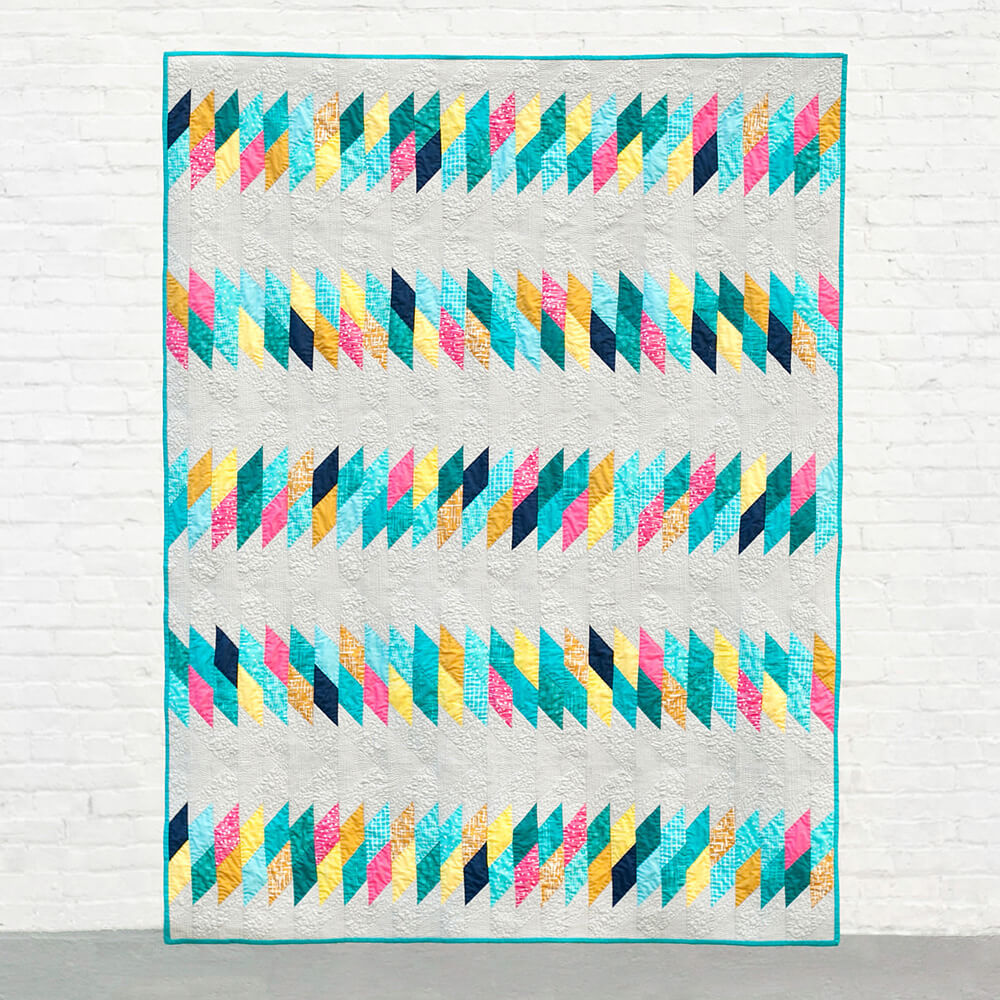
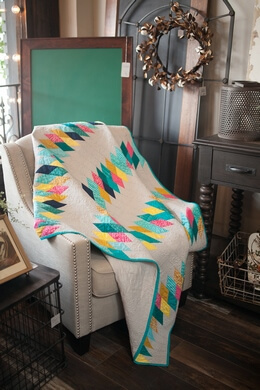
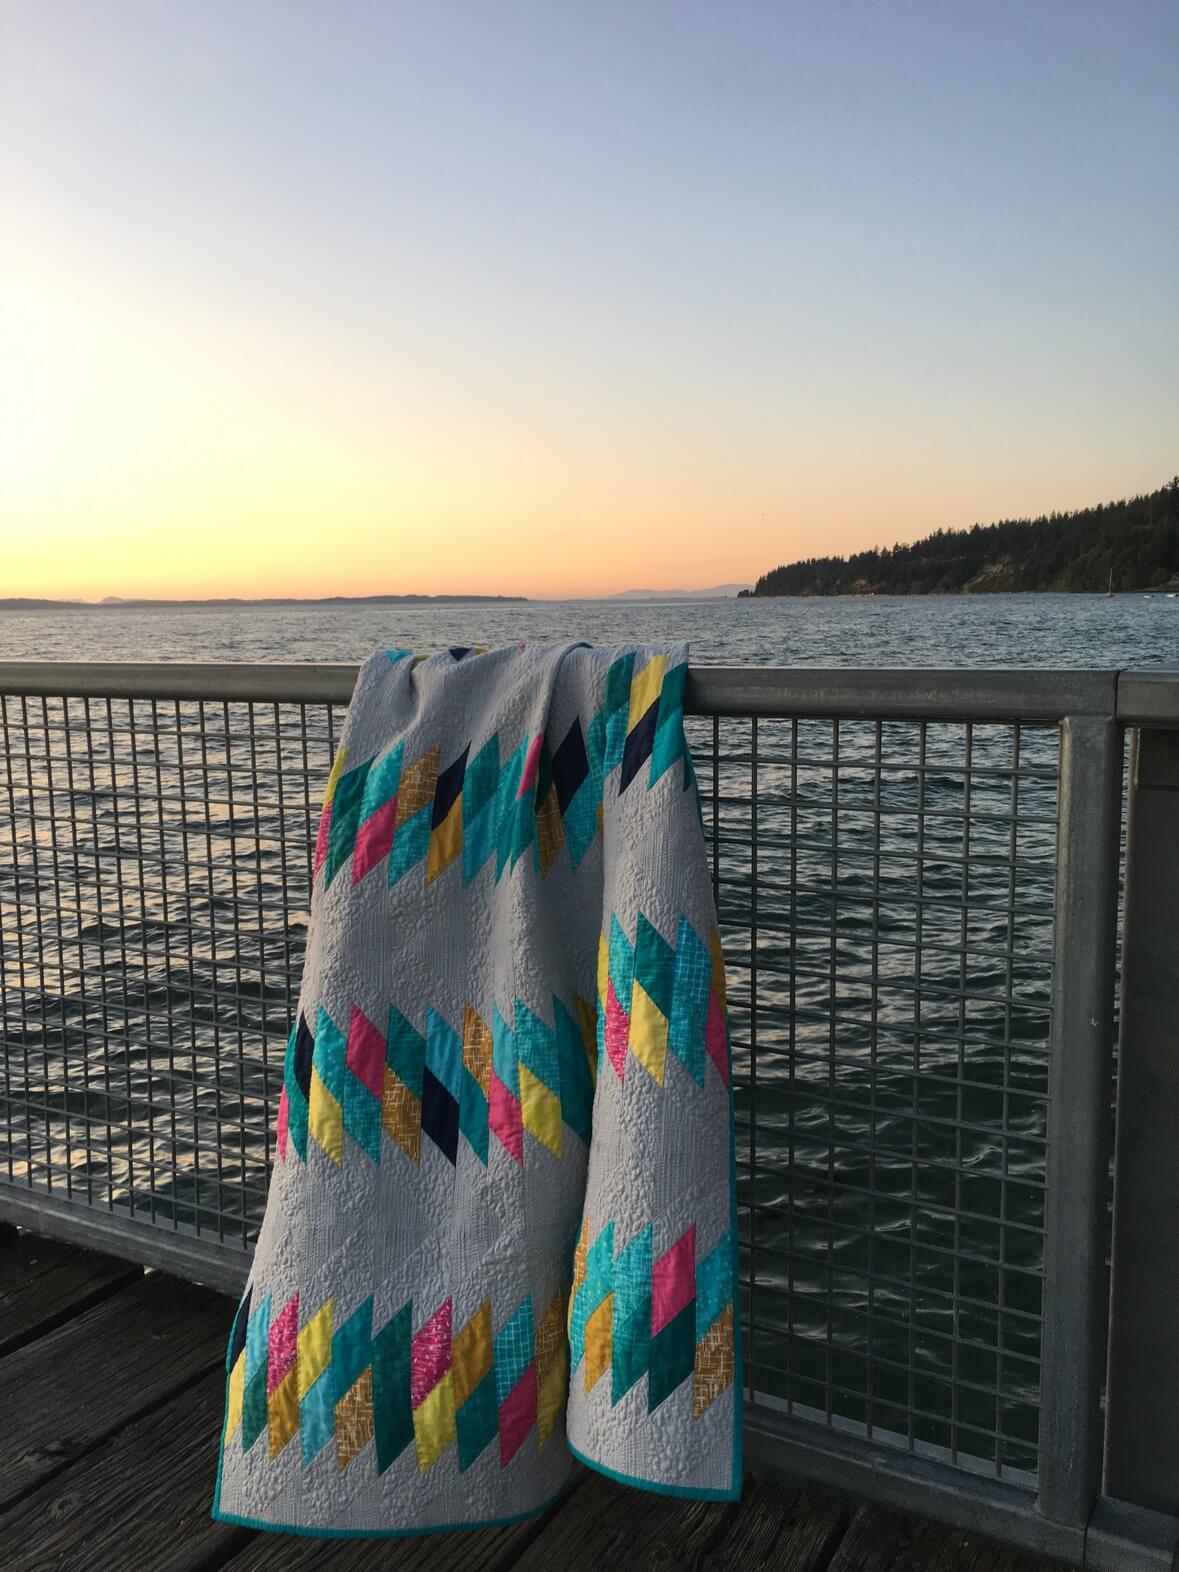
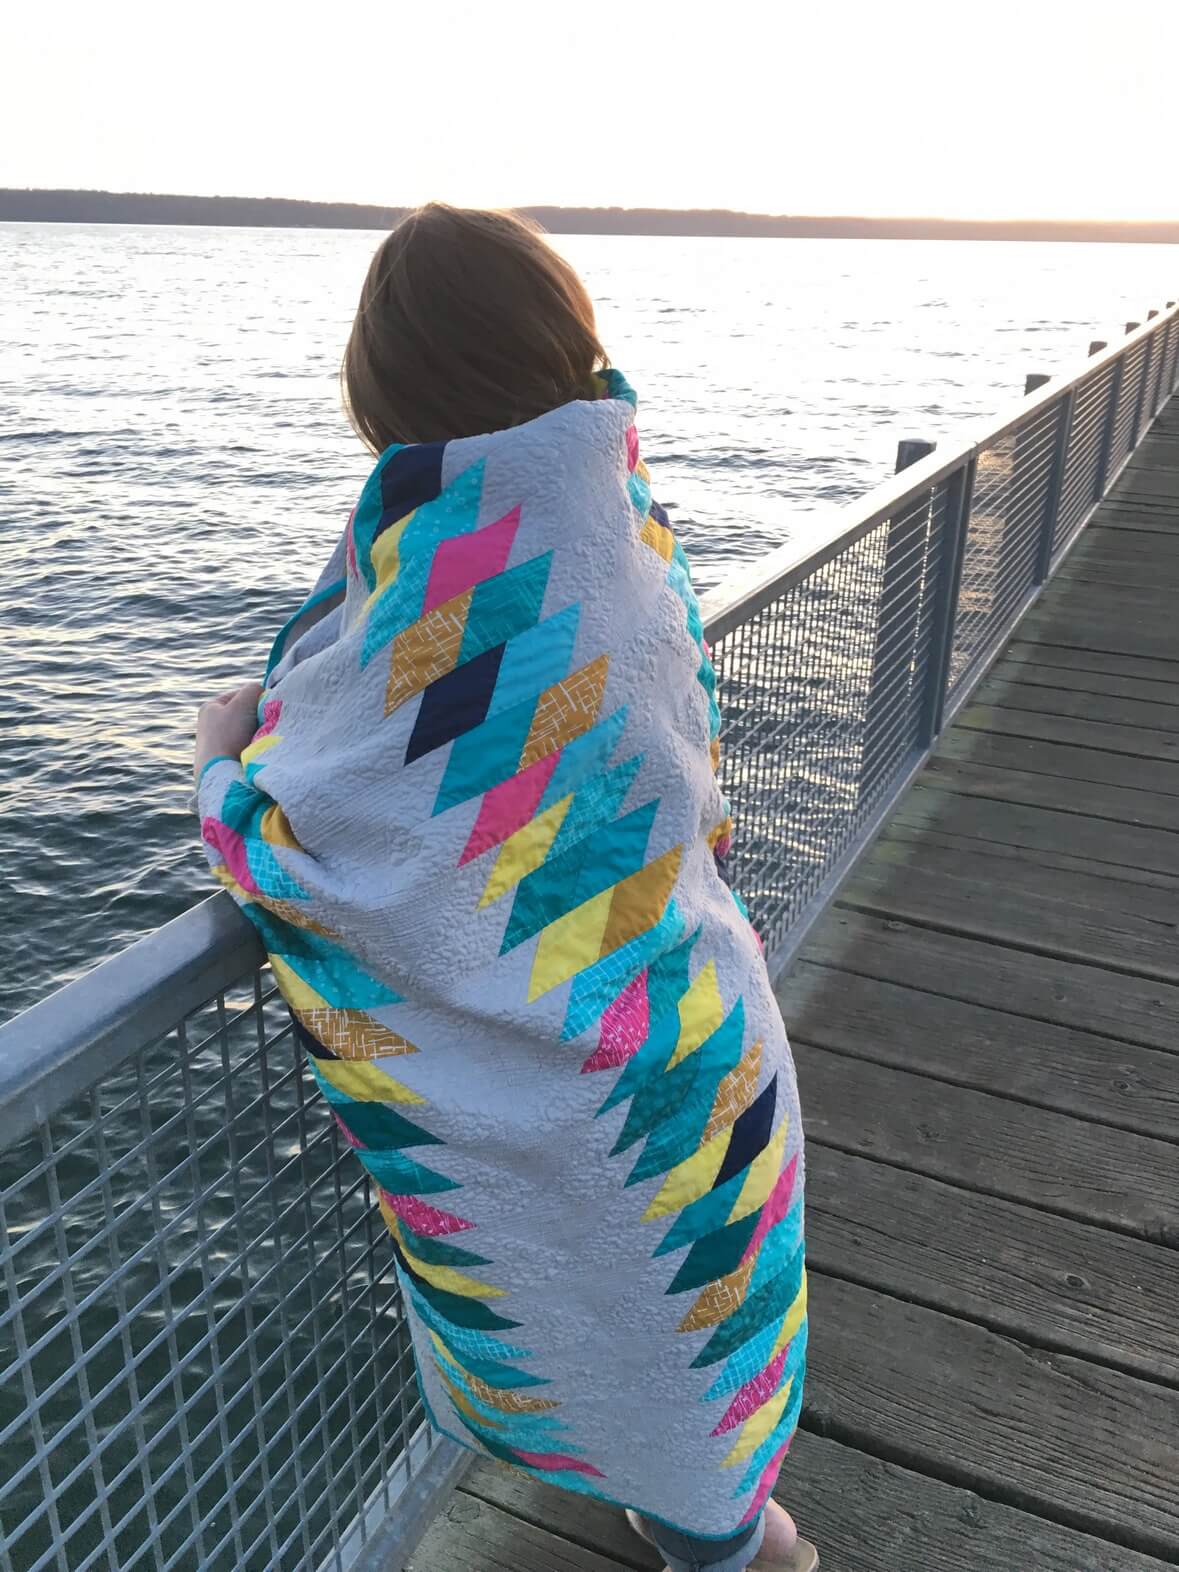
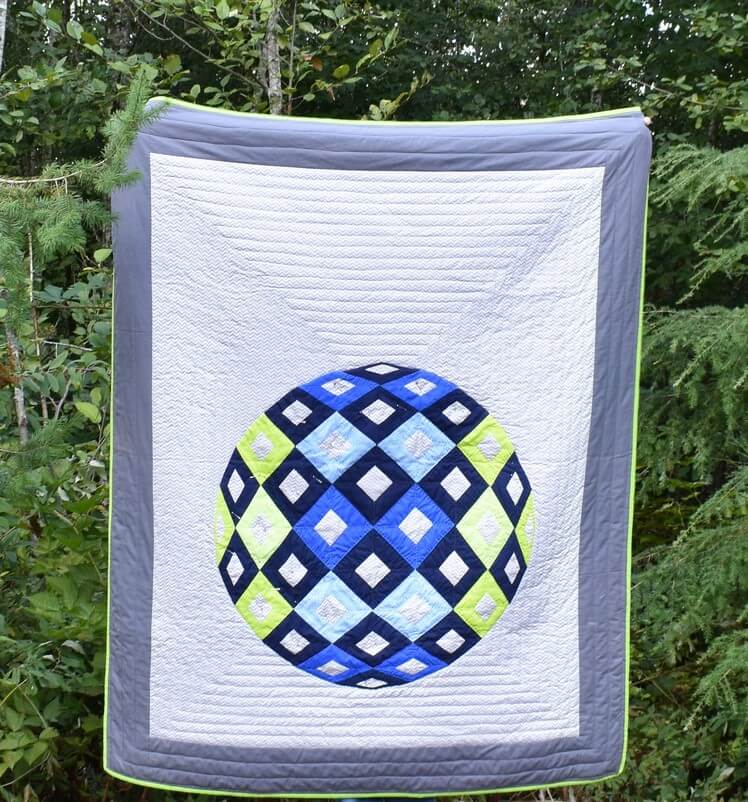
Scrappy Kayak Point quilt- First off, sorry for the terrible photograph. My quilt holder (my 13-year-old) was getting a bit antsy. This was the first pattern test for my Kayak Point pattern. It was going to go to my daughter, but we moved and her decorating colors changed, so I’m making her something else. So where this one will end up is still a mystery! I think it (along with the Scrappy Rainbow) will be one of my first long-arm projects.


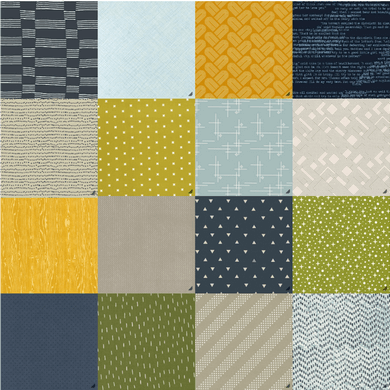
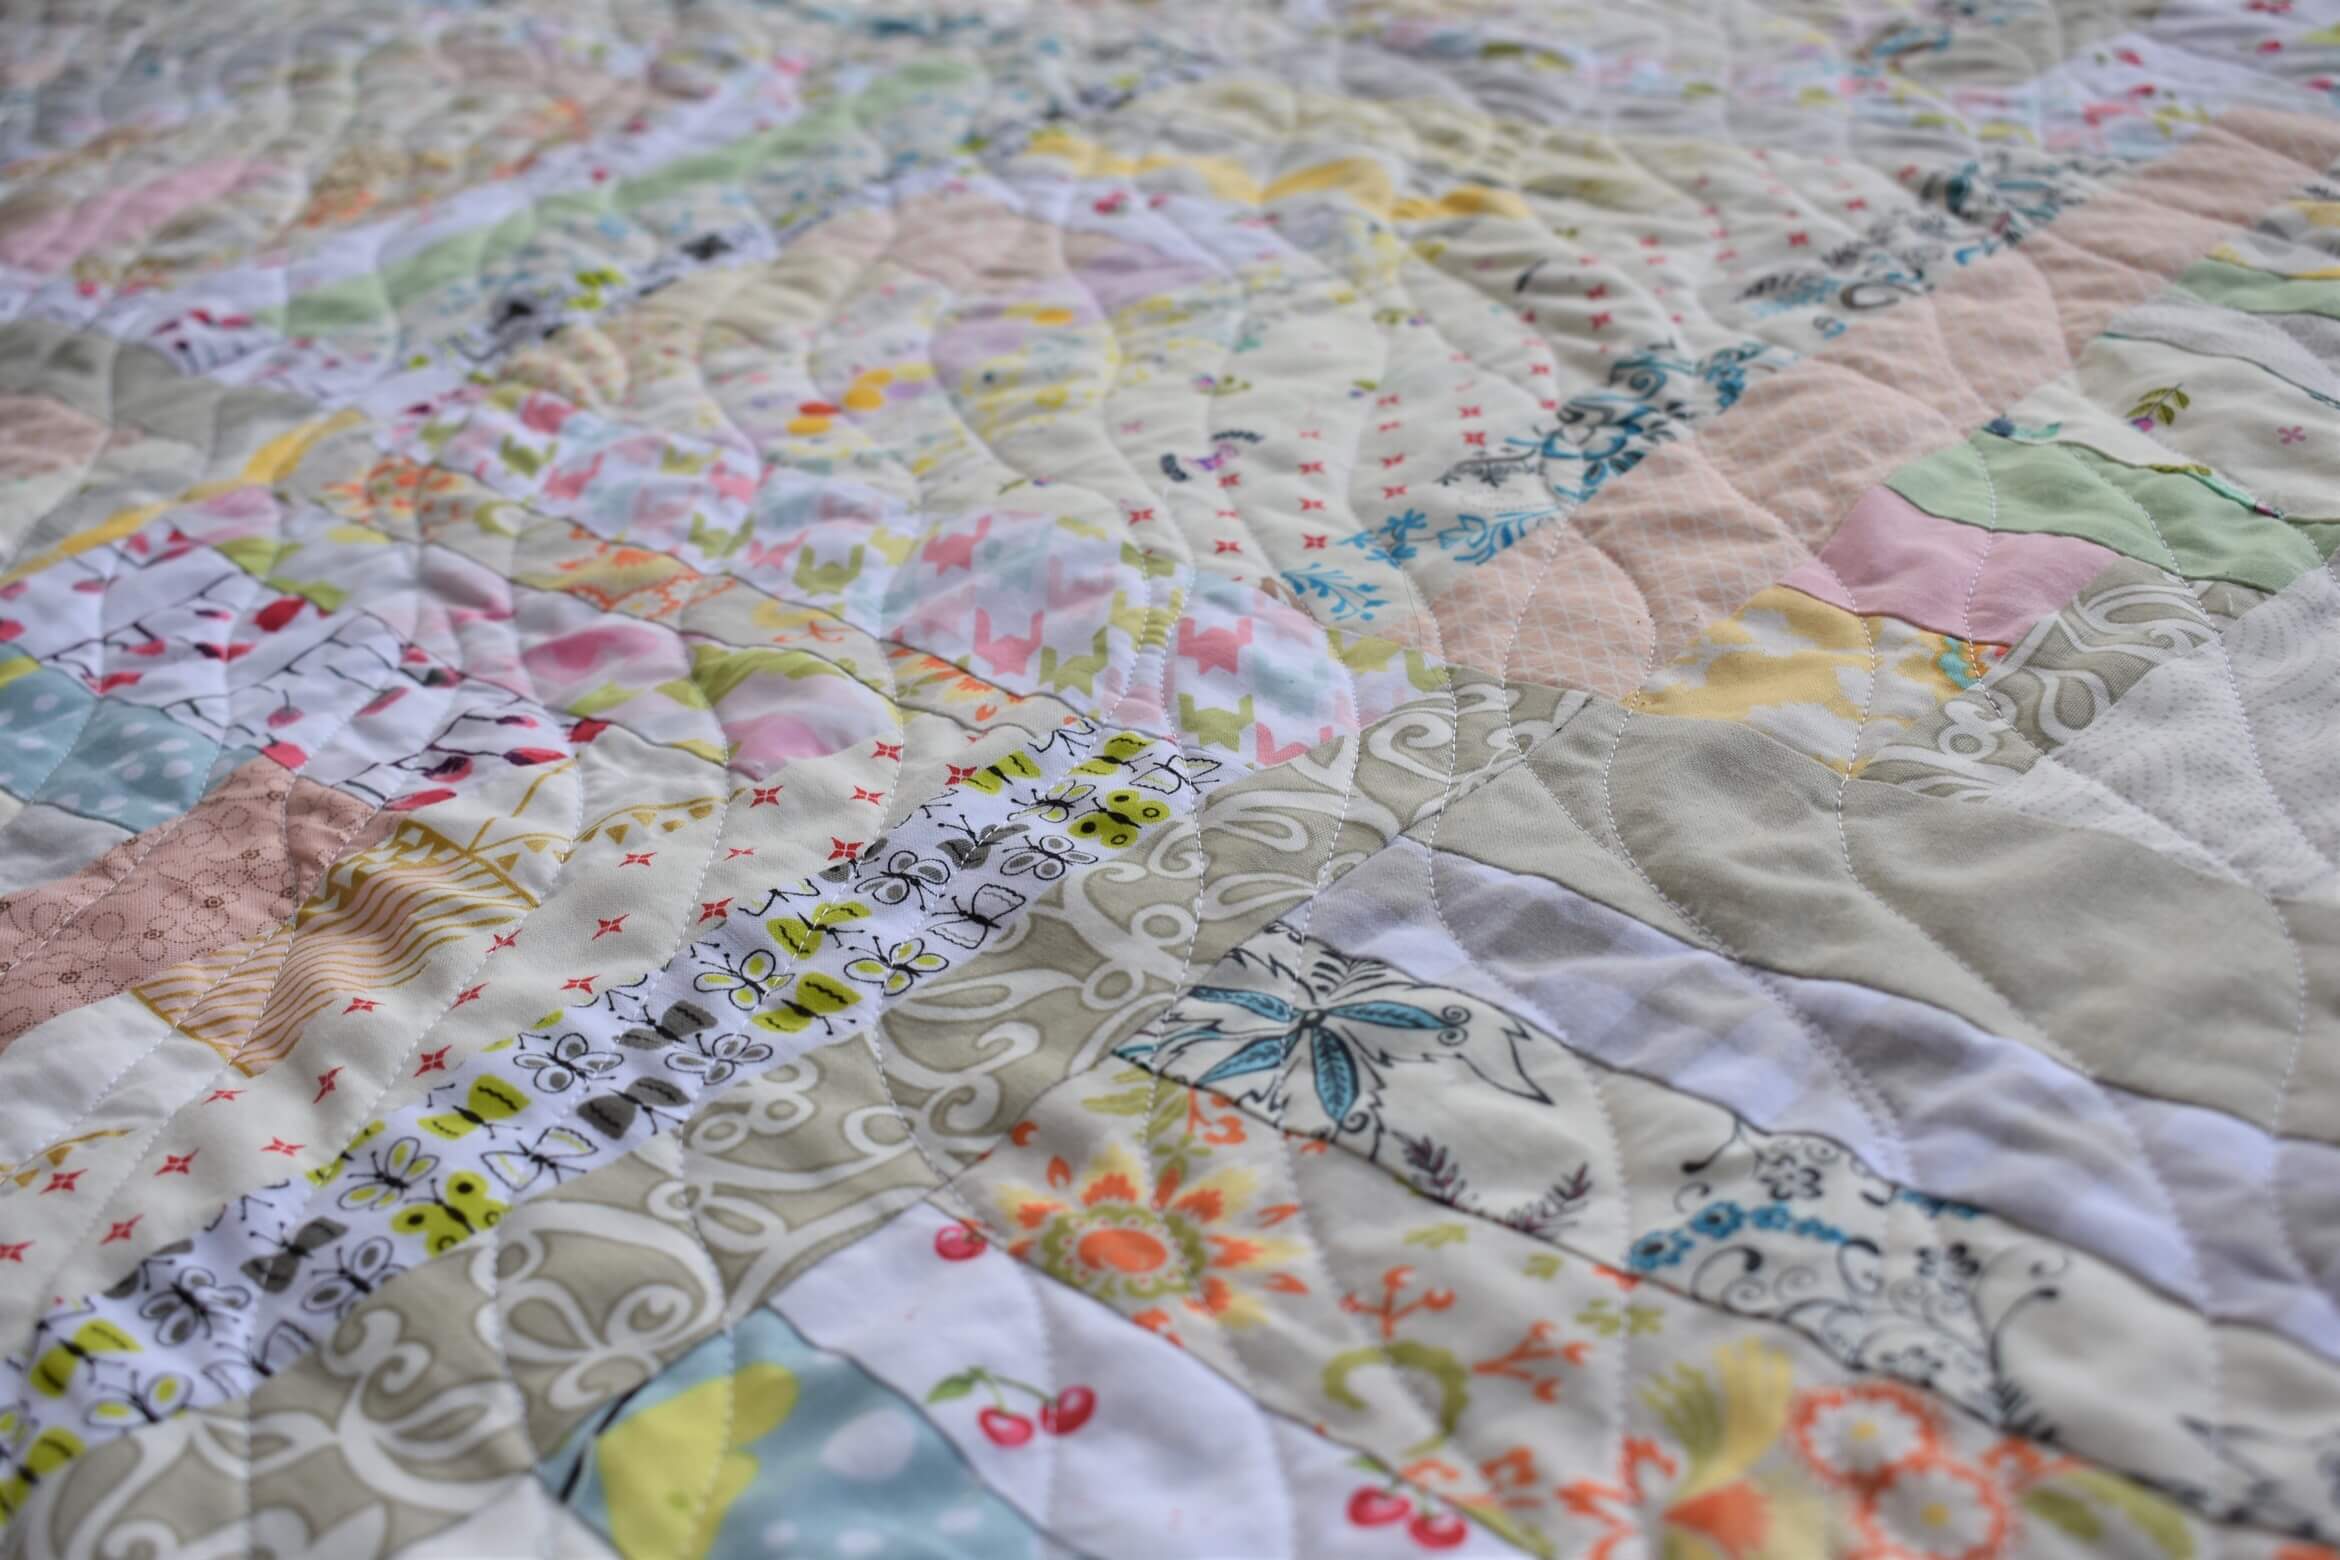
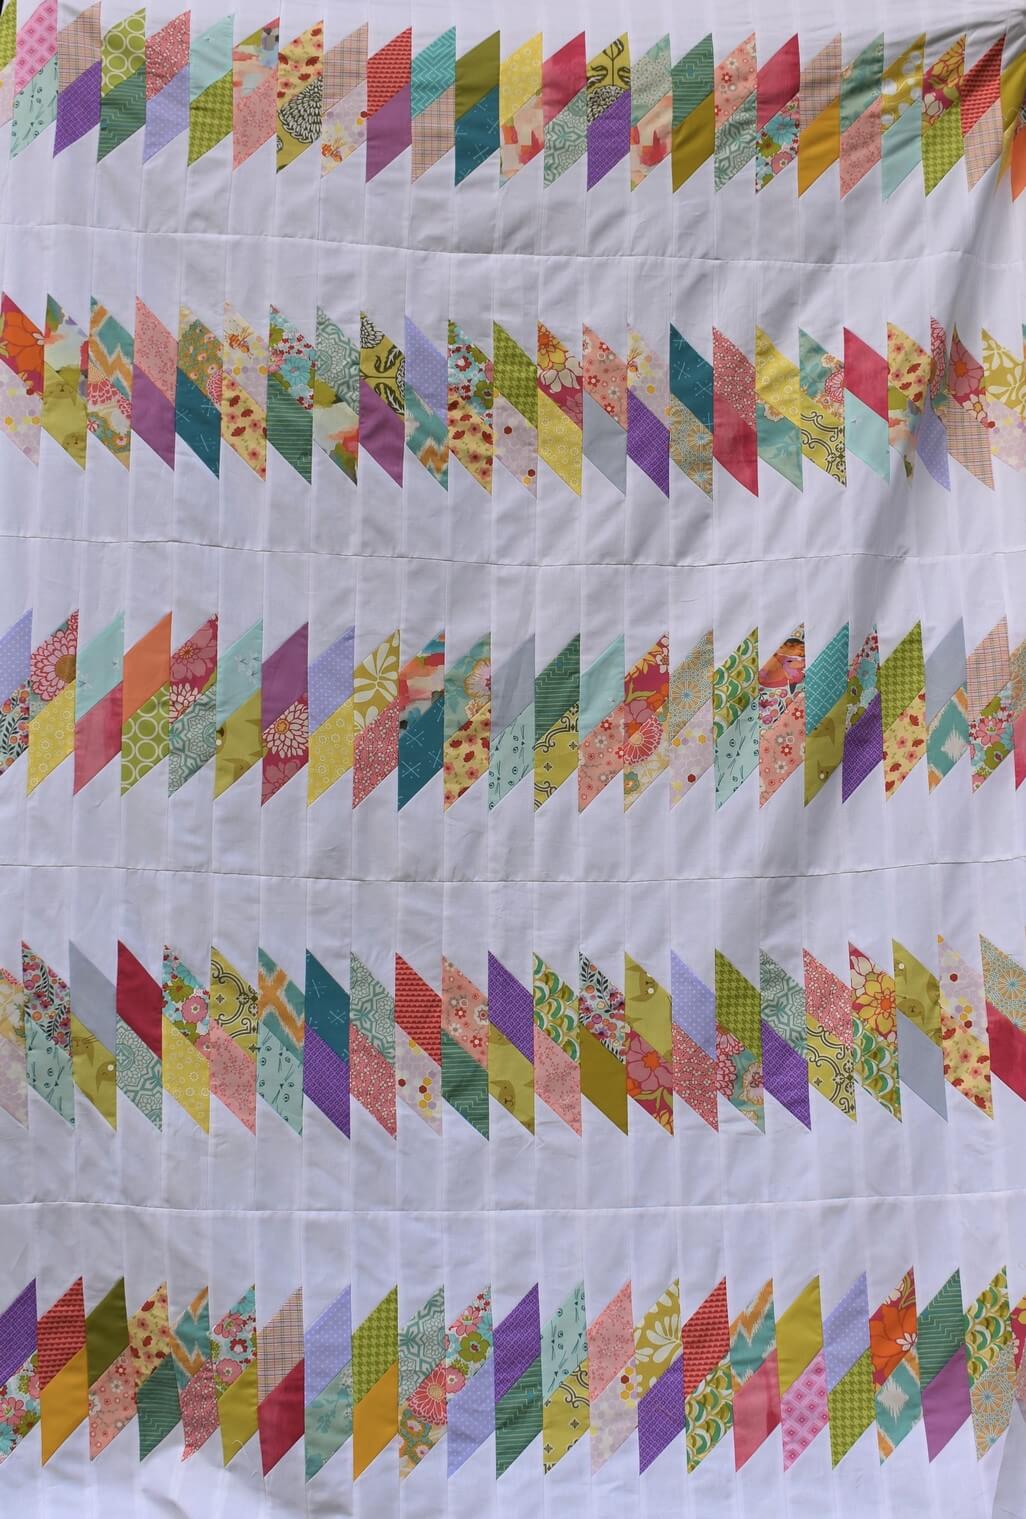
Lauren’s Low-volume patchwork quilt- I gathered fabric from my stash and have been cutting out 5-inch squares for a while now. As of last week, I bought all the fabric I will need to complete the top. The colors aren’t what I would normally pick (particularly the olive!), but I think these fabrics will really add to the modern shabby-chic look my daughter has going on in her room!

DSC_0998 (2)

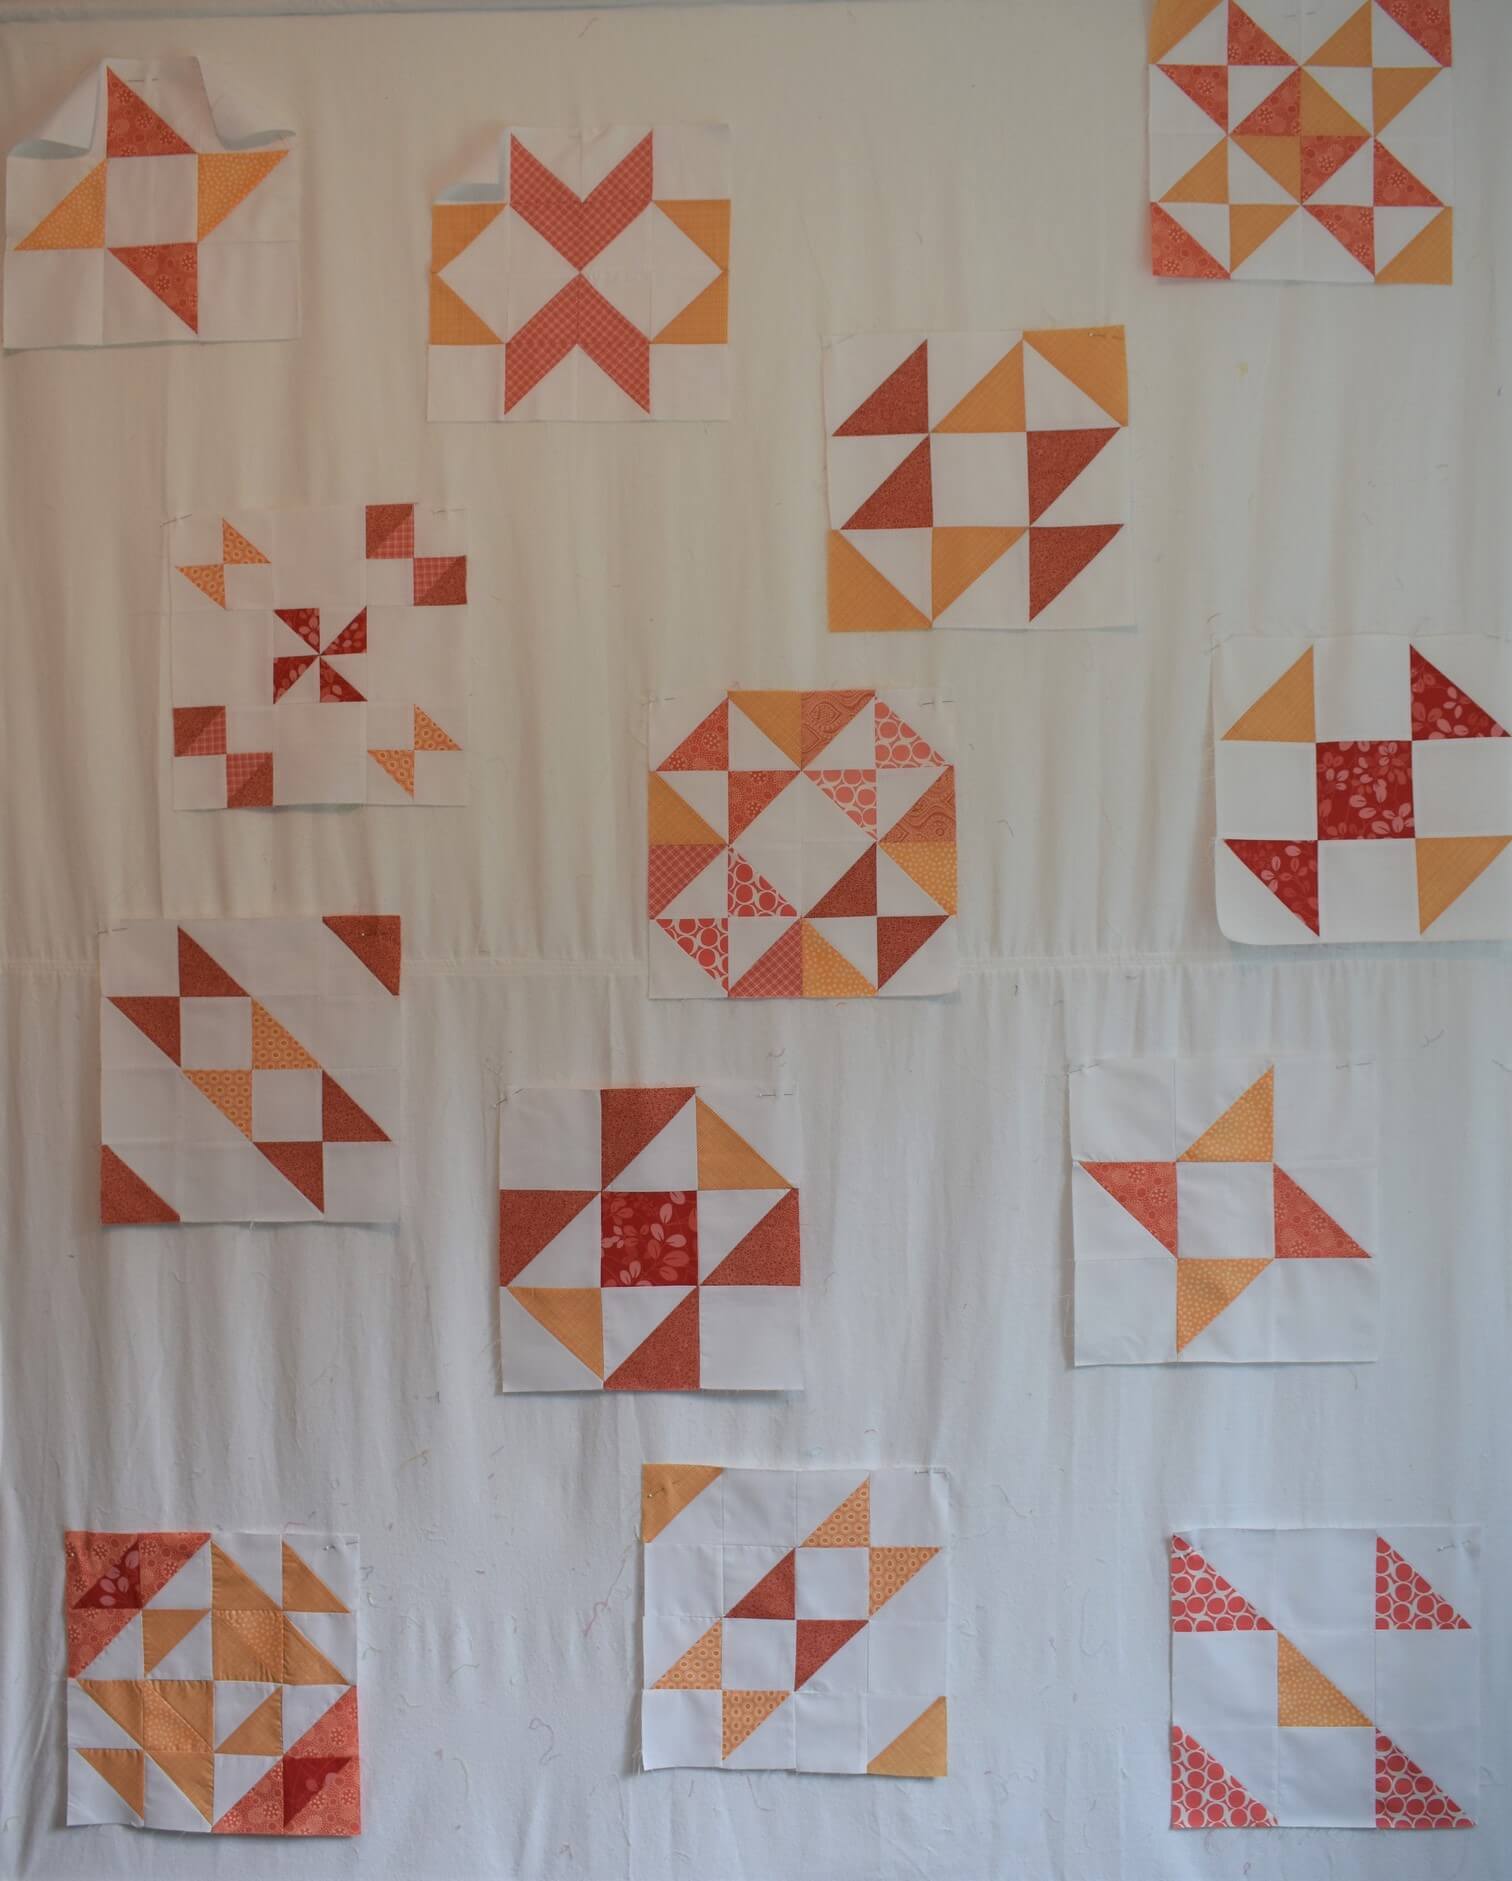
Orange HST quilt- This has been haunting my design wall for waaaayyyyyy too long. The blocks are all completed and starched, and I have the white fabric to add all the negative space. I just need to get started…. story of my life!

Ok, so there you have it- my current list of top sewing priorities. I’m hoping to be able to report to you soon that these are done so I can move on to other things!

Happy Sewing, ~L

Princess Day

Last week, I hosted the daughters of two of my closest friends. I had promised one of the girls a ‘princess day’ months ago, and then when she heard Auntie ‘Rinna had a trampoline- well, she just couldn’t wait to have that special day!

So, instead of doing my usual procrastinating while trying to plan the perfect Princess Party, I set a date with the moms and decided to just chill out a bit and fly by the seat of my pants. My daughter and I were at Hobby Lobby and saw a ‘make your own crown’ craft pack, but other than that and some “Princess Pizza”, we didn’t make any purchases for the party.

DSC_0536

Though our princesses came in beautiful dresses, we all needed new crowns, so our first order of business was to eat some pizza and make crowns. Then, of course, came some trampoline jumping followed by flower picking and cupcake decorating. The cupcakes had been baked the night before, so all our princesses needed to do was frost, decorate, and eat! And they were also very kind (as princesses should be) and made some for their families.

DSC_0281DSC_0486DSC_0520 (2)DSC_0525

After cupcakes, we needed more trampoline time, and everyone took turns showing off their best tricks while the others cheered them on. By then, it was time for a rest, so we used quilts, sheets, throw pillows, and spare lace to make a ‘house’ on the side porch. We took turns snuggling Porkchop the rabbit while I told them how they are princesses because we are all daughters of the King of the universe.

DSC_0618.JPGDSC_0652DSC_0557DSC_0710DSC_0601.JPG

After that little break, the girls were ready for -you guessed it- one more turn on the trampoline! We finished up the adventure part of our day (because princesses were MADE for adventure!) with a little walk in the forest. Two of my princesses were lucky enough to come around a corner and happen upon a deer. I think it made their day, even if she ran off right away.

DSC_0700

By that time, I was pretty worn out- five excited princesses can do that to a girl! So they finished off our day by snuggling on the couch together and watching a movie while I tidied up the kitchen.

I am fully aware that this was not a Pinterest-worthy party. But my sweet girls don’t care about Pinterest. They care that Auntie let them come over to play, that they got to dress up, that they saw a deer in the forest…. Those are the things that matter.

In quilting, don’t we always say “Done is better than perfect”? I’m pretty sure that applies to parties as well as quilts!  So, I encourage you to step out of your comfort zone and do something fun FOR THE FUN OF IT… doesn’t have to look great, doesn’t have to go on your Instagram… just go out TODAY and have your adventure!

Happy adventuring, ~L

Ben

I wish I had a fun update for you this week. But I don’t- this week I had to say goodbye to my awesome dog, my sidekick and shadow, Ben.

If you’ve followed me for a while, you know that Ben was always by my side in (and out of) my studio. He would lay under me while I sewed and catch stray threads with his big old head.

I could write so much more about Ben and what he meant to me, but I would just end up in a puddle of tears. So, instead I’ll leave you with some of my favorite pictures of him over the years in hopes that you can see how great he was and how much he was loved.

Thank you to all of my friends on Instagram and Facebook who have shared their condolences. Your thoughtfulness did not go unnoticed.

I do have some projects that I’ve been working on to share with you, but that will be another post. I hope you all have a wonderful week, and I’ll write soon.

-Lorinda

Catching Up

Well, hello there.

I would start with an apology for not writing, but it seems rather silly, don’t you think?

It’s been over seven months since I posted any content here on the blog….. 224 days to be exact.

224 days of other priorities, of not writing, of wondering what to write about, of questioning IF I wanted to write at all, and then wondering if it was just too late to start again at all.

But I think I’ve figured it out. I thought I’d start with a hello and go from there. Thought I might tell you about what I’ve been up to and what is next for me… sound good?

So, for my quilty friends who don’t follow over on IG, here is my 2018 so far:

I went job hunting. I spent the first couple months of the year updating my resume and looking for a part time job. The kids are teenagers now, and it just seemed like it was time. For someone who has done only volunteer work for years, it was a very humbling experience convincing someone to hire me so I could prove I’m awesome.

I went to QuiltCon. I took some fun classes and it was wonderful to meet quilty friends in real life. I’m sure you all got fabulous QuiltCon recaps at the time, so I won’t bore you with the details!

I got a job! I started working as an associate for Kate Spade, and absolutely fell in love with sales. I have always told people that I’m ‘not a salesperson’. Turns out, what I meant was ‘I hate high-pressure, smarmy sales’. I am actually a really great sales person, and I love doing it as long as I believe the product is a great fit for my client. And speaking of great- look at all the amazing poppy stuff I got recently!

I got hurt. I’m getting old, y’all. I took a nasty fall working at one of my sons’ band events, and messed up my knee and ankle. There were some underlying problems with my knee and foot on that side already, and I’m not 20 anymore, so recovery took longer than I thought it should. My physical therapist is my new best friend, though, and has been super helpful, so things are looking up.

I did the 100 day challenge. For 100 (mostly consecutive) days, I got myself outdoors and took photos of my surroundings. I learned more about photography (hubby got me a great camera during the challenge), and really enjoyed seeing the progression of the seasons during that 100 days. I’m already thinking about what my next challenge could be.

I made some things. Not nearly as many things as I would have liked. There were whole weeks that I didn’t even walk into my studio, and I really felt like I was in a creative funk. But I did keep plugging away and creating, even if it was in spurts. Here is a sampling from my Instagram.


I got a different job! Having my job be completely removed from my quilty endeavors has been a bit odd for me. Scheduling for retail can be a beast, and my focus was honestly drawn away from all things sewing. Maybe I’m just not good at having my attention divided. That being said, I recently accepted an offer to come work at my very favorite quilt shop! I’m really looking forward to the new inspiration being there brings… I am so ready to be drawn out of the creative rut!

So there you are- my last 224 days in a nutshell. Moving forward, I hope to be a little more productive in terms of projects. I hope to expand my content to include some of my other hobbies. I’ll probably also be seeking out some more opportunities to teach and design. And I’m planning on being a little more active here and on my Twitter and Facebook. So thanks for sticking it out with me for all those months of silence, friends. I’m looking forward to the fun things to come!

Happy Sewing,

~Lorinda

My 2018 Quilter’s Planner

By now, I’m sure most of my readers are not only familiar with The Quilter’s Planner but many even own a copy. I’ve seen several comments on The Quilter’s Planner Facebook group from users who have been apprehensive about breaking open such a pretty planner and starting to write in it. And I totally relate.

The fear of ‘ruining’ your gorgeous new planner is real! Writing in those first tasks and events can be intimidating. …what is the best pen to use? …or should I use pencils?! …my handwriting isn’t pretty enough …if I put a sticker in crooked, the whole page will look funny … oh my goodness, what if I accidentally TEAR a page?!

Perfection is the enemy of progress, friends. It is a planner after all, and the whole point of buying one is to write in it. Eventually, we’re all going to have to bite the bullet and put pen (or pencil!) to paper.

To make the transition easier, I decided to customize my planner and make it ‘mine’ before I ever took a pen to it.

I shared a photo the other night on my Instagram of my Quilter’s Planner with a rainbow of washi tape and had a couple of commenters curious to see my system and how I use rainbows to plan my time.

Being a very visual learner, it is much easier for me to conceptualize time if it’s organized with color rather than just a number date.

I chose a spectrum of 8 colors for 2018. Each week is a new color in the spectrum, so I have an 8-week rotation before the whole thing starts over again.

Showing you is so much easier than explaining it, so here’s a little slideshow of January/February.


This slideshow requires JavaScript.

The first thing I needed to do was to use the washi tape to color-code all of my weeks. I simply put a strip of tape down each side of my weekly view calendar and to the right of that week in the monthly view.

You’ll notice that many weeks that start in one month and end in another appear in both ‘monthly view’ calendars (for example, the week of January 29 through February 4). Make sure that those overlapping weeks get that same color in both monthly calendars. I did this by color-coding the weekly view calendars first and then doing the monthly view pages to match. See how the light green appears in both the bottom of my January calendar and the top of my February one?

As I washi-taped my monthly and weekly calendars, I also took the time to flip back to the “Important Dates” pages under the “Projects” tab and color those in too.  This is a really helpful spot to see six months at a glance. Once I added in birthdays and special events, it really helped me visualize my year.

I know that for many people, this ‘each week is a color’ system will not work. My husband told me this morning that he doesn’t get at all how the colors are helpful, but since I’m totally on top things, he figures it must be working well for me.

For some of you, it may just be a matter of adding pretty color to your planner. For me, and maybe for some of you, the colors can be extremely useful.

For example, after setting up my calendar last night, I know that QuiltCon is in my first purple week of the year, so if I haven’t confirmed all my travel details by the time I hit teal or blue, I’m in trouble. I know my birthday is on a Monday because it’s the first day of a blue week. And my Dad’s birthday falls at the beginning of a green week, so I better plan his gift as soon as I hit yellow. The colors help me plan for and manage my time so much better.

Ok, back to the logistics of setting up my Quilter’s Planner!

Once each week was assigned it’s color, I got to the fun task of adding some coordinating stickers. Besides just being fun, this helps reinforce the color scheme for that week. I used both the stickers that are included in the planner and some that I had bought separately. This rainbow pack from Hobby Lobby was perfect for me!

Next, I used pens to add even more color to the pages. This is where it was really important to remember that perfectionism is the enemy. Using cheap gel pens and markers to add squiggles, scribbles, and dots to my weeks, I was bound to screw it up a little bit! And that’s totally ok! The idea is to reinforce the color theme and add to the ‘pretty’… not to make a perfect planner page. I’ll take ‘pretty’ over ‘perfect’ any day.

Last but certainly not least, I started adding in events and tasks to my weeks. There’s not much planned yet, but as I get closer to each week, it sure seems to fill up quickly! As a start, I put in all the birthdays of our family and close friends as well as some important holidays and big events that we have coming up. I have also ordered some colored mechanical pencils to use to fill in tasks and events for each week… besides yellow weeks. Yellow pencil is too light to be seen well!

Here’s a little video flipping through February and March. Usually, I spend a little time at the end of each month to plan for the next and fill in my goals, plans, and events. Obviously, it’s pretty blank at this point, but having the ‘structure’ of my color-coded weeks really helps me visualize my time so much better.


Let me know in the comments what sort of system (if any) you use to organize your calendars. Does color-coding make sense to you, or would it make things more confusing? Any bullet journalers out there? Or another amazing system that you couldn’t live without? I’d love to hear all about it!

Happy Sewing, ~L

Stash Fabrics Design Star Challenge Round 3

Here we are at Round 3 of the Stash Fabrics Design Star challenge. I really enjoyed seeing the remaining nine finalists’ interpretations of our challenge.

With this Round, we were tasked with creating a “Man Bundle”. We were asked if we dropped everything right now and made a quilt for a man in our life, who would it be and why?

I have made quilts for several wonderful men and boys in my life, and all those quilts were as varied and unique as the men I made them for. But I have noticed that many of those quilts have blue and/or green tones in them. I think it might be a Northwest thing. Trees, moss, water, sky… blue and green are everywhere I look, and I can’t help but be influenced by it.

This slideshow requires JavaScript.

 I am currently finishing up two ‘man quilts’ for special guys in my life: one for my youngest son (using this Quilt Theory pattern) and one for my husband, and this bundle is a good blend of the styles of those two quilts. My husband’s quilt has lots of slate blue, navy and gray. My son’s quilt is brighter, with lots of blue, teal, and green.

DS Round 3

So I wanted something that was fun and colorful, but with a mellow side. This combination of vivid color and grayed-out beige was exactly what I was looking for. It reminds me of that peaceful moment on a hike when you’ve reached your goal and it’s time to turn back, but for a few moments you just sit and enjoy the view.  Those quiet bits of time in the midst of an adventure have been some of the best moments I’ve spent with the men I love most.

To vote for your favorite bundles, visit the Stash Fabrics Blog. You can vote once per day per device until the 13th.

Happy Sewing, ~Lorinda

Stash Fabrics Design Star Contest

<Happy dance, happy dance>

Oh, don’t mind me! I’m just over here doing my little happy dance because I’m SO THRILLED to be one of the twelve finalists for the 2017 Stash Fabrics Design Star Contest.

Stash Fabrics is an online fabric shop with tons of gorgeous modern quilting fabrics. They also carry a fabulous collection of threads and rulers, so they’re a great place to go to fill out your Christmas wishlist!

If you were a follower of mine back when I was doing Color Play Friday, you know that 1) I absolutely love putting together pretty bundles of fabric from an inspiration image or prompt, and 2) Using the Stash Fabrics Design Wall is one of my favorite ways to do so.

Without further ado, here is my bundle for Round Two:

LaurelPoppyandPine Design Star Round 2 Entry


Our challenge for this round was to design a bundle based on a chosen decade. I selected the 60’s for the wonderfully bright colors. The tailored outfits of the 60’s Mod style are gorgeous and glamorous, but the fact that they’re in such loud colors keeps them fun! The style is a great mix between 1950’s tailoring and 1970’s colors.

Before designing my bundle, I spent some time curating a 60’s fashion Pinterest Board for inspiration. As you can see, my color palette came straight out of 60’s teen fashion magazines!

This slideshow requires JavaScript.


Be sure to visit the post on the Stash Fabrics Blog and vote for your favorites. You can vote once per day per device until the 19th! 

Happy Sewing! ~L


Sewing Kit for Lauren

In a couple of weeks, my local high school will be putting on yet another amazing drama production (not that I’m biased or anything!). My daughter didn’t audition for this play, but is instead helping the costuming director with measuring students, making costume adjustments, and doing any needed repairs as the production goes on.

In order to be as productive as possible, I knew it would be helpful for her to have her own sewing kit backstage. That way, she wouldn’t be hunting down the costume director for thread or trying to find an extra pair of scissors while on a time crunch. And, of course, it gave me a good excuse to make something cute! I mean, why use a boring, store-bought bag when you can have a fun, custom one?

My first task was to find a bag pattern that would work for her needs. For that, I turned to my Instagram followers. They did not disappoint- there were a few really great suggestions. Ultimately, I decided the Sew Together Bag would be the best one for the job.  This thing really is so roomy! And I loved that there were lots of different compartments to keep all the little notions that she’ll be carrying.

Next step- fabrics! She chose this gorgeous Bari J Millie Fleur print for the exterior and several different gray solids for the interior pouches. Then she kicked it up a notch by choosing Cotton + Steel Sparkle Canvas for the binding. Because its canvas, it adds a lot of sturdiness to the bag, and because it’s glittery, it makes my heart happy.

The bag pattern was fun and fairly easy to assemble. There were a few times that I had to re-read instructions, but that is to be expected the first time making anything! Now that I’ve done it once, this will be a cinch next time I make it. (And I WILL make it again because I LOVE this pattern)

My final step, of course, was filling the kit with everything I thought she might need as a costuming assistant. I will admit, that I may have gone a little overboard here- I know the costumer will probably already have buttons- but I wanted her to have a complete kit for any future work she does too. Plus, it was fun!

Here’s what I put in the kit:

Snips

Needles

Pins in a pincushion

Masking Tape (for quick hems)

Seam ripper

Small ruler

Tailors Chalk

Bobbins (I did six with various colors of thread)

Safety Pins

Wonderclips

Measuring Tape

Woven Elastic

Snaps

Buttons

Hook and eye closures

Interfacing scraps

Velcro

Patches

In the future, I will probably also add a thimble and pinking shears. Oh, and maybe my Clover mini iron… yes, it actually fits in there!

Anything I missed? Let me know in the comments!

Happy Sewing! ~L

Introducing the Kayak Point Quilt

Happy Monday, friends!

I am so happy to share with you today my latest pattern for Quilt Theory.

Introducing the Kayak Point quilt!

IMG_4379

As some of you may know, for this collection, the Quilt Theory designers limited ourselves to a palette of 12 colors that we could use in our quilts. I knew right away which of the 12 colors I wanted to use. They just made me so happy! And I also knew right away that I wanted to use a selection of Michael Miller prints and solids… they’re so gorgeous!

As I was designing, I kept in mind that I wanted to make this pattern pre-cut friendly with very little waste. I’m happy to say that I succeeded- this quilt top uses almost two full jelly rolls or one jelly roll with yardage for the background.

IMG_4720

I named this quilt after one of my favorite beaches here in Washington. I spent countless hours there with my dad and sister playing, crabbing, and learning to fish. The elongated diamond shapes remind me of kayaks lined up in rows. So of course, I had to do a little photo session out there!


I really pushed it down to the wire with this one… I finished the hand quilting on the afternoon before I was supposed to deliver it and took it out to Kayak Point to photograph it that night! Although time consuming, I think the hand quilting was worth it! Aurifil was kind enough to provide me with coordinating 12 weight thread to hand quilt each diamond, and I love how it turned out.


IMG_4972


Giveaway Time! 

To help us celebrate, Michael Miller was gracious enough to offer one lucky winner a jelly roll of Modern Basics in Ocean AND 3 yards of Bright White Cotton Couture. That’s enough fabric to make a Kayak Point quilt top of your own!

Lorinda MM Giveaway (5)Lorinda MM Giveaway (2)

My giveaway closes on October 22 at 12 am Pacific Time. Sorry international readers, this giveaway is only open to United States residents 18 and older. Winner will be randomly selected by Rafflecopter, and I will email them on the 23rd. If I don’t hear back from the first winner within three days, a new winner will be selected. Click the button below to be brought to the giveaway.

MM Giveaway button


 Last but certainly not least, be sure to stop by each designer’s website this week for more info on all the Collection 3 quilts and lots of fun giveaways! Like, seriously, I wish I could win this stuff!

In case you missed it, here is the Blog Hop schedule:

Friday 10/13 – Quilt Theory

Saturday 10/14 – Michelle from Michelle Bartholomew Handmade Quilts

Monday 10/16 – Lorinda from Laurel Poppy and Pine (you’re already here!)

Tuesday 10/17 – Kitty from Night Quilter

Wednesday 10/18 – Stephanie from Late Night Quilter

Thursday 10/19 – Yvonne from Quilting Jetgirl

Friday 10/20 – Cheryl from Meadow Mist Designs

Saturday 10/21 – Quilt Theory


Happy Sewing! ~L

Blogger’s Quilt Festival: Leslie in the Sky with Diamonds

Happy Friday, friends!

My second entry for the Blogger’s Quilt Festival is vastly different than my By Your Side Quilt.

file_008

I made this one over the course of a year as a Christmas gift for my sister. It was all about the process on this one- experimenting with techniques, playing with color. I took my inspiration from the way my sister created a mural in her bedroom- bit by bit over time as she felt inspired, with lots of different-looking elements that blend together. My only guidelines were the color palette (I pulled all my fabrics before starting) and that I wanted lots of night skies and stars. You can see my original post about making this quilt here.

15741283_10154879622802156_7161040787570146311_nfile_001-1file_000-3

This one is so removed from my own style, but my husband paid me a huge compliment when it was on my design wall and he said, “Even if you hadn’t told me, I would know this was for your sister.” Because it was for her, I made sure it was something that she would enjoy. A couple of times over the last year, I’ve gotten texts from her with pictures of different parts saying, “I just noticed this!” I love that she’s still discovering new things after so many months.

Thanks for stopping by!

Happy Sewing, ~L