By now, I’m sure most of my readers are not only familiar with The Quilter’s Planner but many even own a copy. I’ve seen several comments on The Quilter’s Planner Facebook group from users who have been apprehensive about breaking open such a pretty planner and starting to write in it. And I totally relate.
The fear of ‘ruining’ your gorgeous new planner is real! Writing in those first tasks and events can be intimidating. …what is the best pen to use? …or should I use pencils?! …my handwriting isn’t pretty enough …if I put a sticker in crooked, the whole page will look funny … oh my goodness, what if I accidentally TEAR a page?!
Perfection is the enemy of progress, friends. It is a planner after all, and the whole point of buying one is to write in it. Eventually, we’re all going to have to bite the bullet and put pen (or pencil!) to paper.
To make the transition easier, I decided to customize my planner and make it ‘mine’ before I ever took a pen to it.
I shared a photo the other night on my Instagram of my Quilter’s Planner with a rainbow of washi tape and had a couple of commenters curious to see my system and how I use rainbows to plan my time.
Being a very visual learner, it is much easier for me to conceptualize time if it’s organized with color rather than just a number date.
I chose a spectrum of 8 colors for 2018. Each week is a new color in the spectrum, so I have an 8-week rotation before the whole thing starts over again.
Showing you is so much easier than explaining it, so here’s a little slideshow of January/February.
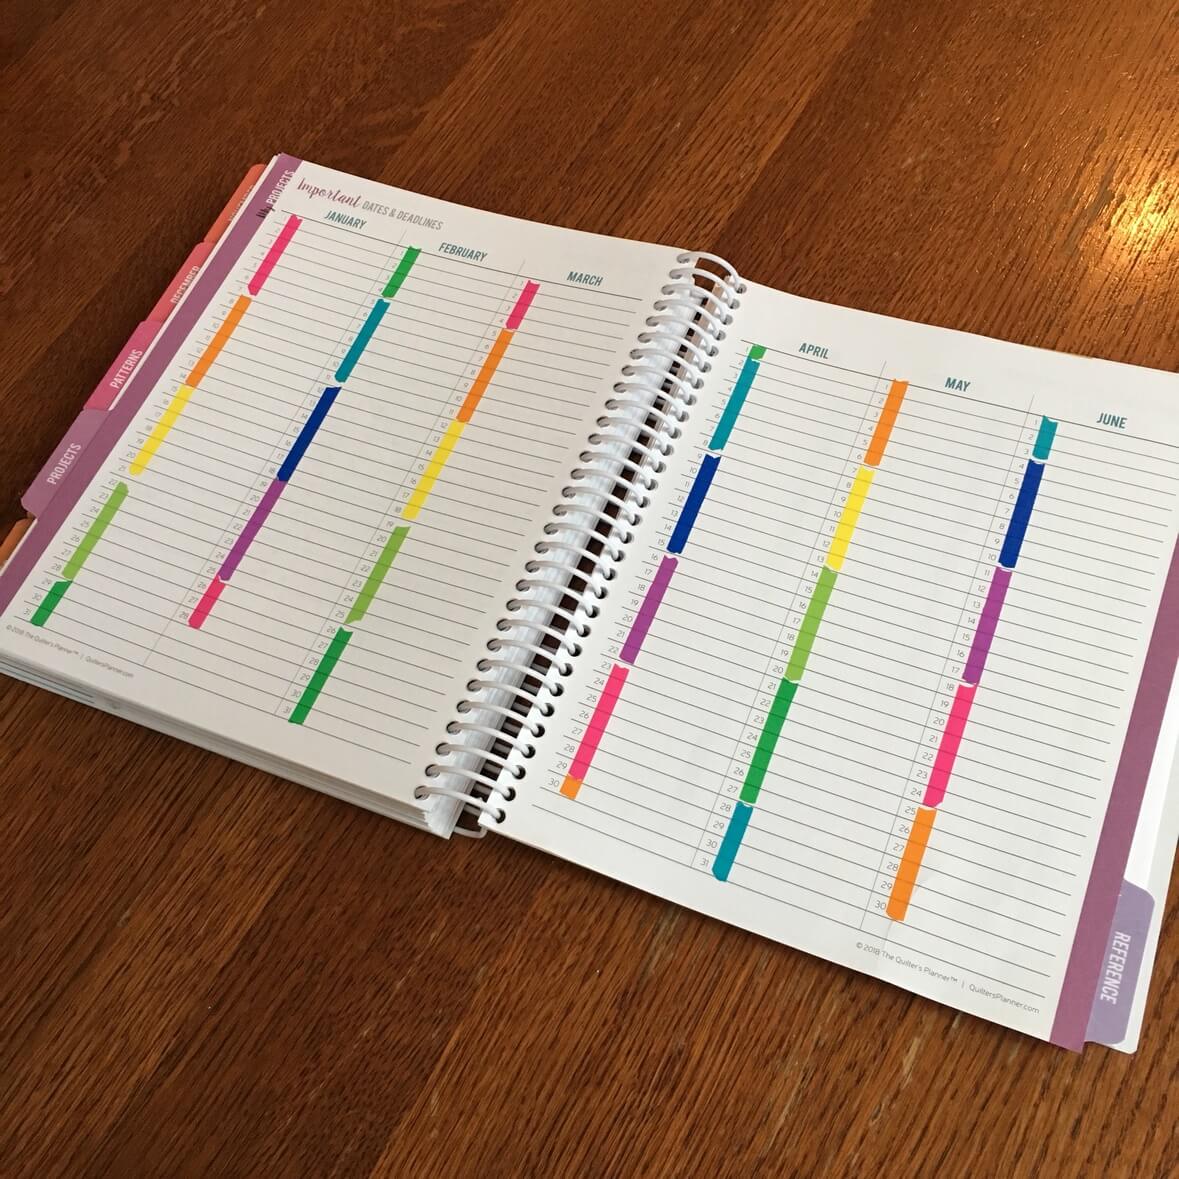
The first thing I needed to do was to use the washi tape to color-code all of my weeks. I simply put a strip of tape down each side of my weekly view calendar and to the right of that week in the monthly view.
You’ll notice that many weeks that start in one month and end in another appear in both ‘monthly view’ calendars (for example, the week of January 29 through February 4). Make sure that those overlapping weeks get that same color in both monthly calendars. I did this by color-coding the weekly view calendars first and then doing the monthly view pages to match. See how the light green appears in both the bottom of my January calendar and the top of my February one?
As I washi-taped my monthly and weekly calendars, I also took the time to flip back to the “Important Dates” pages under the “Projects” tab and color those in too. This is a really helpful spot to see six months at a glance. Once I added in birthdays and special events, it really helped me visualize my year.
I know that for many people, this ‘each week is a color’ system will not work. My husband told me this morning that he doesn’t get at all how the colors are helpful, but since I’m totally on top things, he figures it must be working well for me.
For some of you, it may just be a matter of adding pretty color to your planner. For me, and maybe for some of you, the colors can be extremely useful.
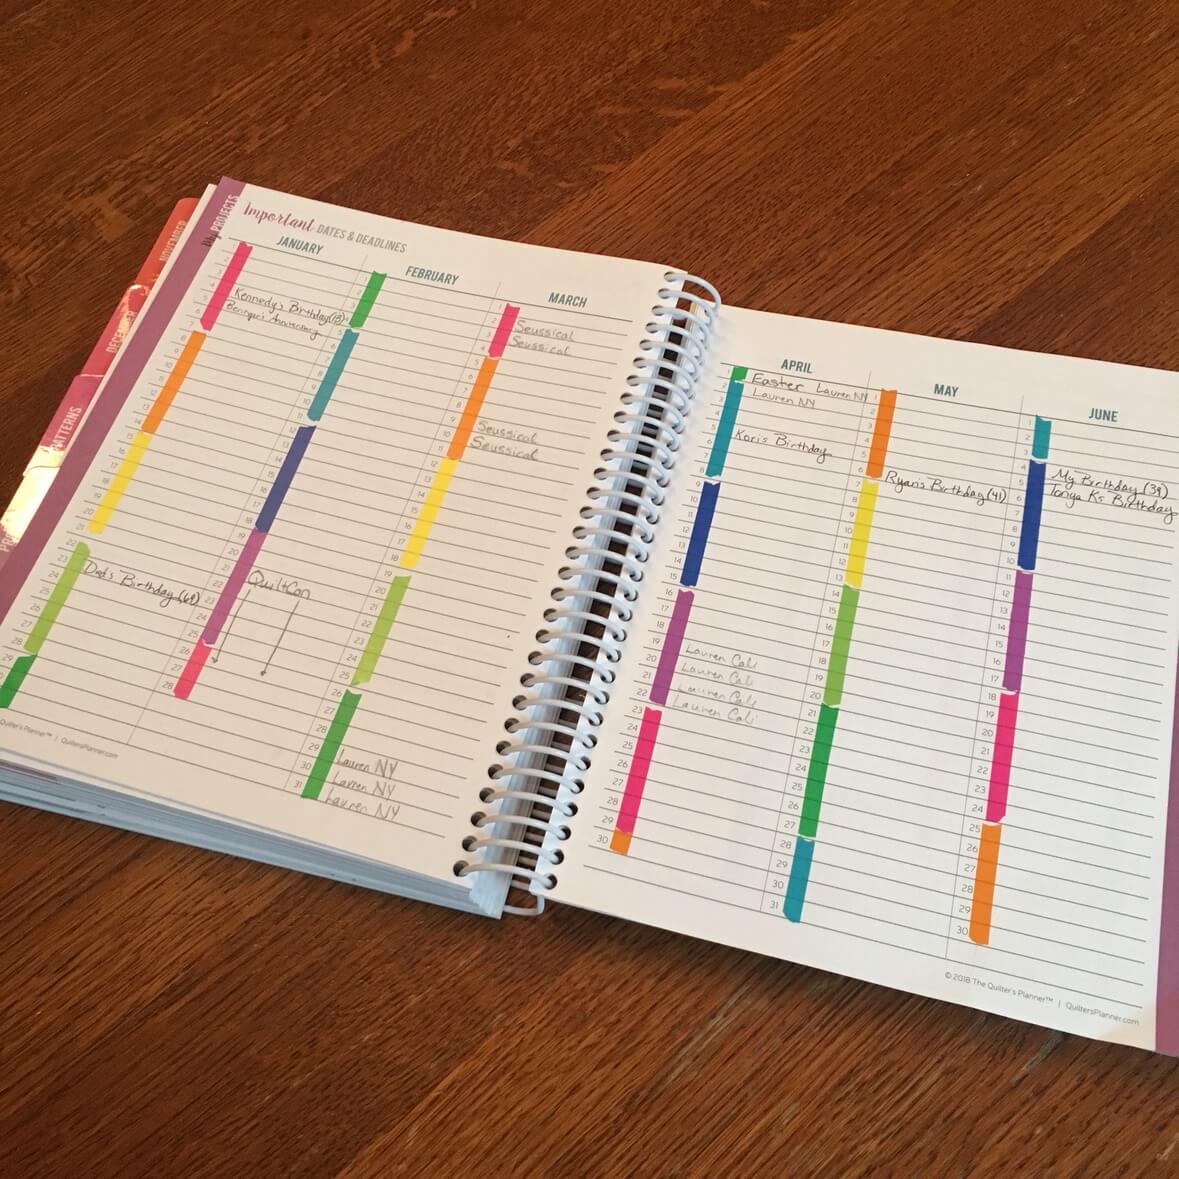
For example, after setting up my calendar last night, I know that QuiltCon is in my first purple week of the year, so if I haven’t confirmed all my travel details by the time I hit teal or blue, I’m in trouble. I know my birthday is on a Monday because it’s the first day of a blue week. And my Dad’s birthday falls at the beginning of a green week, so I better plan his gift as soon as I hit yellow. The colors help me plan for and manage my time so much better.
Ok, back to the logistics of setting up my Quilter’s Planner!
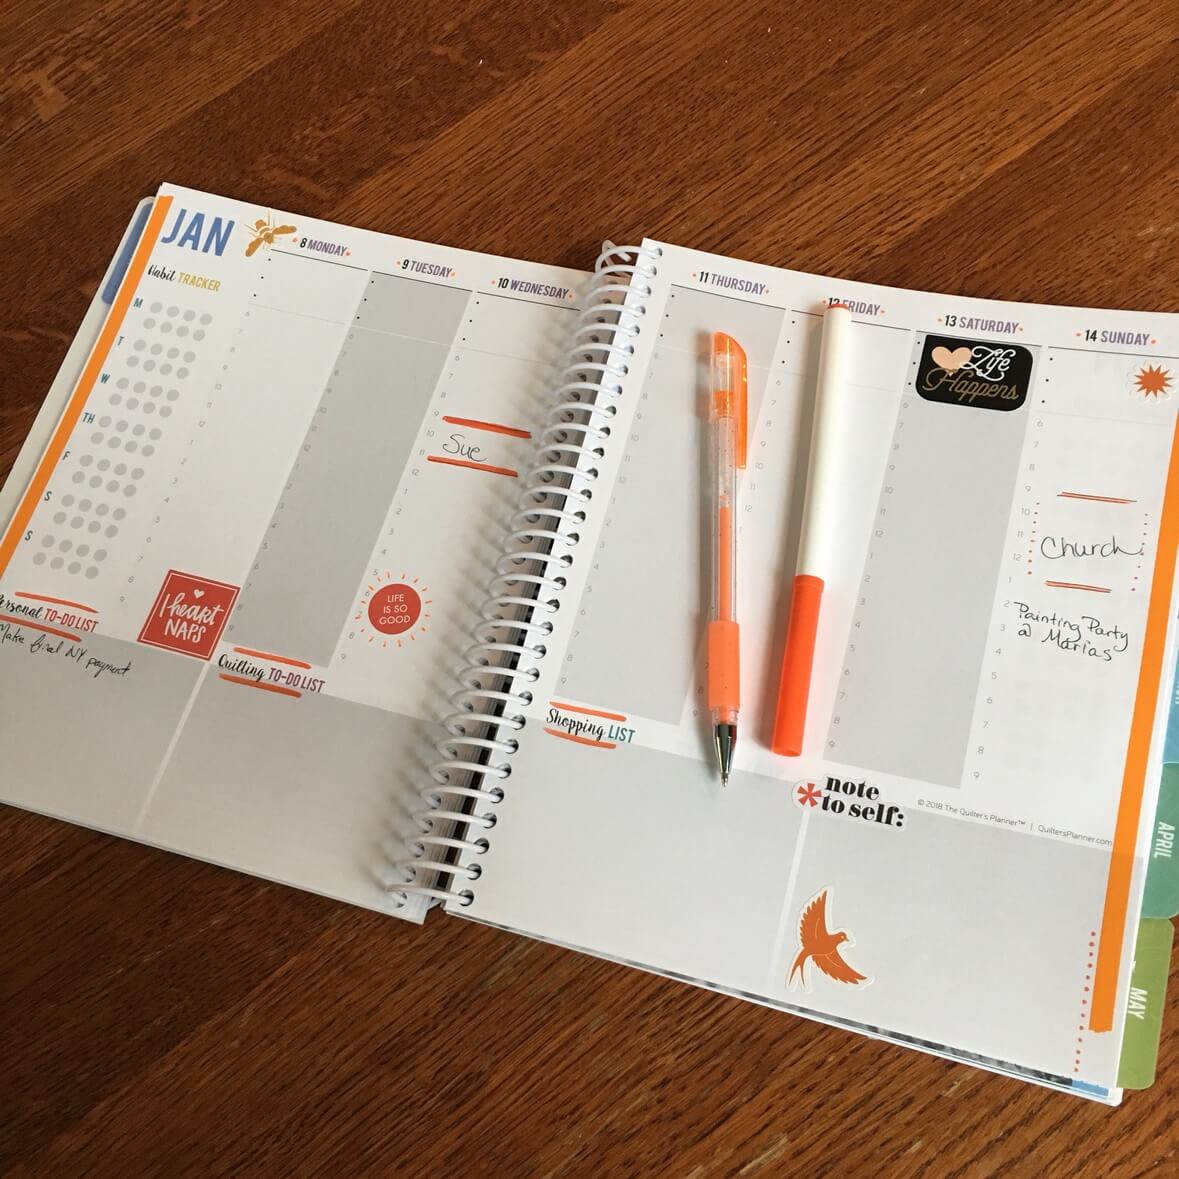
Once each week was assigned it’s color, I got to the fun task of adding some coordinating stickers. Besides just being fun, this helps reinforce the color scheme for that week. I used both the stickers that are included in the planner and some that I had bought separately. This rainbow pack from Hobby Lobby was perfect for me!

Next, I used pens to add even more color to the pages. This is where it was really important to remember that perfectionism is the enemy. Using cheap gel pens and markers to add squiggles, scribbles, and dots to my weeks, I was bound to screw it up a little bit! And that’s totally ok! The idea is to reinforce the color theme and add to the ‘pretty’… not to make a perfect planner page. I’ll take ‘pretty’ over ‘perfect’ any day.
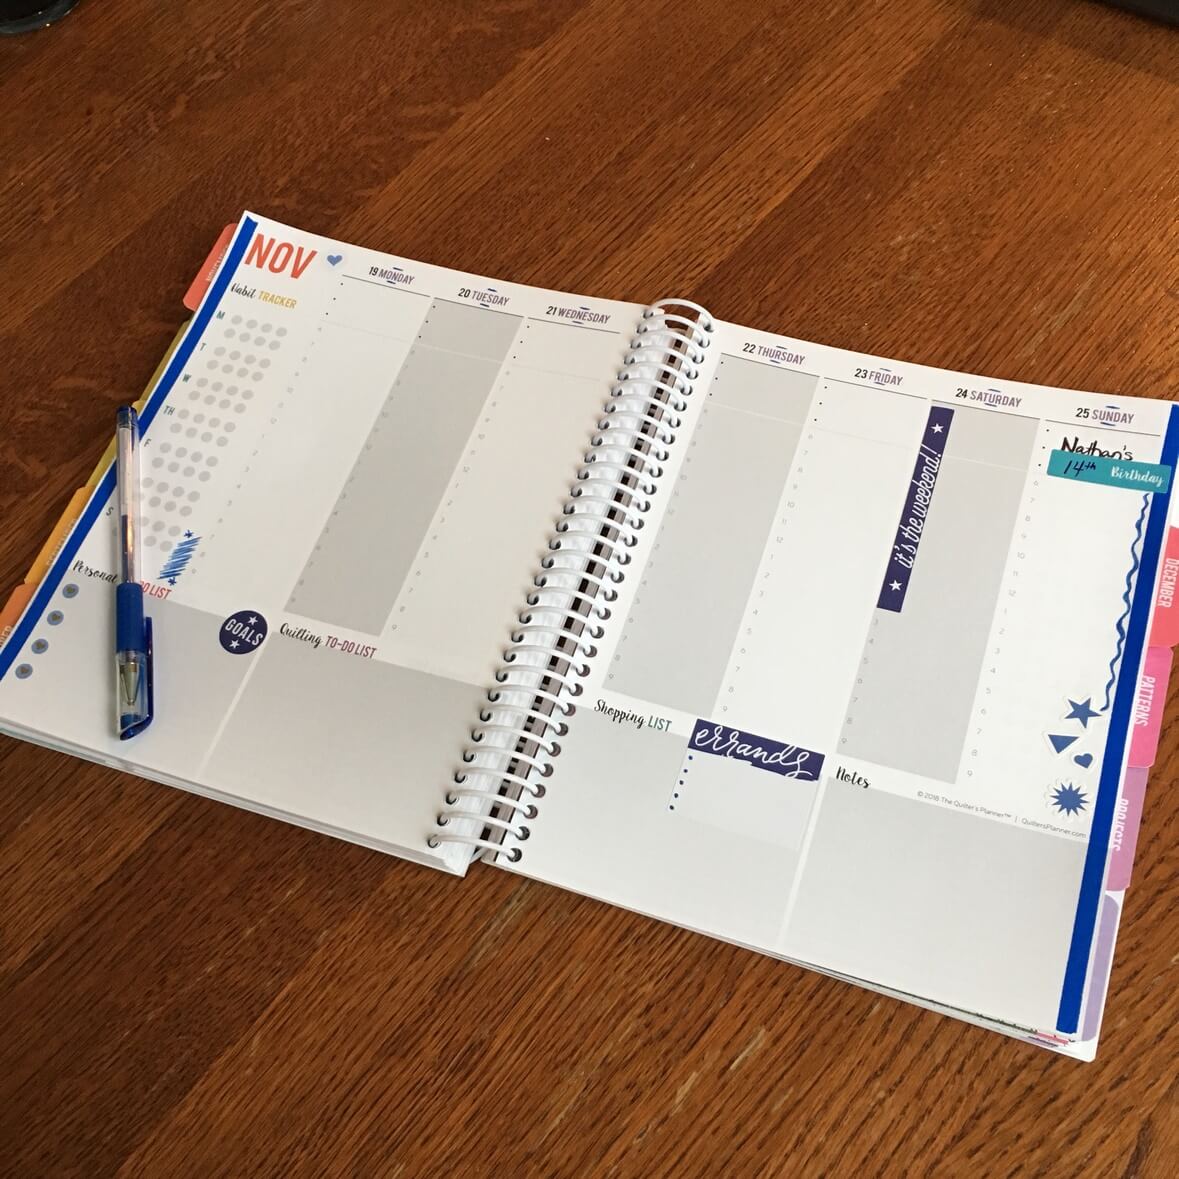
Last but certainly not least, I started adding in events and tasks to my weeks. There’s not much planned yet, but as I get closer to each week, it sure seems to fill up quickly! As a start, I put in all the birthdays of our family and close friends as well as some important holidays and big events that we have coming up. I have also ordered some colored mechanical pencils to use to fill in tasks and events for each week… besides yellow weeks. Yellow pencil is too light to be seen well!
Here’s a little video flipping through February and March. Usually, I spend a little time at the end of each month to plan for the next and fill in my goals, plans, and events. Obviously, it’s pretty blank at this point, but having the ‘structure’ of my color-coded weeks really helps me visualize my time so much better.
Let me know in the comments what sort of system (if any) you use to organize your calendars. Does color-coding make sense to you, or would it make things more confusing? Any bullet journalers out there? Or another amazing system that you couldn’t live without? I’d love to hear all about it!
Happy Sewing, ~L

I love the way you have made this planner yours and can really use it to it’s full advantage. It doesn’t surprise me that you organize by color, colors ‘make sense’ to you. I used to love watching you pick daily palettes on Periscope.
This may be a weird question…have you ever experienced synesthesia?
LikeLike
Thank you so much for sharing this!! What a fun and visually appealing system!!
LikeLike
I really like this visual system, so helpful (and colorful)!
LikeLike
Wow! This is so me! The color makes so much sense. I can “see” the way the weeks flow. All the sudden it makes the planner very useable. Thanks so much for sharing this idea!
LikeLiked by 1 person
This is a great system! As you said “pretty is better than perfect”. Couldn’t agree more.
LikeLiked by 1 person
Thanks for breaking this process down into smaller tasks. That makes it so much easier to start!
LikeLiked by 1 person