Uncategorized

Weekend Finishes

Happy Tuesday, friends! I hope you all had a good weekend and a productive start to your week.

I was able to knock two WIPs off my list this weekend, which felt great!

file_002

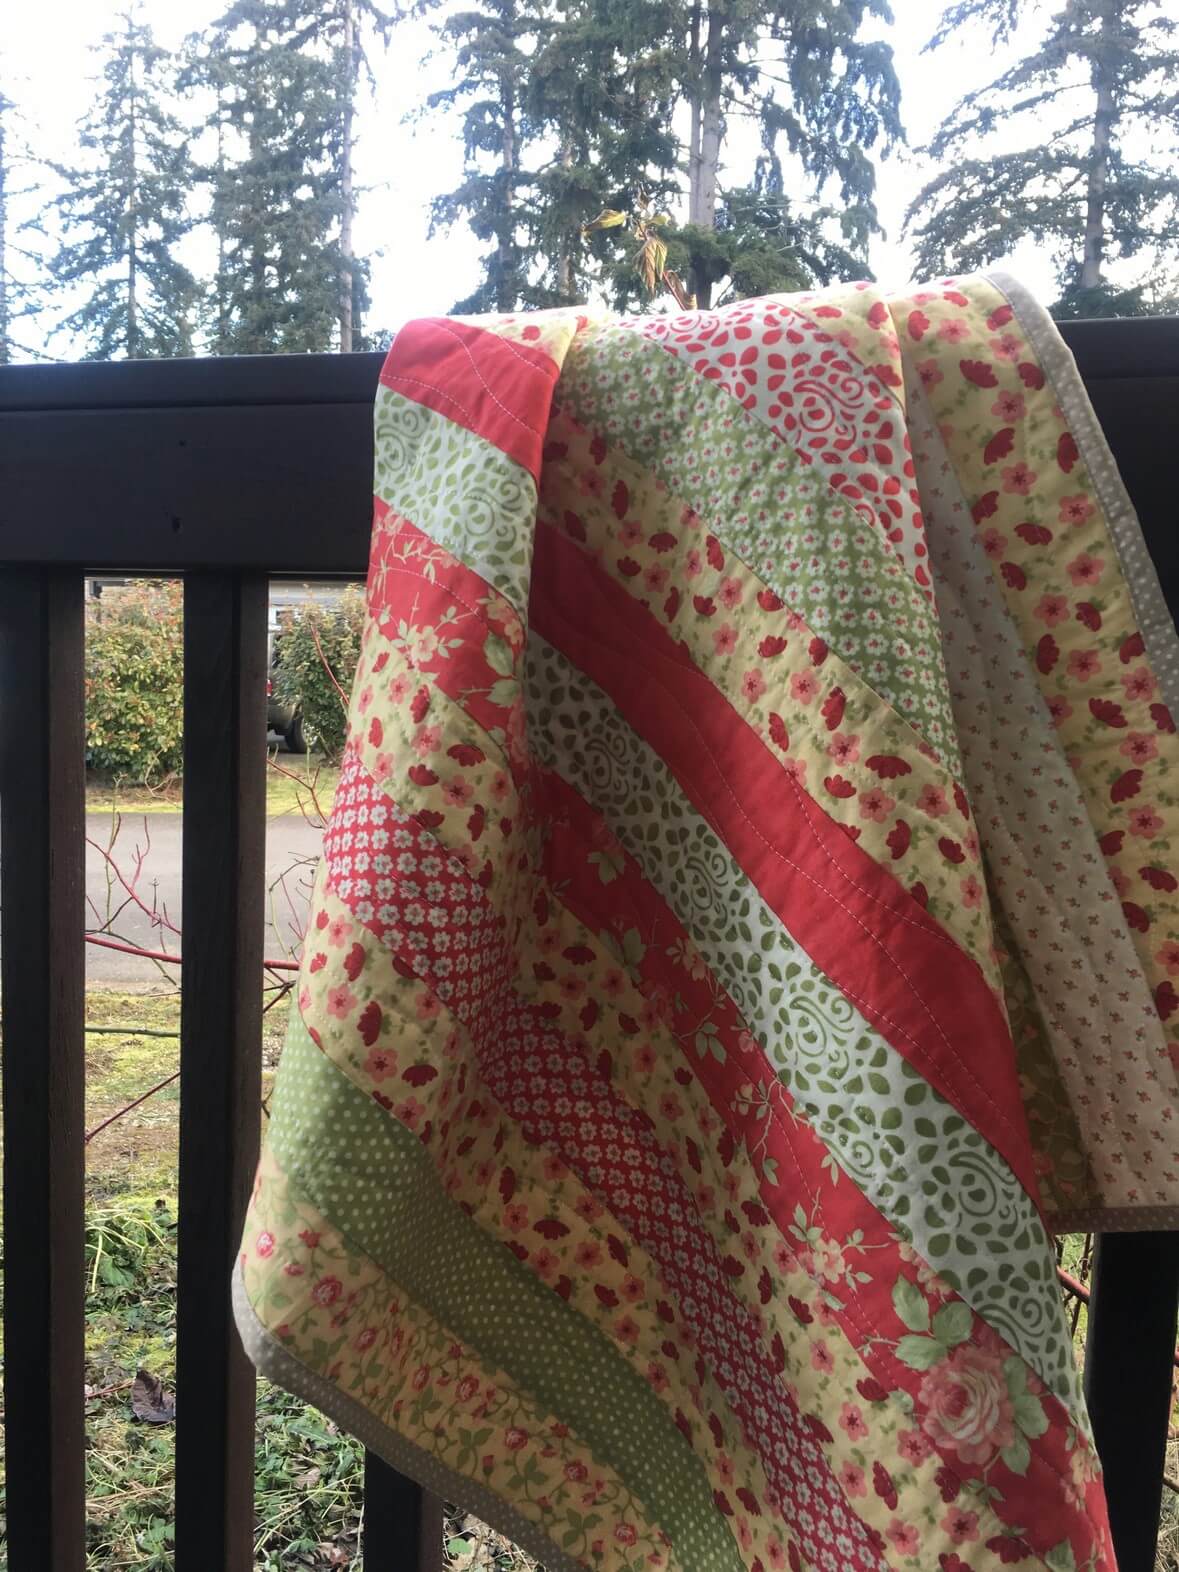
First off was this super simple jelly-roll baby quilt. I whipped up this top months ago for a friend and it’s been sitting on my shelf ever since. It was about time I quilted it up!

I recently purchased Christa Watson’s Craftsy class (non-affiliate link) and wanted to practice lesson one: wavy lines with a walking foot. I’ve quilted with a similar motif before on my AGF Denim Market quilt, but Christa shared some nice tips that really helped me out.

I found this quilting design really relaxing!

file_009

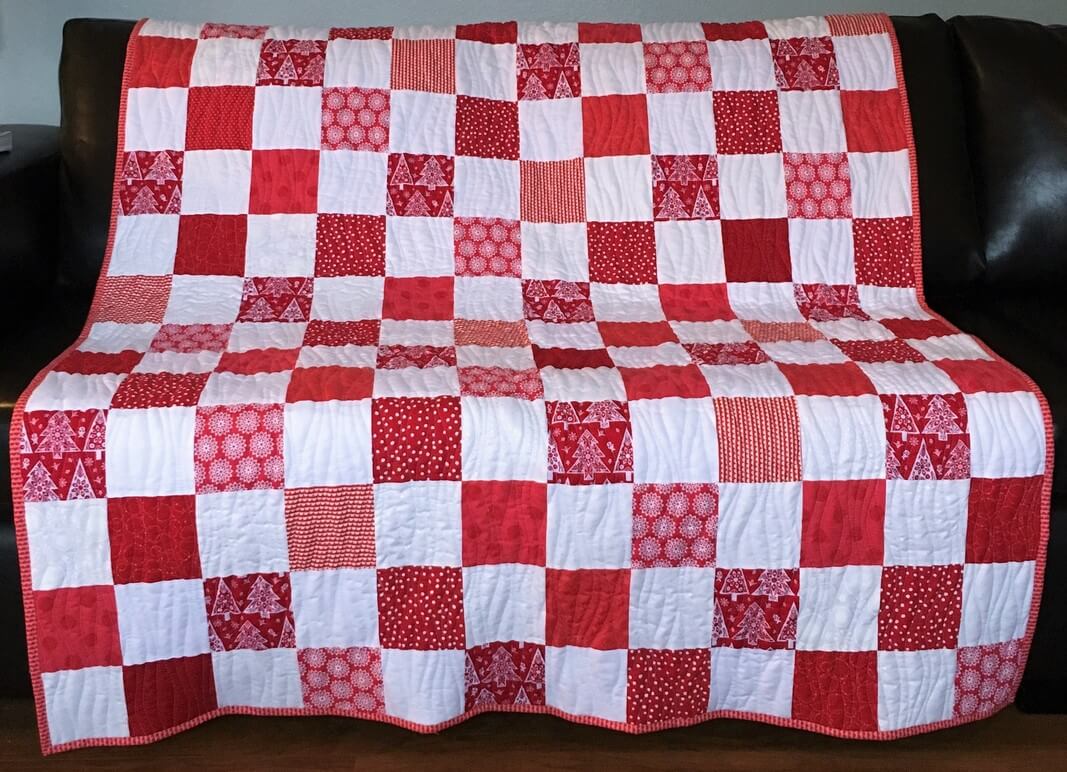
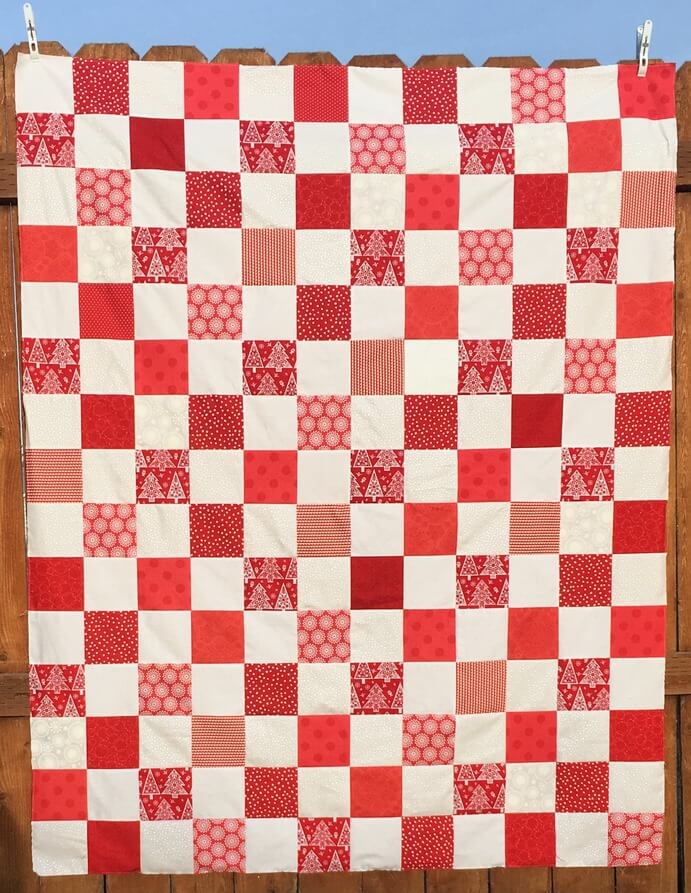
My second finish was my Christmas quilt. I first talked about it in December, and really wanted it done before Christmas, but there just wasn’t time for it.

file_003

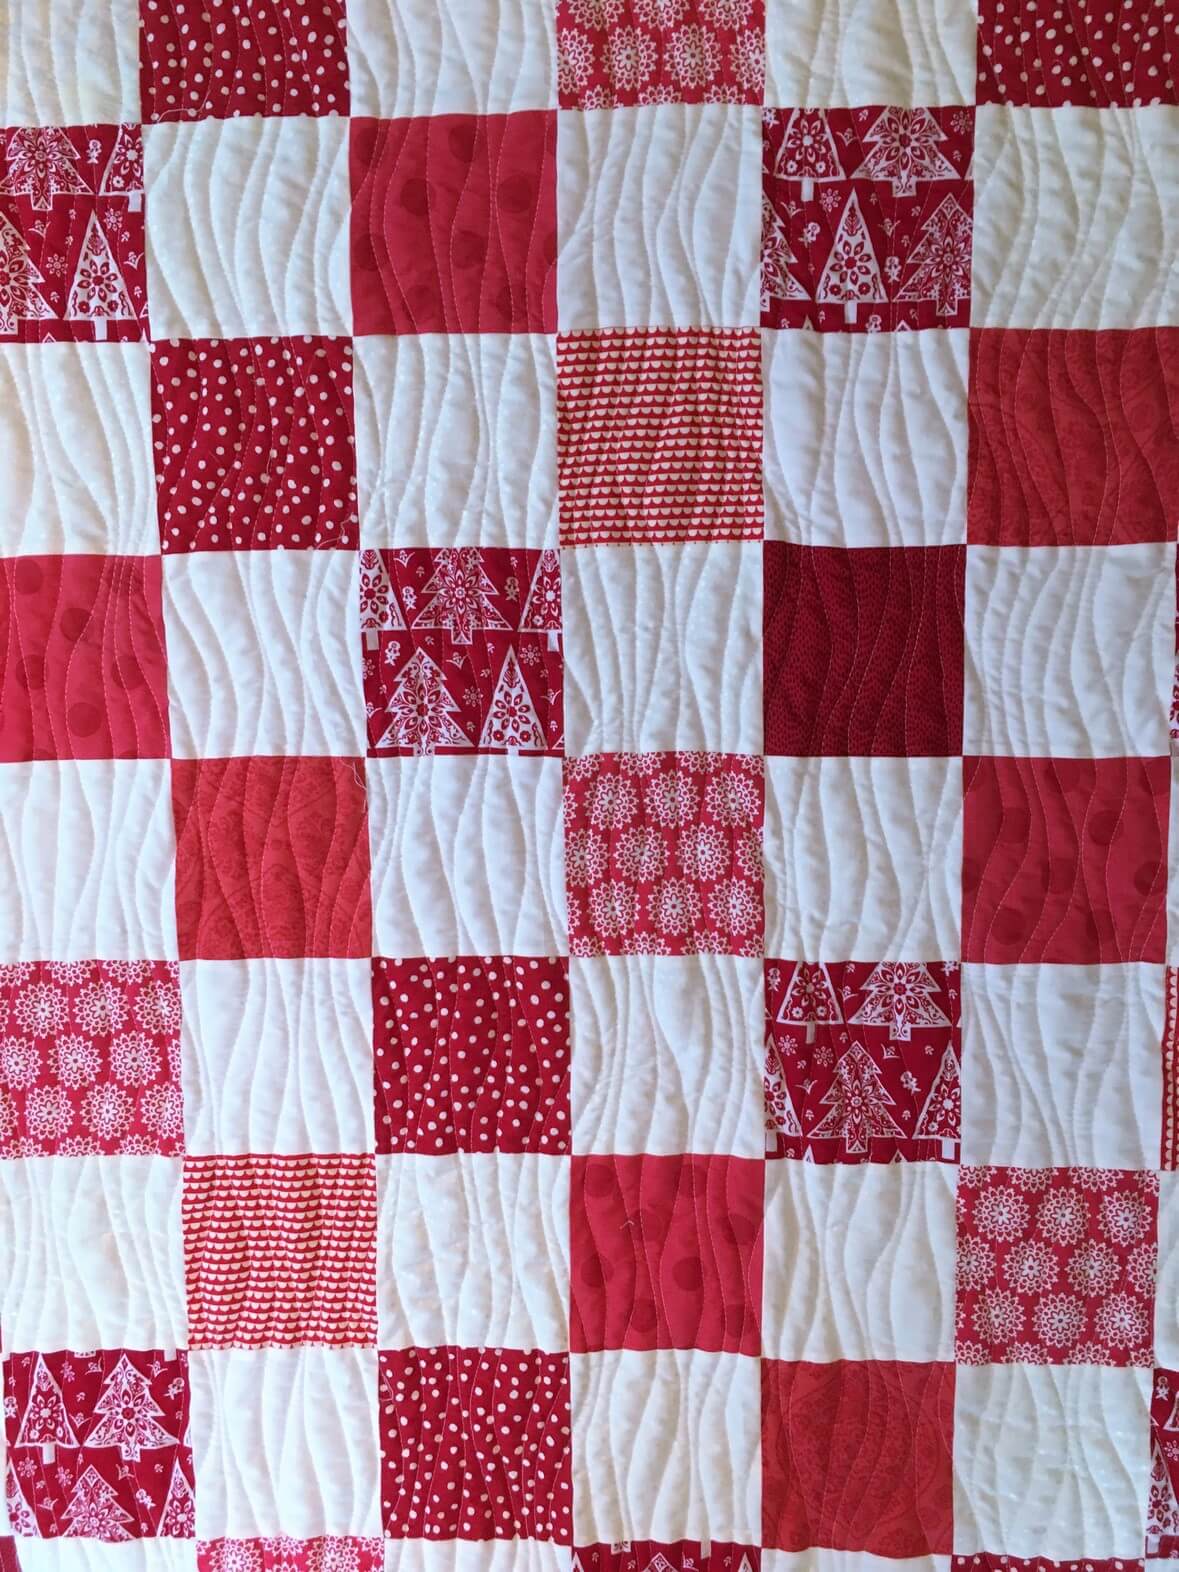
I used the same wavy line motif for this one, but the quilting is a little more dense and the batting a bit thicker. It really gives this quilt a different look than the baby quilt.

file_005

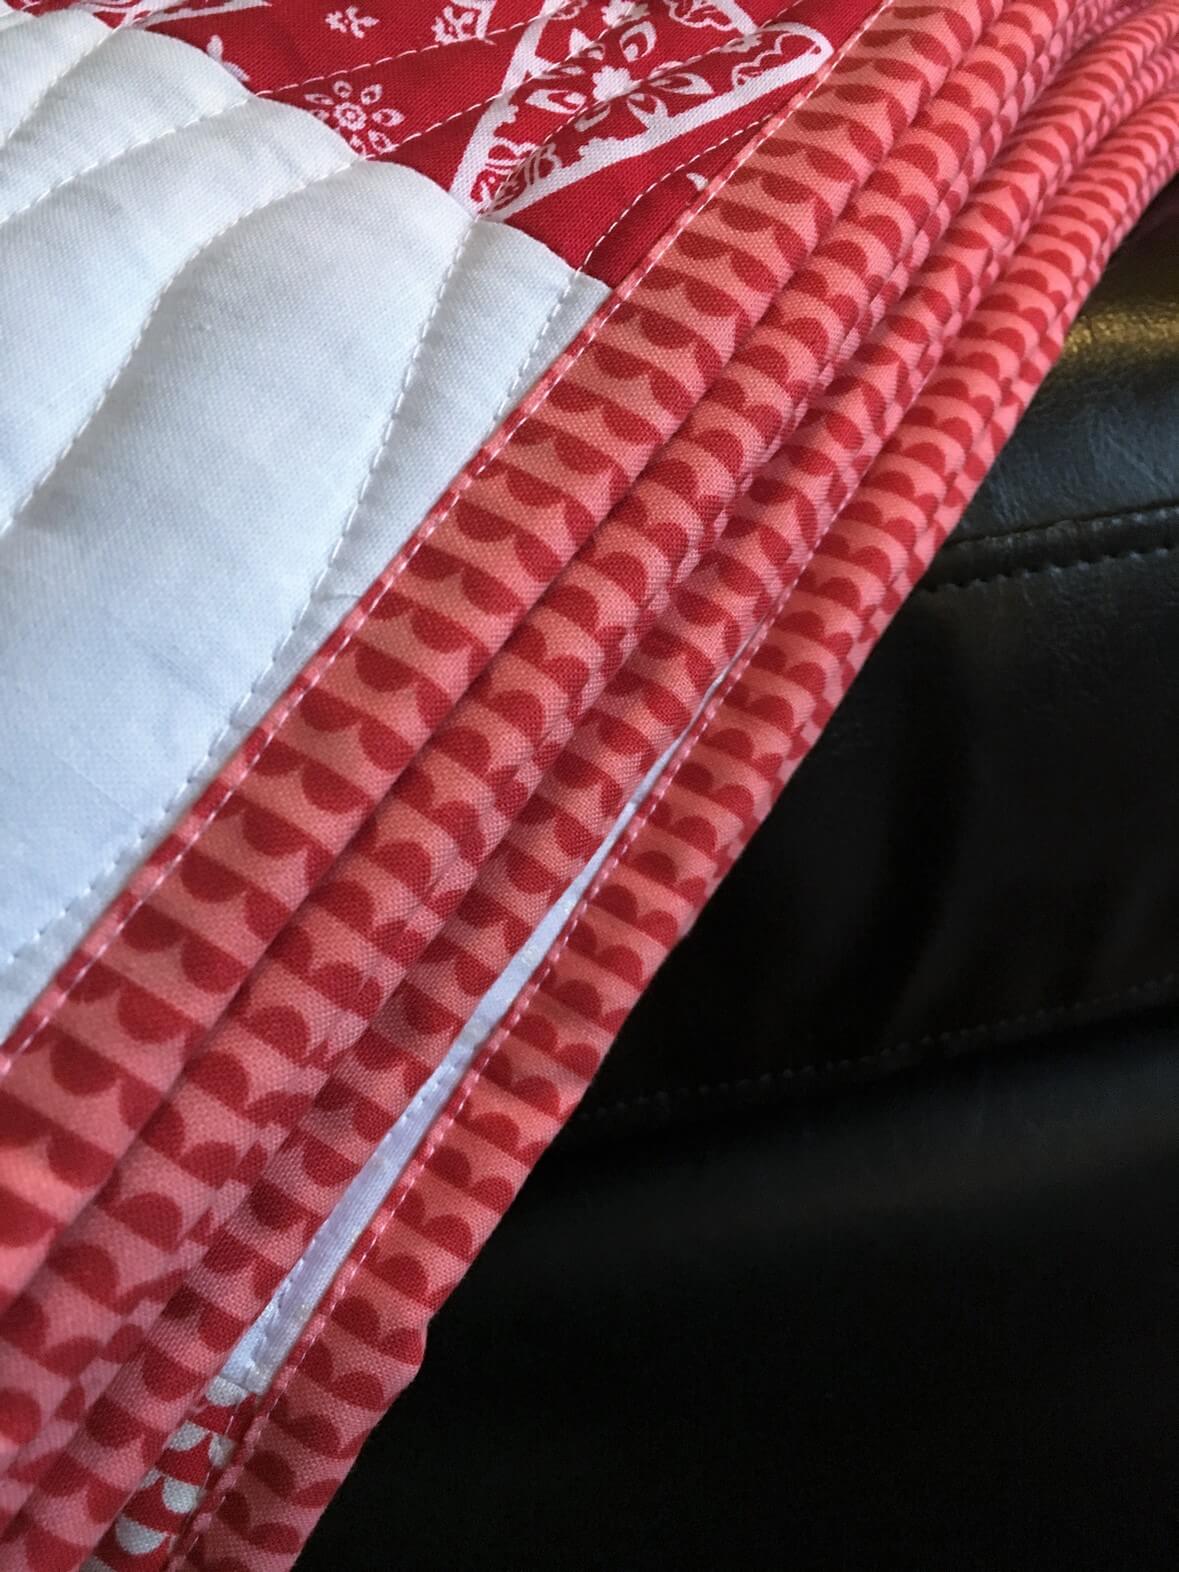
I used this adorable Bonnie and Camille scallop fabric for the binding. I love the tiny bit of contrast the coral/pink gives against the red and white of the quilt. file_001

file_008

I did machine binding for both of these quilts. I love hand binding, but I really have been wanting to practice my machine binding skills. I’m thinking that from now on I’ll probably machine bind quilts for kids and babies because of the amount of washing they get. And the fact that it goes so quickly is a really great bonus!

I hope you all have a fantastic week!

Happy Sewing! ~L


Color Play Friday: Airlie Gardens

Hi friends! I hope you all are well. There has been a whirlwind of sickness at my place… no fun at all. We’re hoping  to all feel better really soon!

Well let’s get to the fun, shall we?

If you’re new to Color Play Friday, welcome! This is my fun way of taking a little time each week to expand my color knowledge and fabric-selection skills. Often, a picture will take me completely out of my comfort zone and force me to combine fabrics in a new way.

 You can head over to my Color Play Friday page to see the rules and my palettes and bundles from previous weeks. You can also search #colorplayfriday on Instagram to see lots of palettes and bundles from the past! If you’d like to know more about participating in Color Play Friday, please feel free send me an email and I’ll let you in on all the details of how to join.

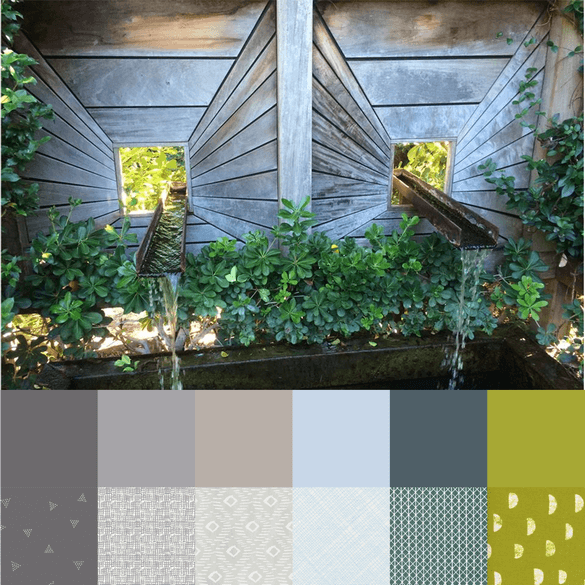
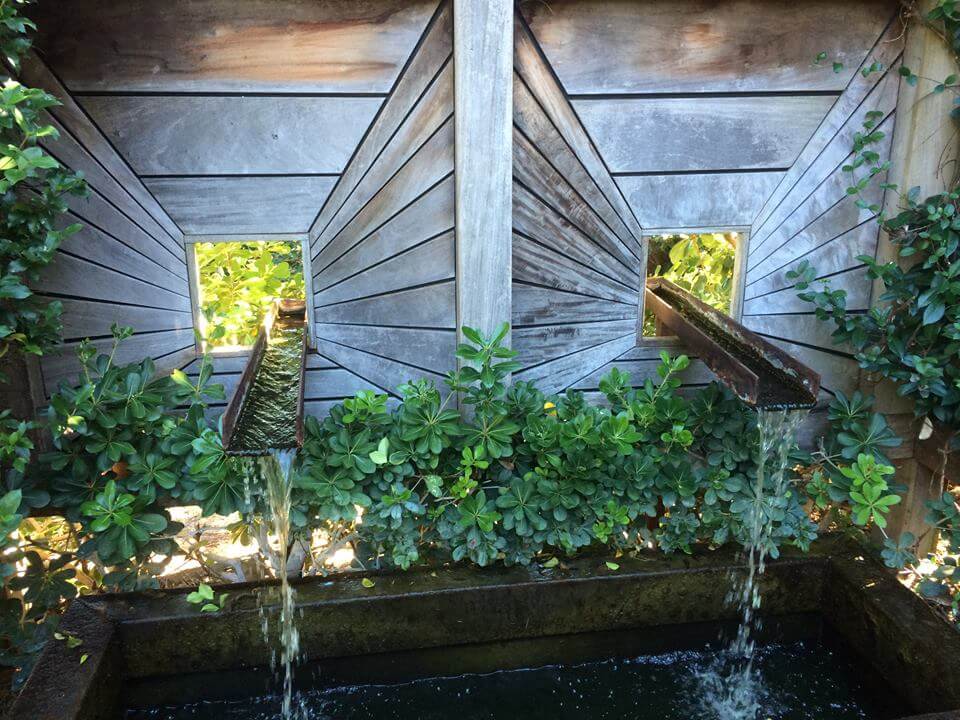
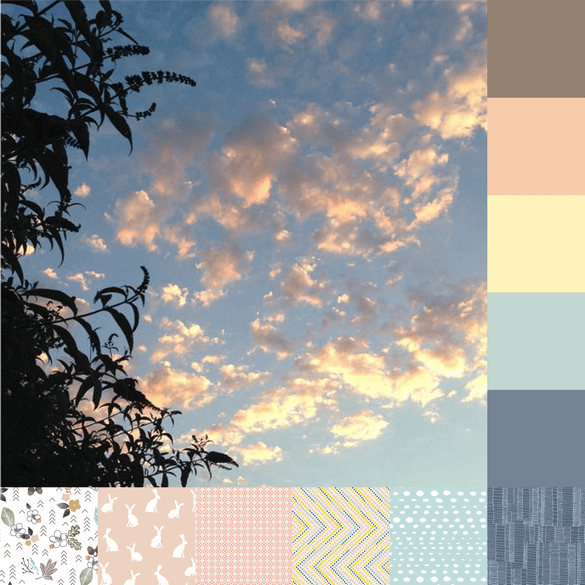
Here is our first photo from a Color Play participant, Airlie Gardens from Sarah at 123Quilt. Sarah is a beautiful photographer, and I love the perspective in this photo.

airlie-gardens-palette-and-bundle

Although there are so many gorgeous greens in this picture, the greys are what stood out to me most. Of course, I had to add that fun pop of lime green too!

Here are the fabrics I chose:

Dear Stella, City Life, Triangle Dot in Fossil

Dear Stella, Net in Grey

Isa Pearl Design, Blush and Blooms, Diamond Texture in Grey

Timeless Treasures, Hatch Basic in Ice

Cotton and Steel Basics, Netorious in Campout

Alexia Marcelle-Abegg, Print Shop, Moons in Grass


A note about scale:

  • While I believe scale is a very important part of fabric selection, the fabrics shown in my Color Play images are not always perfectly to scale. I do my best, by you should always double check scale before ordering!

Don’t forget to head over to 123Quilt and see what Sarah came up with!

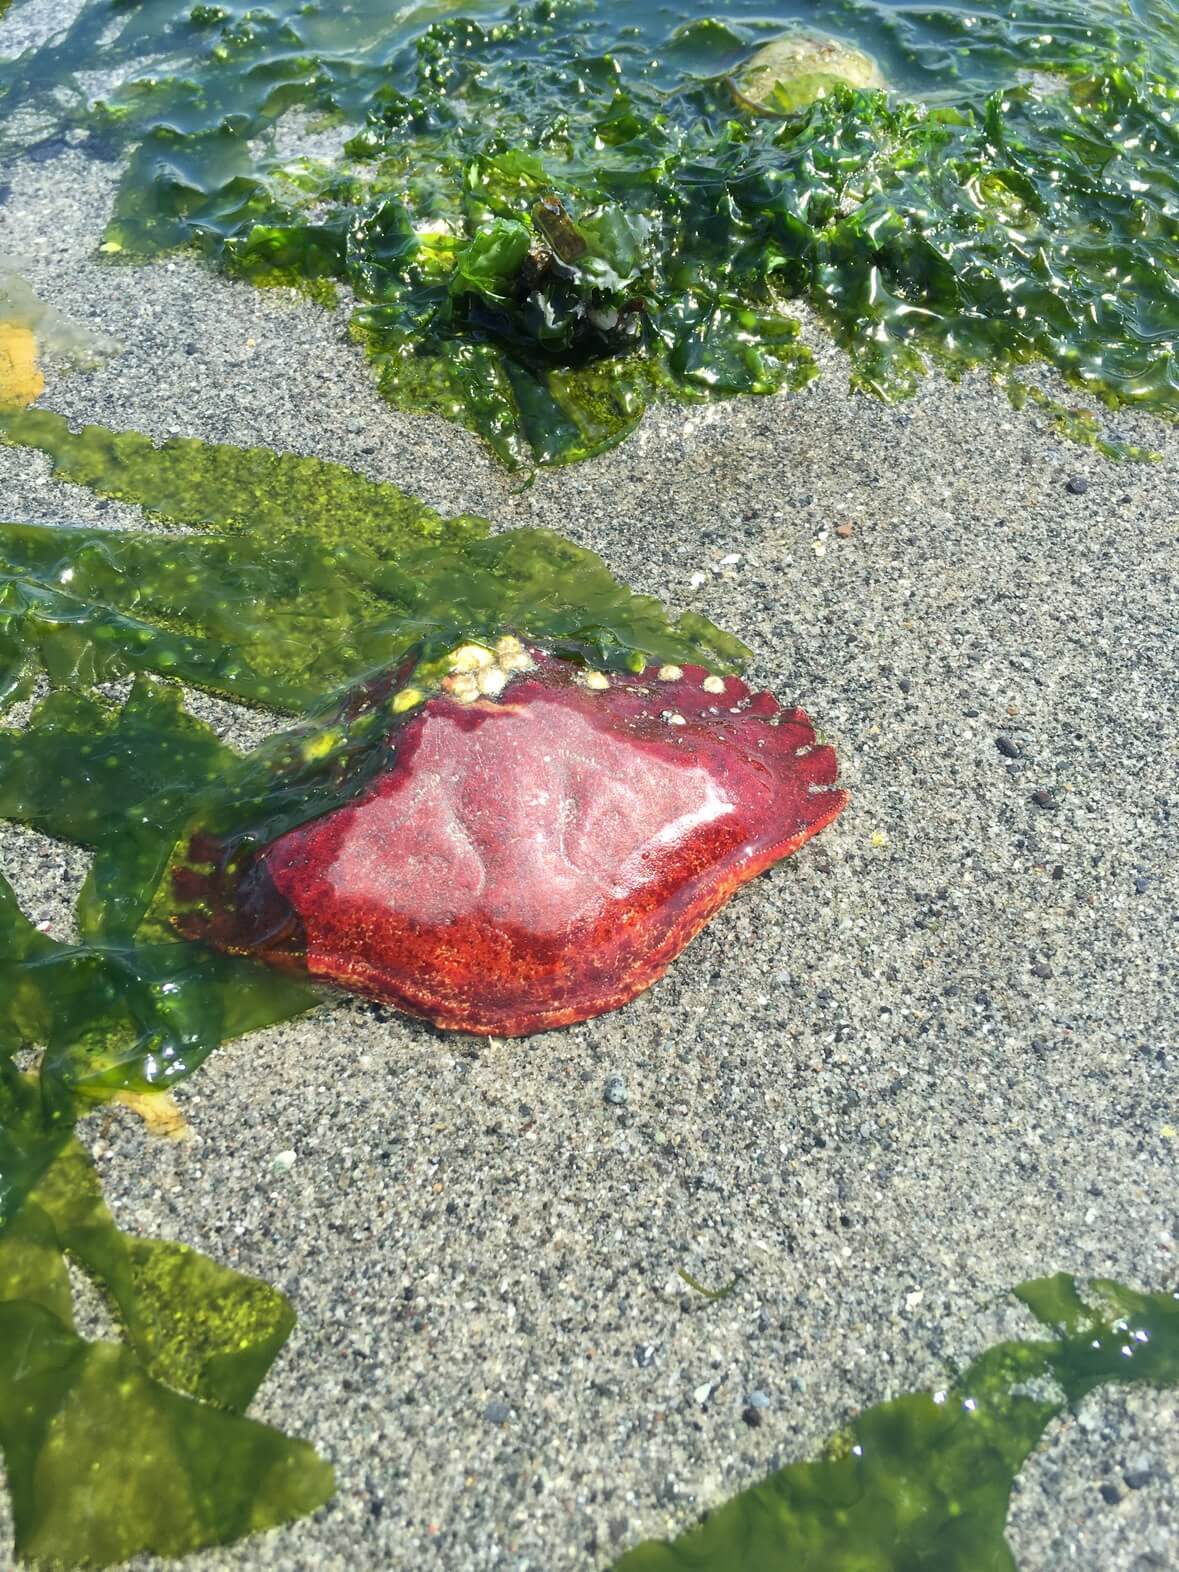
Next week’s photo is one of mine aptly titled Crab Shell:

crab shell.jpg

I hope you can join us next week!

Happy Sewing, ~L

Sunday Stash

Hi friends! As I mentioned on Tuesday, it’s pattern testing week for the Quilt Theory designers. I decided that to test my partner’s pattern, I would make a quilt for my youngest son. I’ve been promising him one for so long, and he’s been so patient waiting for it.

I got a lot of what I needed from my stash, but I was short on low volume prints and also needed some more blues and greens.

There were a few impulse purchases this week as well, and I needed to replenish my stock of Aurifil white, which is my go-to thread.

File_000 (3).jpg

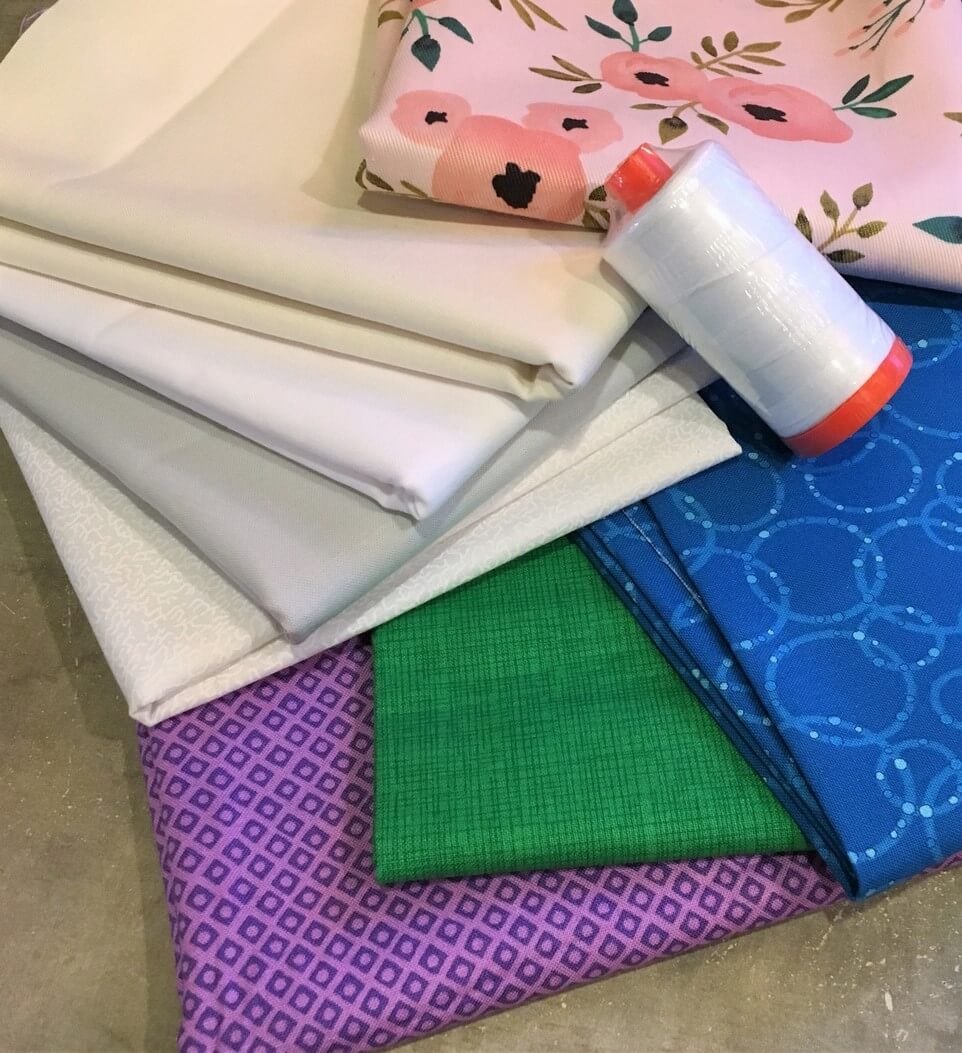
Here is what I got:

1 1/4 yards Purple Dot N’ Square from Michael Miller

FQ Timeless Treasures Crosshatch in Clover

FQ Suds in Blue Hawaiian from Patrick Lose

1/3 yard each of Kona White, Bone and Silver and some random box-store white-on-white

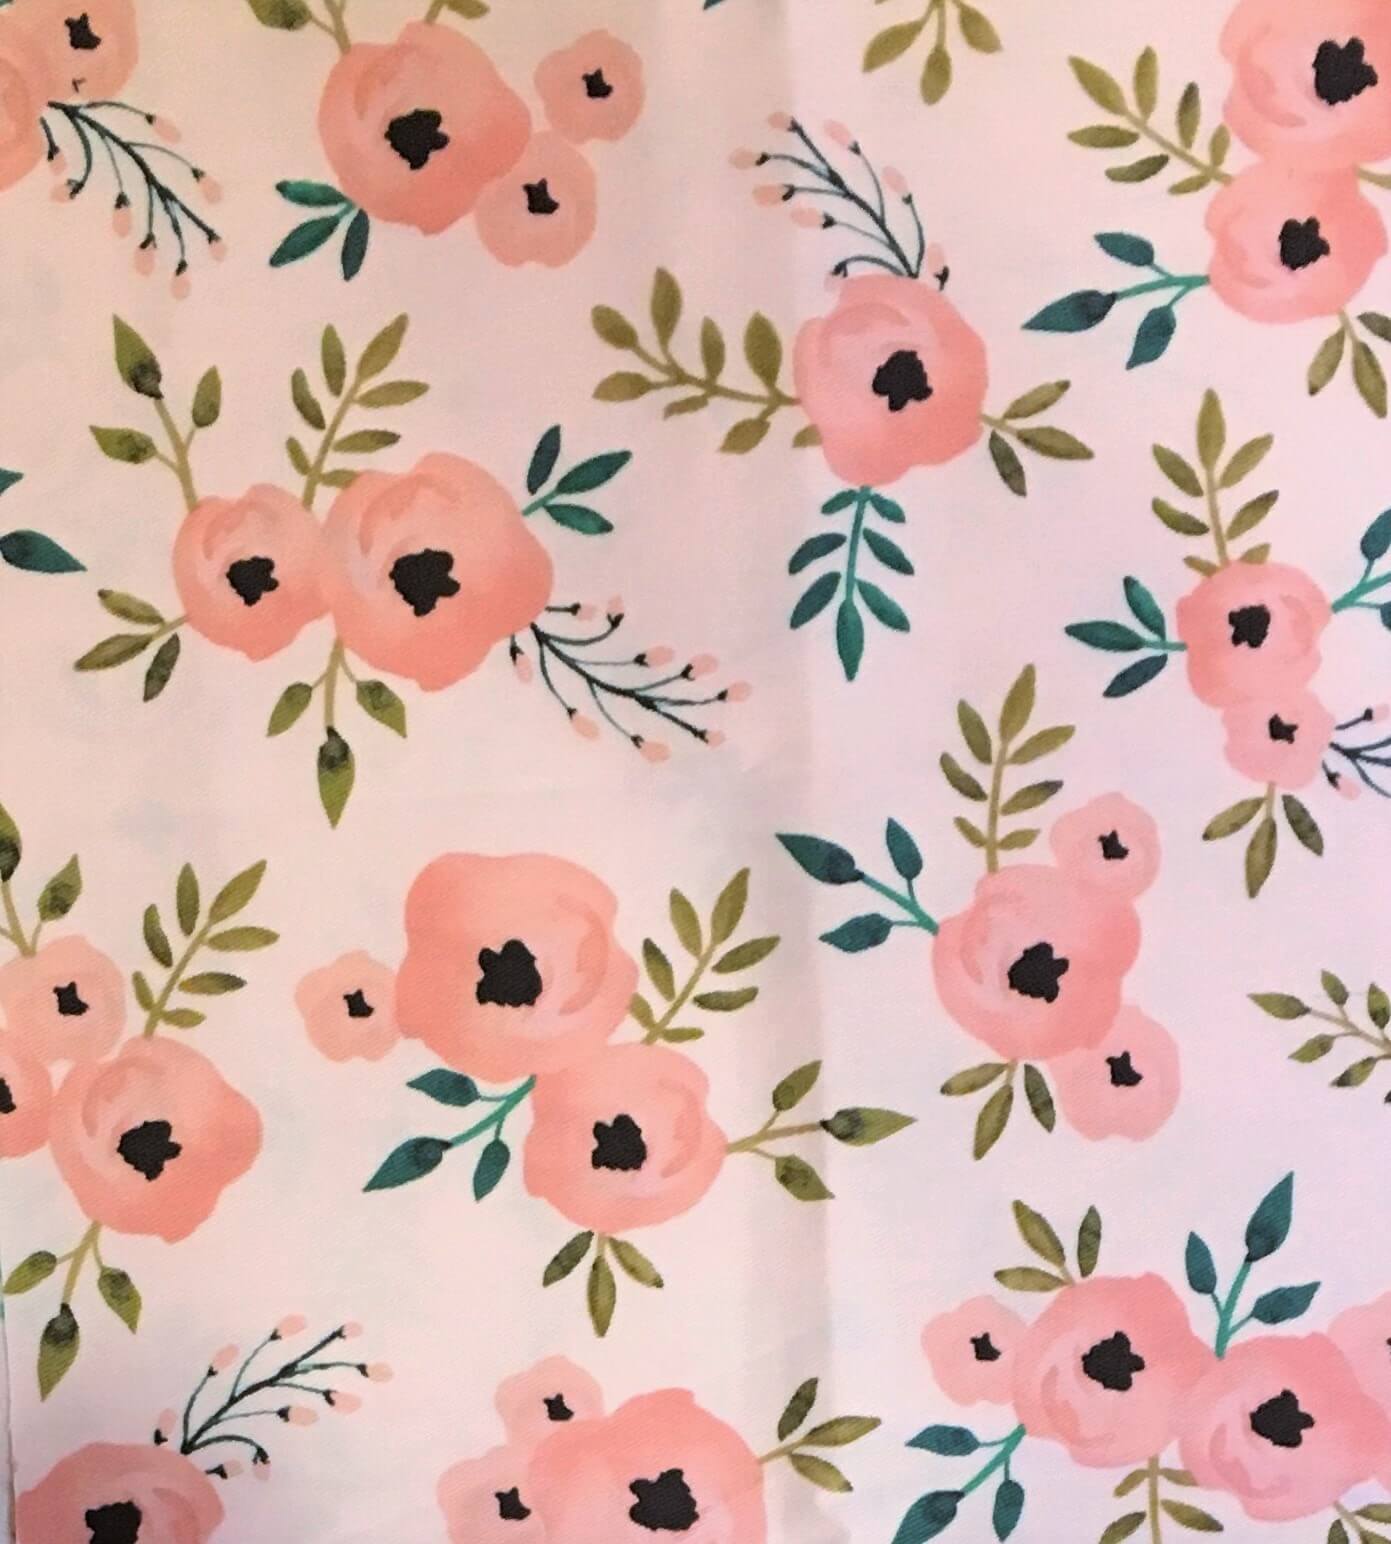
and 1/4 yard of gorgeous floral canvas from Brother and Sister Design Studio

The floral was a total impulse buy that I couldn’t just leave behind. I’ll be making a pencil/makeup pouch with this. Total selfish sewing!

file_002

Here’s a close-up of the floral fabric. Isn’t she lovely?!

Happy Sewing! ~L

molli_sparkles_sunday_stash_badge

Color Play Friday: Wildflower Garden

Welcome to the first Color Play Friday of the New Year!

If you’re new to Color Play Friday, welcome! This is my fun way of taking a little time each week to expand my color knowledge and fabric-selection skills. Often, a picture will take me completely out of my comfort zone and force me to combine fabrics in a new way.

 You can head over to my Color Play Friday page to see the rules and my palettes and bundles from previous weeks. You can also search #colorplayfriday on Instagram to see lots of palettes and bundles from the past! If you’d like to know more about participating in Color Play Friday, please feel free send me an email and I’ll let you in on all the details of how to join.

You’ll notice throughout January that all the pictures this month are related to gardens and summer. Obviously, the cold weather is getting the best of me… I’ve been dreaming of beach days!

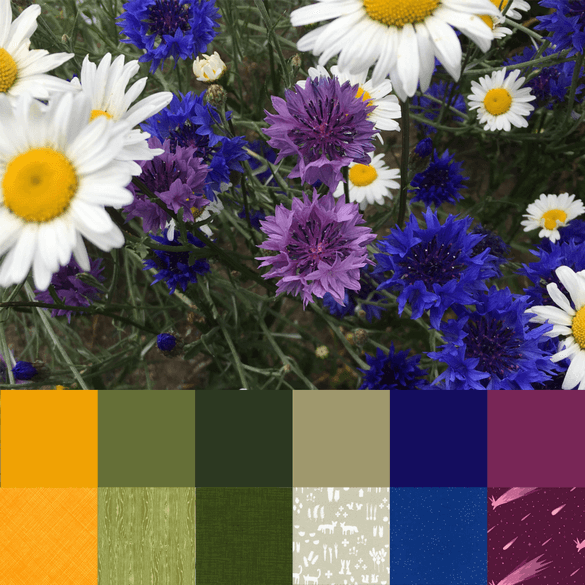
This photo was taken in my front yard and screams of warm weather to me… those bright colors make me happy!

Wildflower Garden Palette and Bundle.png

I chose this picture for it’s bright colors, so I really wanted to get some bright fabrics in this bundle, particularly the yellow and blue. And as soon as I saw that rabbit meteor fabric, I knew it had to be a part of this bundle.  My garden was mysteriously invaded by rabbits this year, so a fabric with rabbits falling from the sky seemed appropriate!

.

Here are the fabrics I chose:

Timeless Treasures, Hatch in Citrus

Joel Dewberry Aviary 2, Woodgrain in Dill

Timeless Treasures, Sketch in Pine

Alexia Marcelle-Abegg, Print Shop, This + That in Linen

Cotton and Steel Basics, Sprinkle in Peacock

Felice Regina, Luna Sol, Meteor Shower in Dusk


A note about scale:

  • While I believe scale is a very important part of fabric selection, the fabrics shown in my Color Play images are not always perfectly to scale. I do my best, by you should always double check scale before ordering!

Don’t forget to head over to the other blogs and see what they came up with!

Sarah from 123Quilt

Next weeks Photo is from Sarah at 123Quilt and is titled Airlie Gardens.

sarah-smith-123-quilt-airlie-gardens-wilmington-nc

I hope you can join us next week!

Happy Sewing, ~L

Leslie in the Sky With Diamonds

Happy New Year!

I hope you all had a wonderful holiday season. As you may have noticed, things were pretty quiet here on the blog. I took full advantage of winter break: slept late, baked, and went on adventures with my family.

But now the kids are back in school, and I’m ready to hit the ground running!

First off, it’s pattern testing week for Quilt Theory’s second collection! I’m having a fun time reviewing and working on my assigned pattern. If you follow my on Instagram, you should see some sneak peeks over the next couple of days. I can’t wait for you guys to see these patterns- they are awesome!

I’m also so excited for the return of Color Play Friday this week!  We took all of December off, and it was just enough time for me to really miss picking all those beautiful bundles. In order to focus more on her other work, Trina has decided to step down as co-hostess, but will be joining us from time to time as a participant. And one more CPF change: because having ALL the pictures taken by me would be boring, our Color Play participants will also be submitting photos for us to use!  We have two this month from Sarah at 123Quilt, and they are gorgeous!

Aside from all that, I transfered my list of WIPs and upcoming projects into my 2017 Quilter’s Planner, and I am not comfortable with how long it is!  I need to get some things finished up!

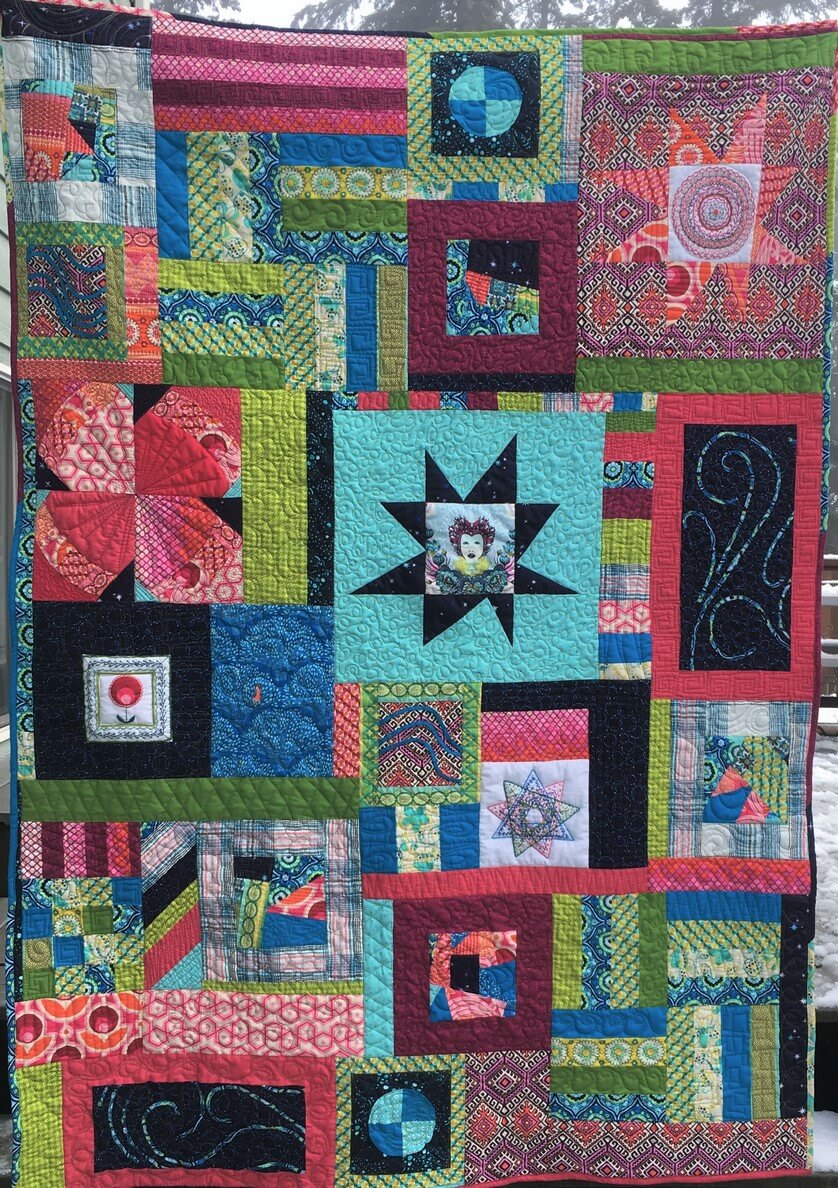
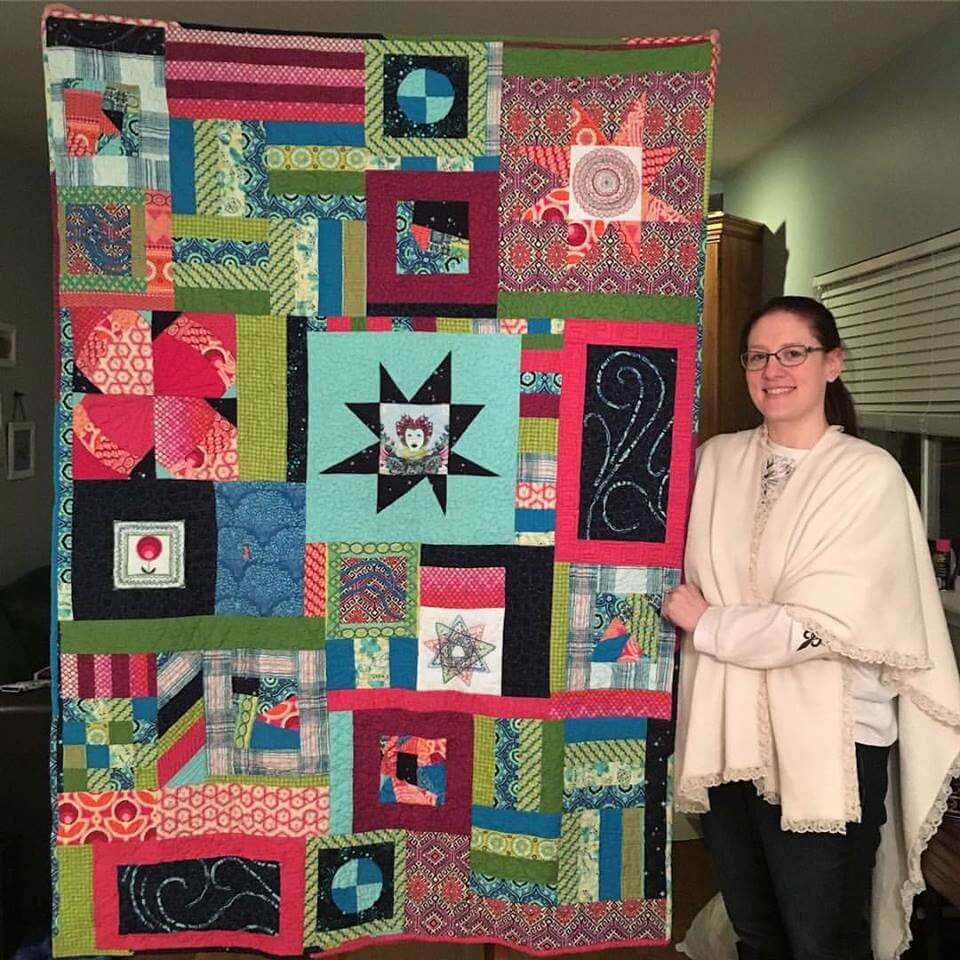
Speaking of finishes! Today I want to share with you some details on my latest finish, a scrappy improv quilt called Leslie in the Sky With Diamonds. It was a Christmas gift for my sister (Leslie) that I started over a year ago.

File_002 (2).jpg

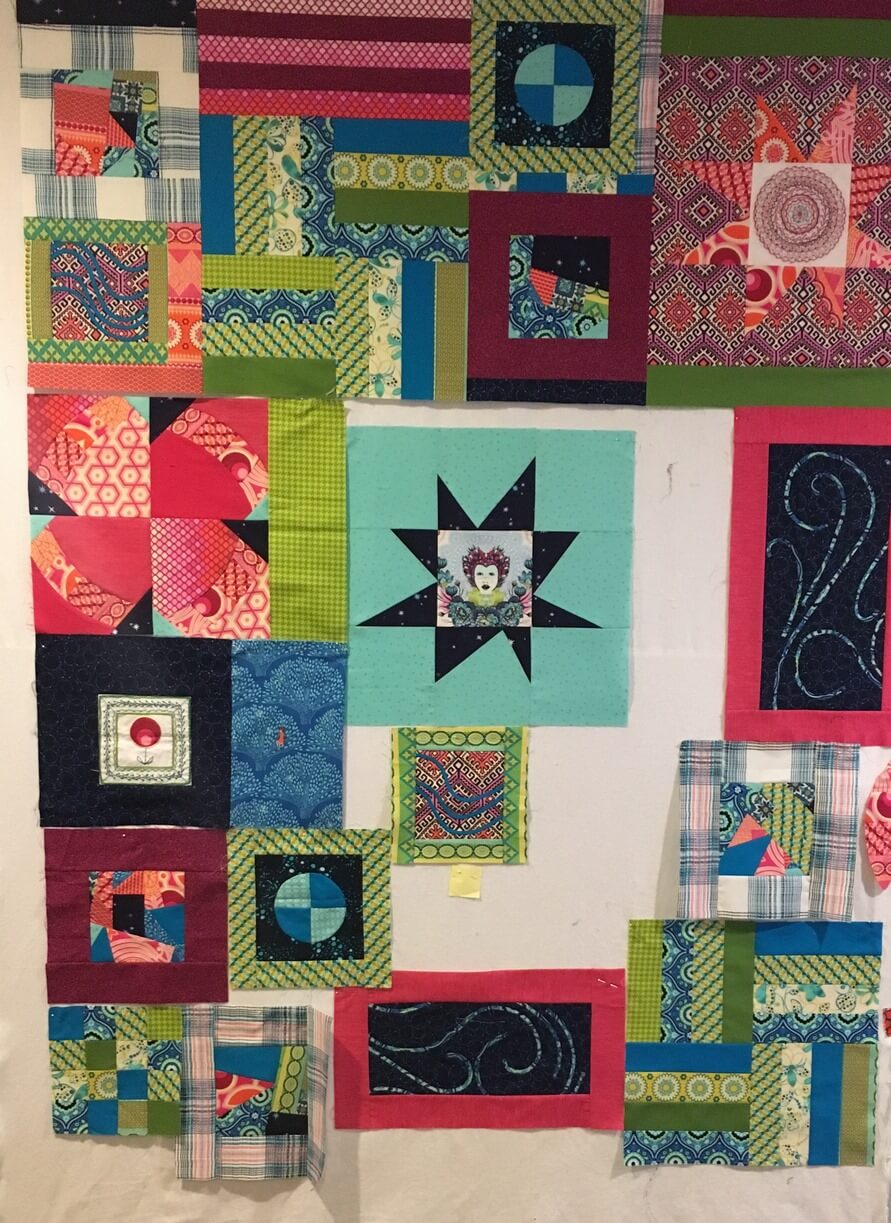
The inspiration for this quilt was always about the process. My sister is the kind of person who makes art for the sake of the MAKING, not the end product. I used that example by sewing and embroidering bits and pieces of this over the course of a year or more, with a mad frenzy of creation right at the very end.  If you look carefully at my Instagram feed, you’ll see parts of this quilt coming together slowly over time. Because I made it as I went, it is completely improv. Once I had most of the blocks I wanted, I put them up on my design wall and started filling in the blank spots.

file_000-6

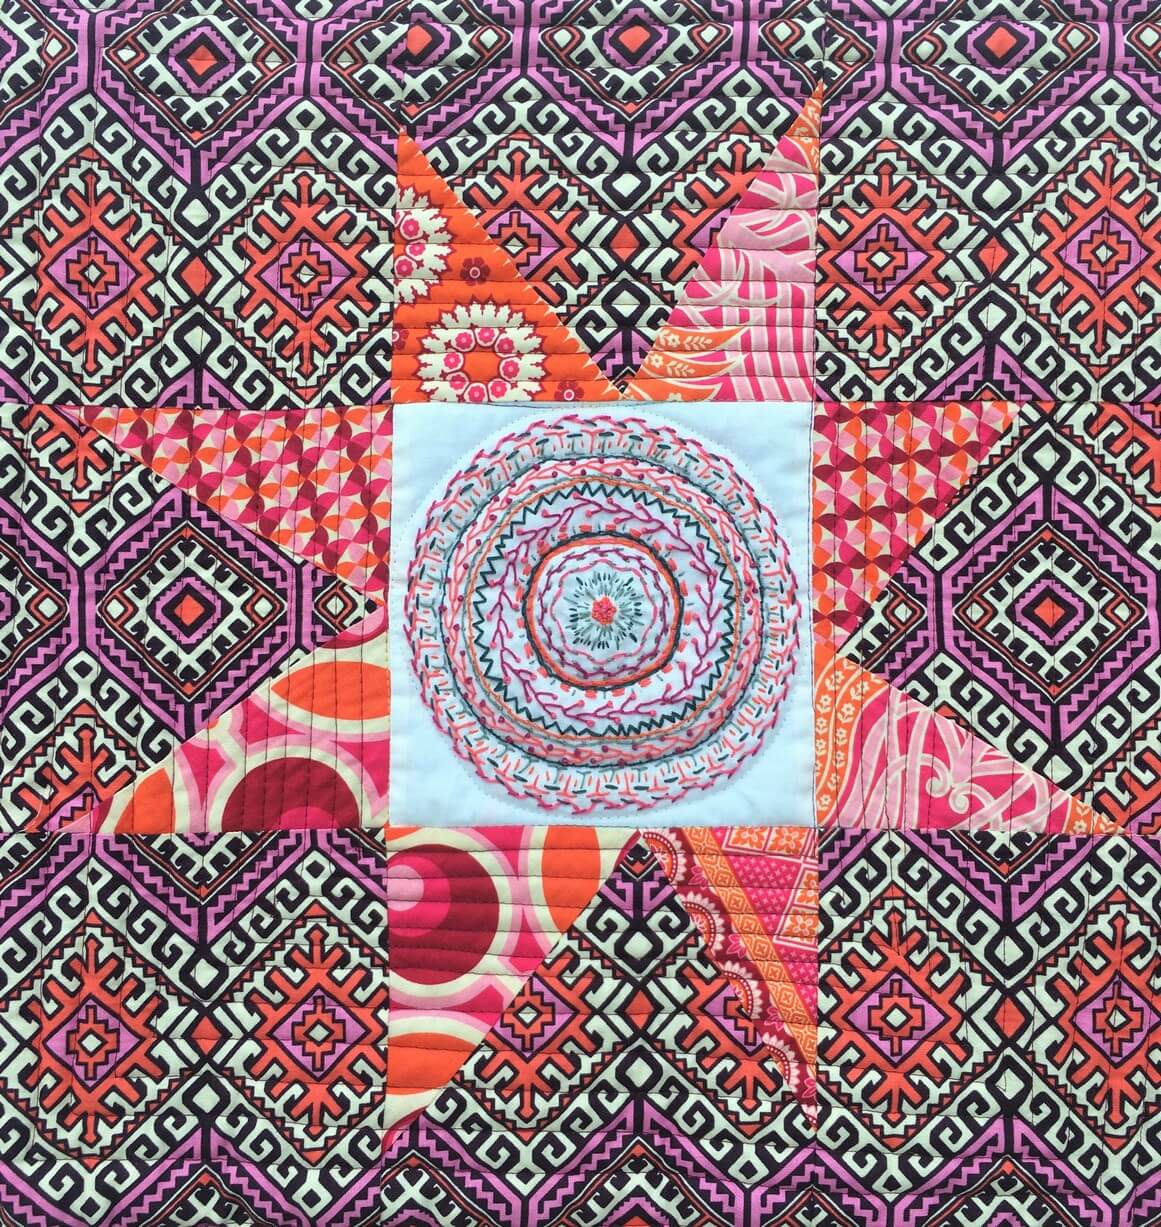
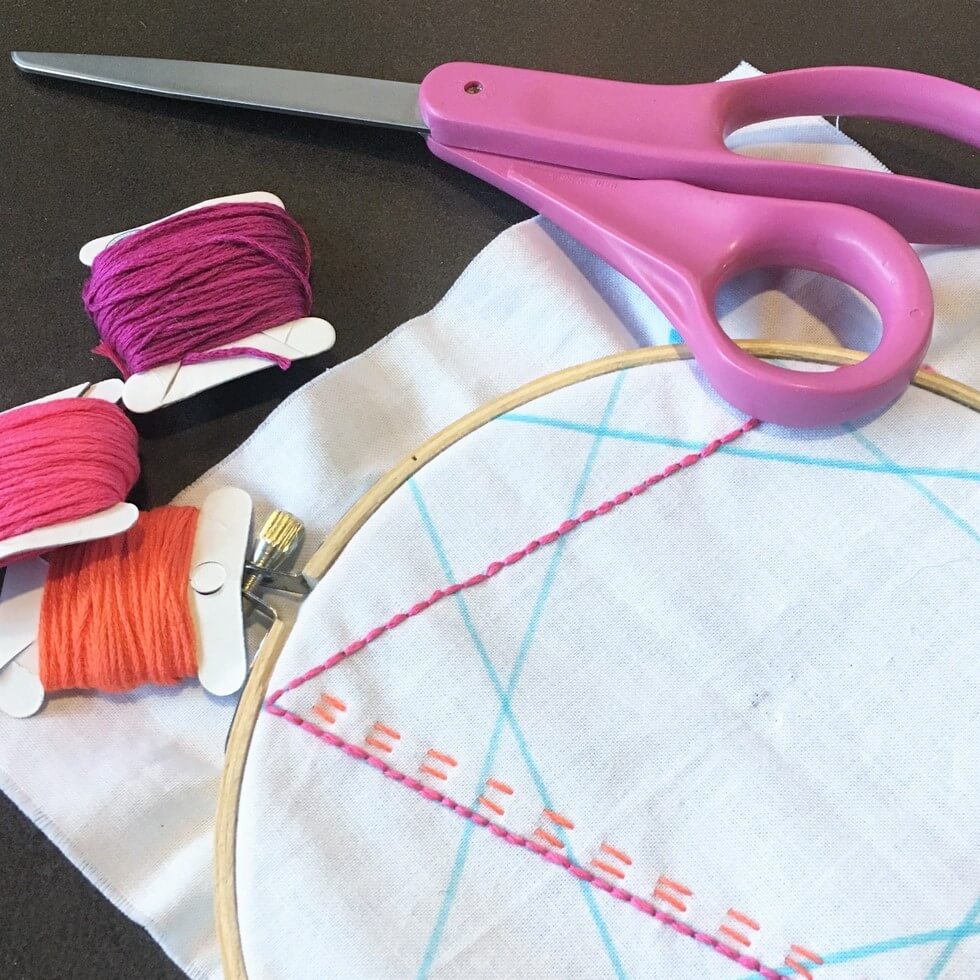
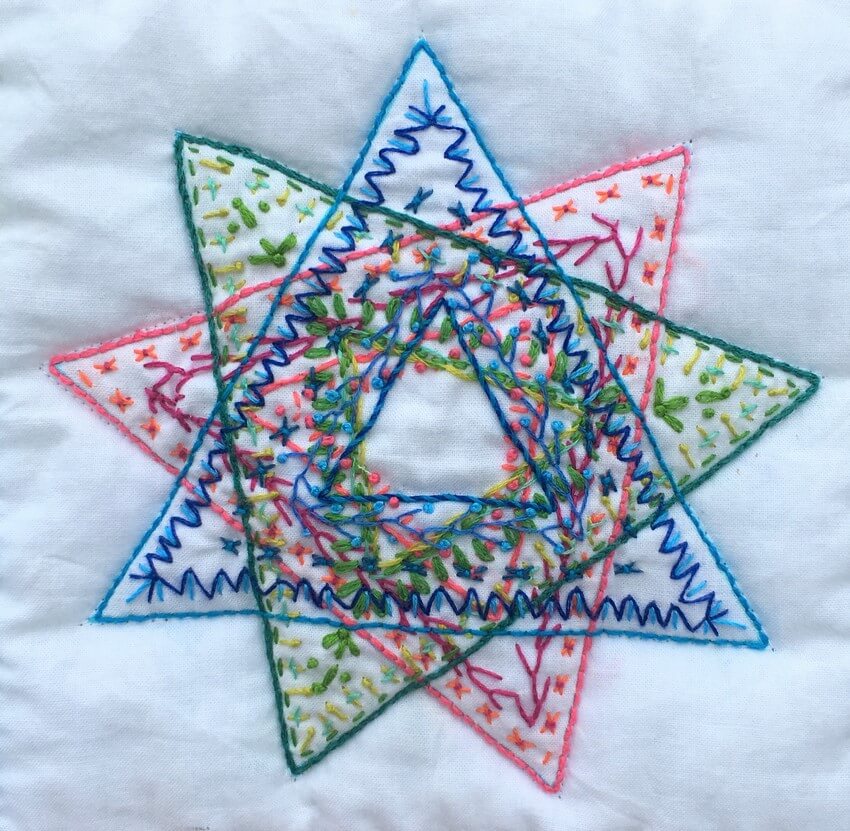
When I was a teenager, Leslie took an embroidery class. She would come home from class each week, come into my room, and teach me the stitches she had learned. So of course, I had to have embroidery on her quilt!

The name of this quilt comes, of course, from the Beatles song. When she was very young, Leslie thought the song was about her, and we always put her name in there.  Heck, I STILL sing the lyrics “Leslie in the sky with diamonds.” In keeping with that theme, I incorporated lots of night skies and stars in this quilt.

File_008.jpg

Now, it wasn’t all peaches and lollipops for me! As I was finishing up the quilting on this, I just wasn’t thrilled with the look of my free motion quilting. That happens, I suppose, when you’re inches away from it instead of looking at the whole quilt. I actually had to step away and take a nap and convince myself that I don’t actually suck at sewing. Sometimes you need a break. Sometimes you need to tell that critical voice in your head to shut up. That day, I needed both, but I got over the slump and got it done!

15741283_10154879622802156_7161040787570146311_n.jpgBusy quilts are not my normal style, but I got the best compliment I could get when she said that she felt like I really captured who and what she is in this quilt. I hope she has many happy nights snuggled under it!

So what have you all been working on now that the holiday season is over?  I’d love to hear from you in the comments!

Happy sewing, ~L

Here are some of the link-ups I’m joining this week:
     cooking-up-quilts-main-crush-monday     sew-fresh-quilts-ets-bee-social     my-quilt-infatuation-needle-and-thread-thursday     confessions-of-a-fabric-addict-can-i-get-a-whoop-whoop

Christmas Sewing

Hi Friends!

Tis the season for staying cozy in the studio sewing with fun, holiday fabrics! Now, if I were smart, I’d get a head start and do my Christmas sewing in late summer or fall when the kids go back to school. But I really do enjoy sewing with the season, so my projects will just have to have short turn-around times!

I thought I’d share with your today a little of what I’ve been doing lately.

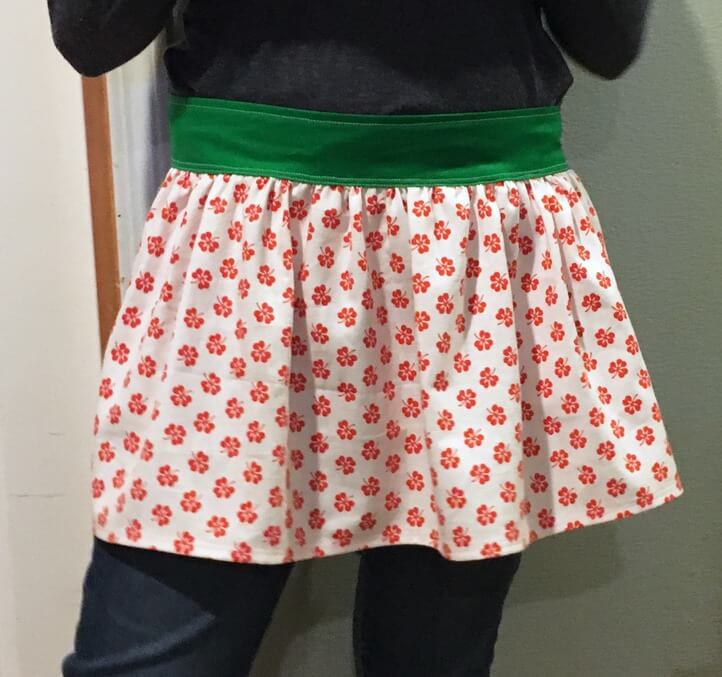
First up was a little half-apron for my daughter. She is 14 and an aspiring chef. She jokingly calls herself a 1950’s housewife and says she was born in the wrong era. That is, until you remind her there were no iPhones in the 50’s! file_001

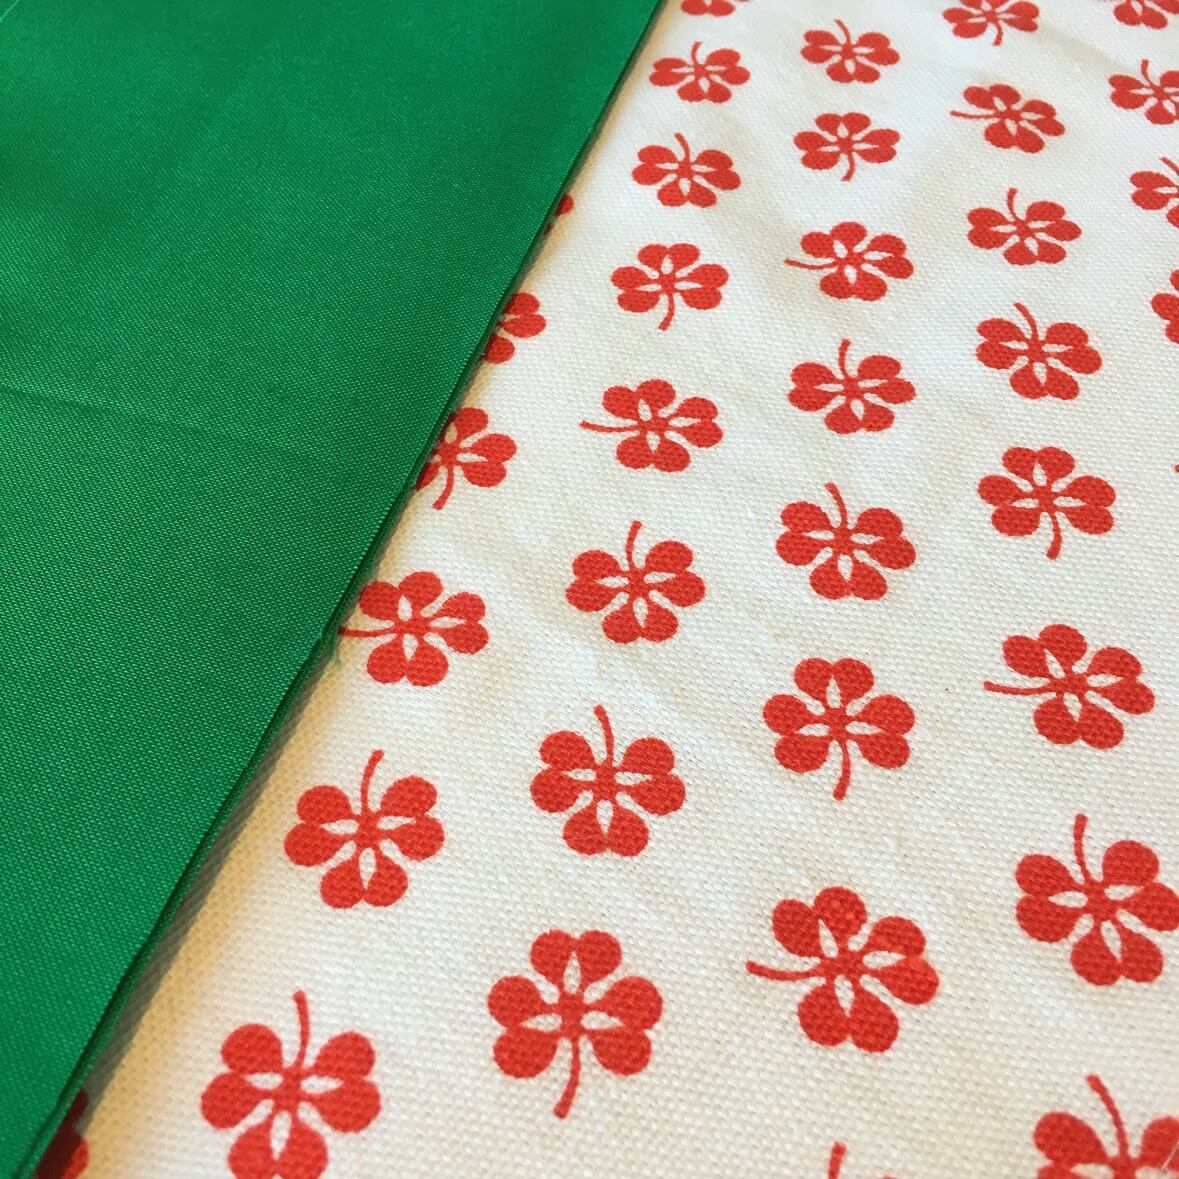
I wanted to make her a little 50’s-inspired apron at the beginning of the Christmas season. It just makes holiday baking more fun. In my stash, I have a small bin for anything that’s not quilting cotton. In there, I was lucky enough to find this little vintage red and white clover canvas that I bought at a garage sale years ago.  And there was just enough to make a short half-apron! Add in some green Kona Cotton, and you’ve got yourself a project!

file_000

Making this was quite simple. First I made a wide tube with the Kona and turned it inside out to create the waistband/ ties. I made the ties fairly long in order to be able to have a nice, big bow on the back of the apron.

I hemmed the bottom and sides of the canvas and then gathered the top before stitching it to the waistband.

To gather fabric, first sew a line of stitches where you want your ruffle using your longest stitch length, leaving at least 6 inches of thread on each end. Next, tie the threads on one end into a knot. Separate the threads on the other end and gently pull just one thread out while holding the fabric to begin gathering it toward the knotted side. The trick here is to not break your thread- be gentle.

Once your fabric is ruffled up to the length you need, tie the threads on that end of the fabric into a knot and even out your gathers.

After completing the apron, something just wasn’t sitting right with me design-wise…. it needed more. And I decided that the ‘more’ needed to be a cute little green pocket. I’m so glad I added it… it really upped the ‘cute’ factor.

file_002

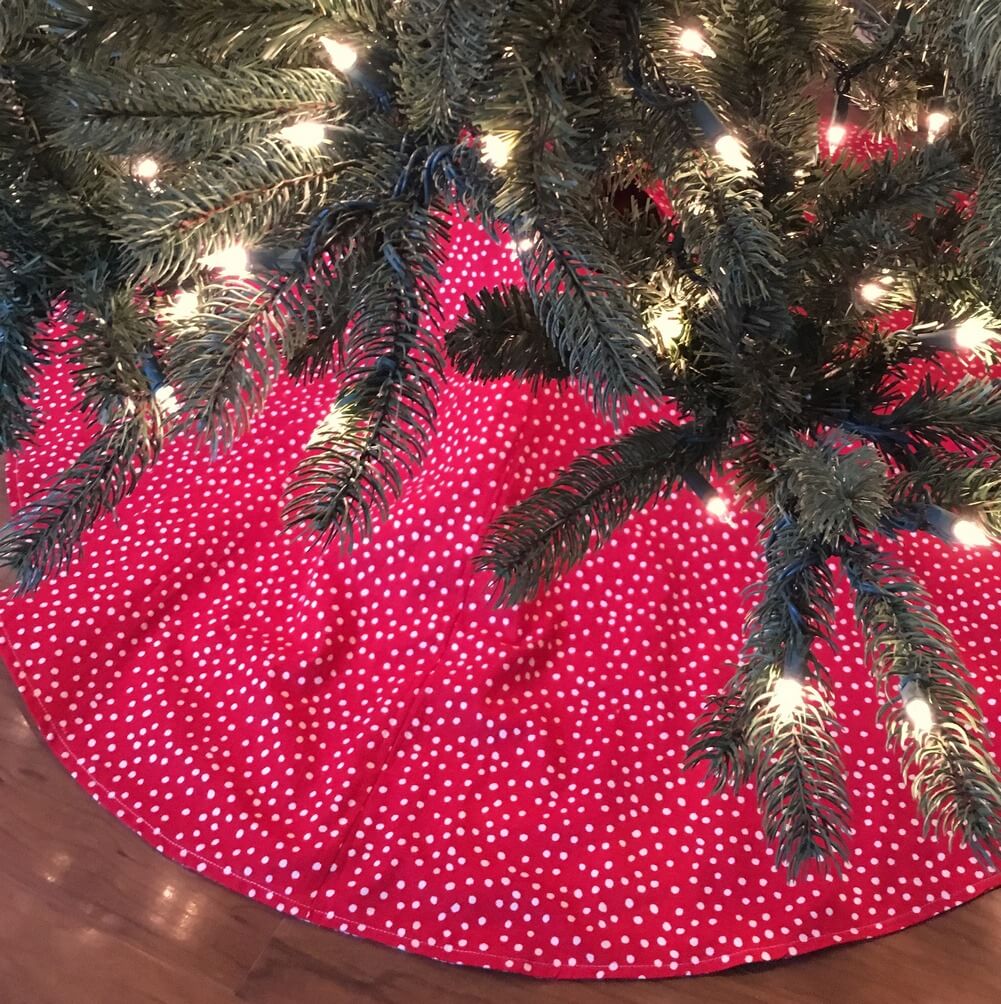
Next up was a new tree skirt. I used a simple circle skirt design. In order to have it be a little thicker, and to make it look nicer, I lined this instead of just hemming along the bottom.

I cut two circles of fabric, sewed them right sides together leaving a small hole, and then flipped the whole thing inside out before overstiching around the whole thing. And Bonus: It’s reversible!

file_004

While cutting fabric for the tree skirt, I accidentally cut two linings instead of one. Instead of putting that fabric in my scrap bin, I figured why not make another apron?!

I widened the ‘waist’ part of the tree skirt lining (My daughter is slim, but not the size of my Christmas tree trunk!), added the waistband and hemmed the bottom.

file_005

Note that there was no need to gather this apron like the clover apron because it was made with a circle of fabric as opposed to a rectangle. Those pretty ruffles just appear naturally!

file_003

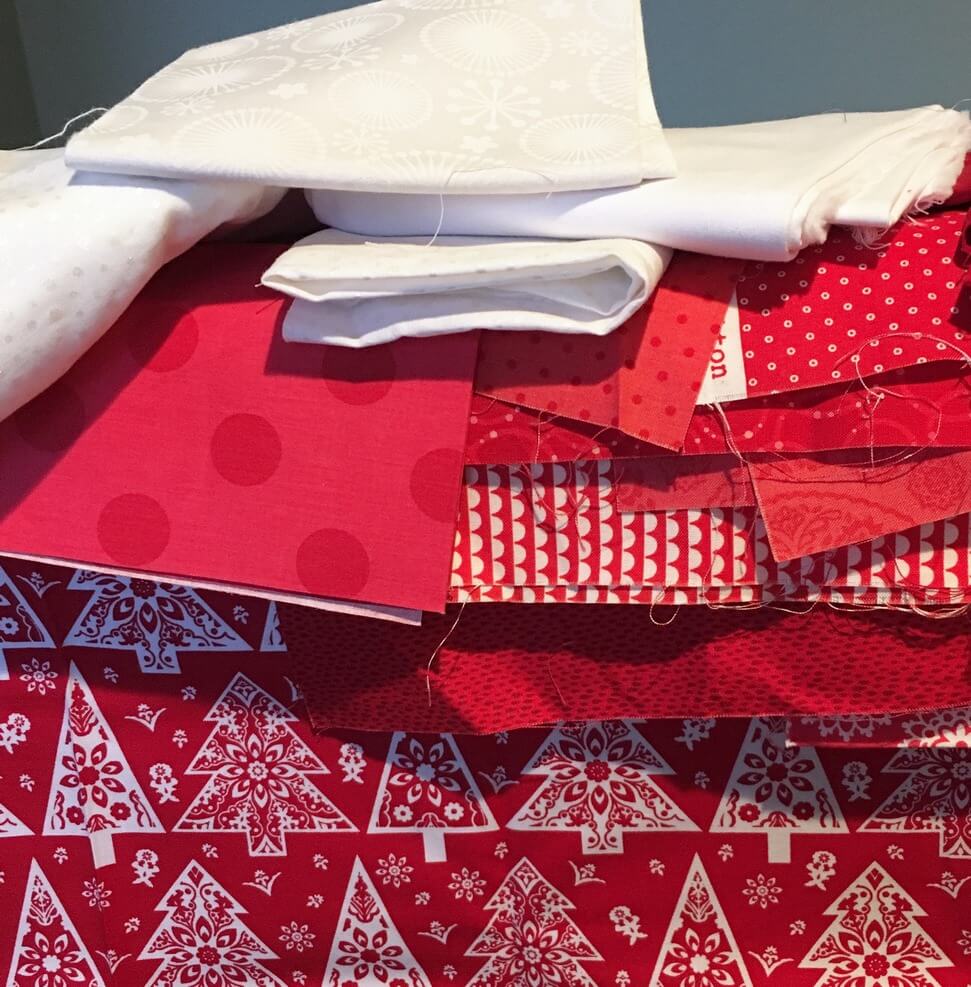
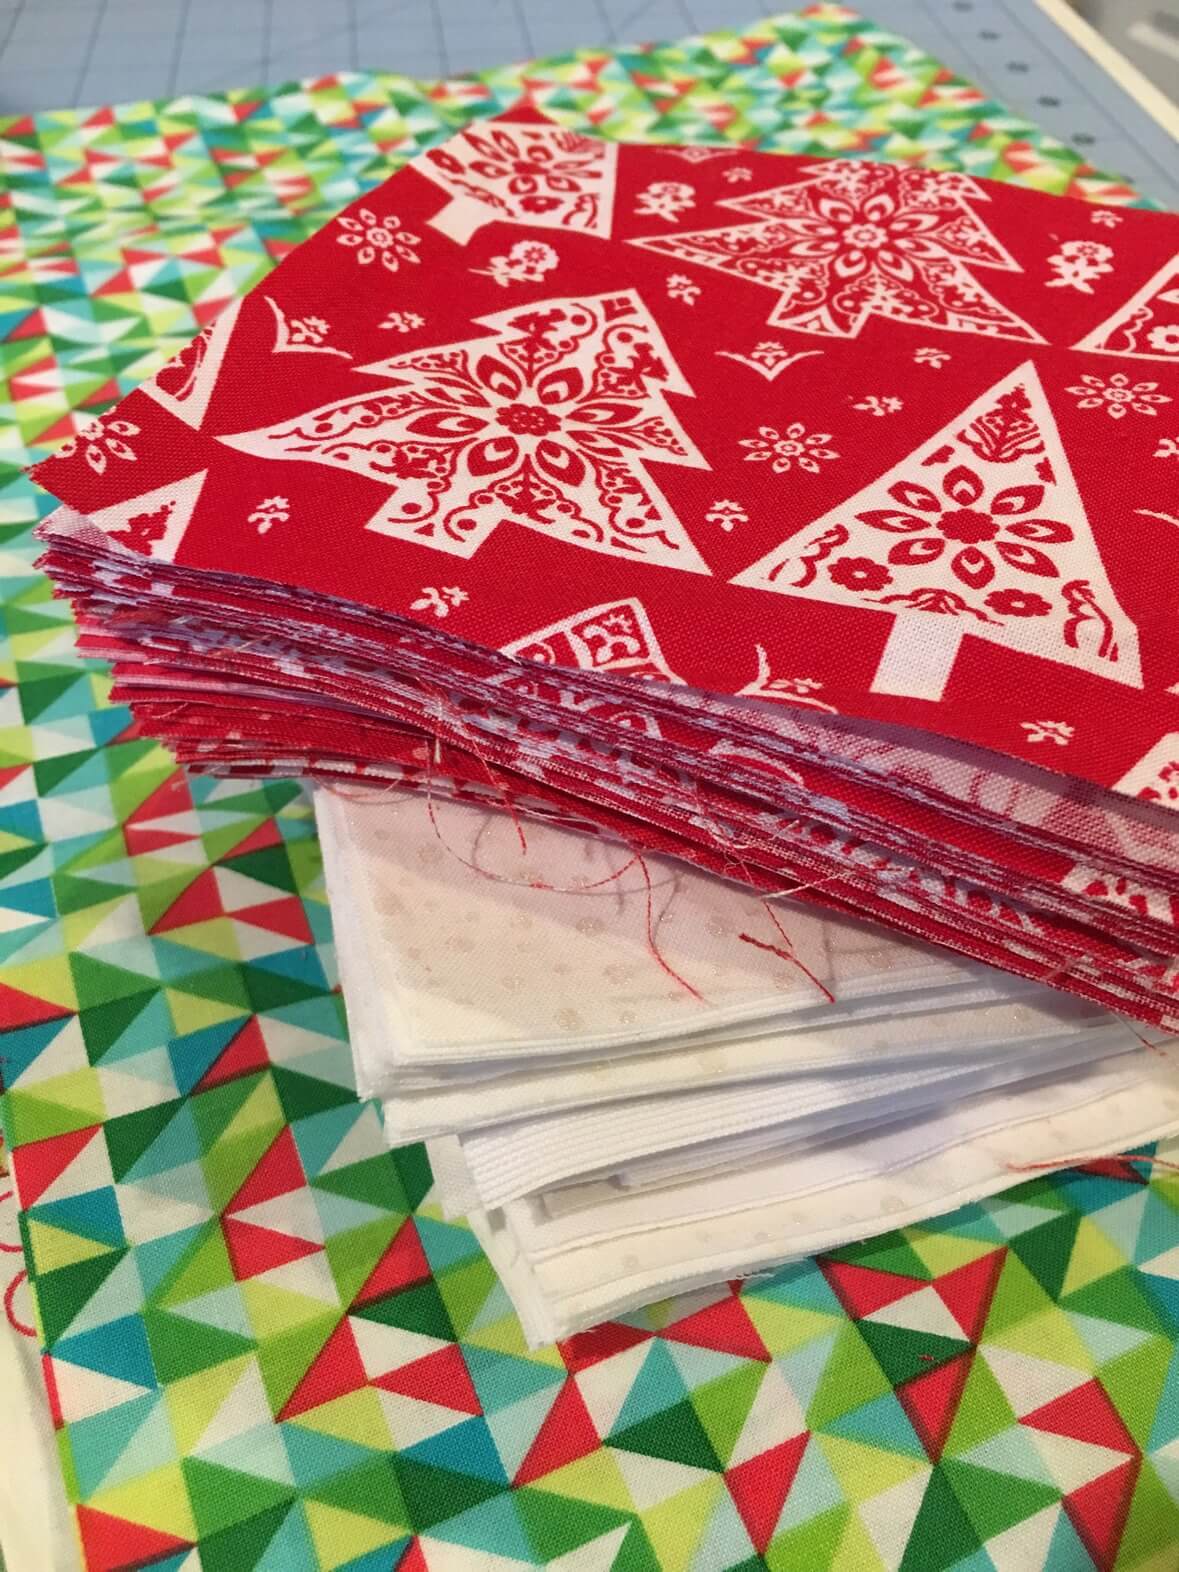
So, what’s a girl to do three weeks before Christmas when she has out all her Christmas fabric for making aprons and tree skirts? Why, start a CHRISTMAS QUILT, of course! I really am overly optimistic.  But I figured that if I made it a simple patchwork, I could probably get it done in time, am I right?

file_000-4Look at those adorable little squares waiting to be made into something grand.

file_006And…”TA DA!”, I finished the quilt top! Now, I’m *hoping* to baste this (along with another secret Christmas.gif"alignnone size-full wp-image-6361" src="https://laurelpoppyandpine.com/img/2016/12/file_0071.jpg" alt="file_007" />

I hope you enjoy the rest of your holiday season, and Happy Sewing! ~L

SMS Giveaway Day

Welcome to Laurel, Poppy, and Pine!

Quick introduction: I’m Lorinda; I’m a quilt pattern and fabric designer working from my home studio in the lovely Pacific Northwest. You can find out more about me here.

Check out my Spoonflower page to see my fabric designs.

Or click here to be brought to my patterns and tutorials page.

My favorite social media platform is Instagram, but you can also find me on Bloglovin’,  Facebook, Flickr, Twitter, and Pinterest.

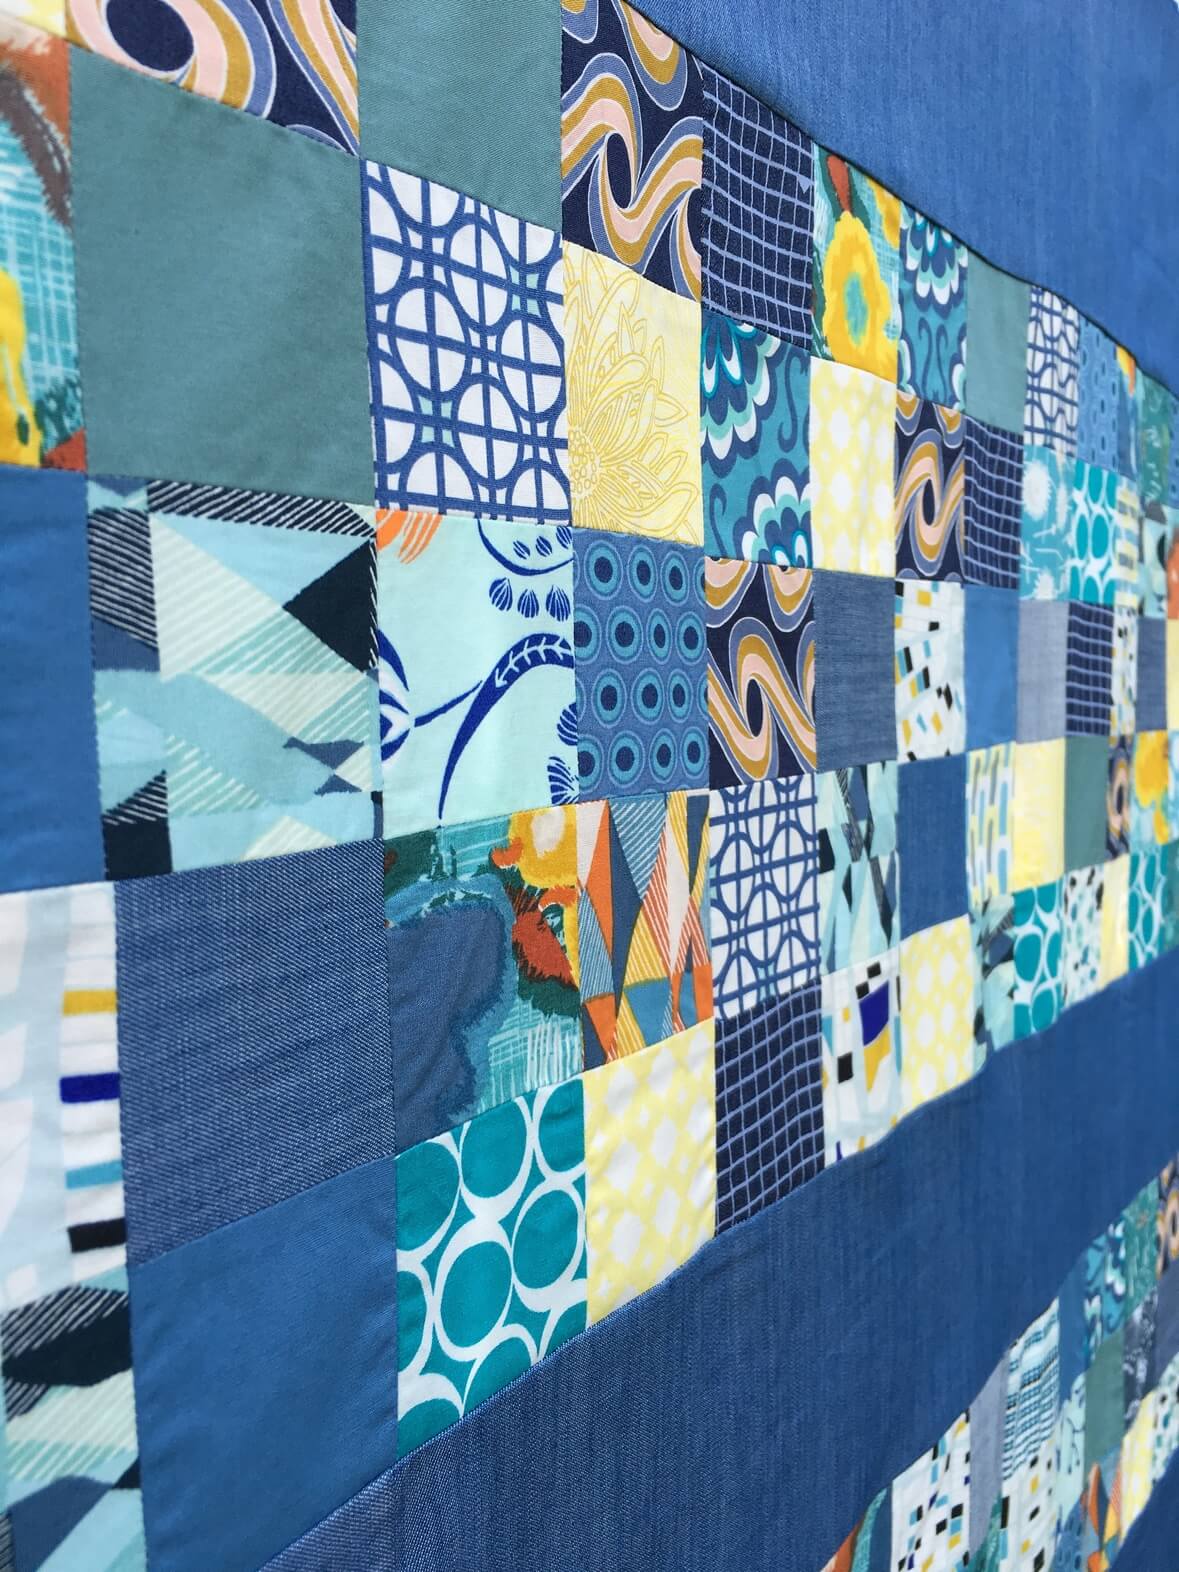
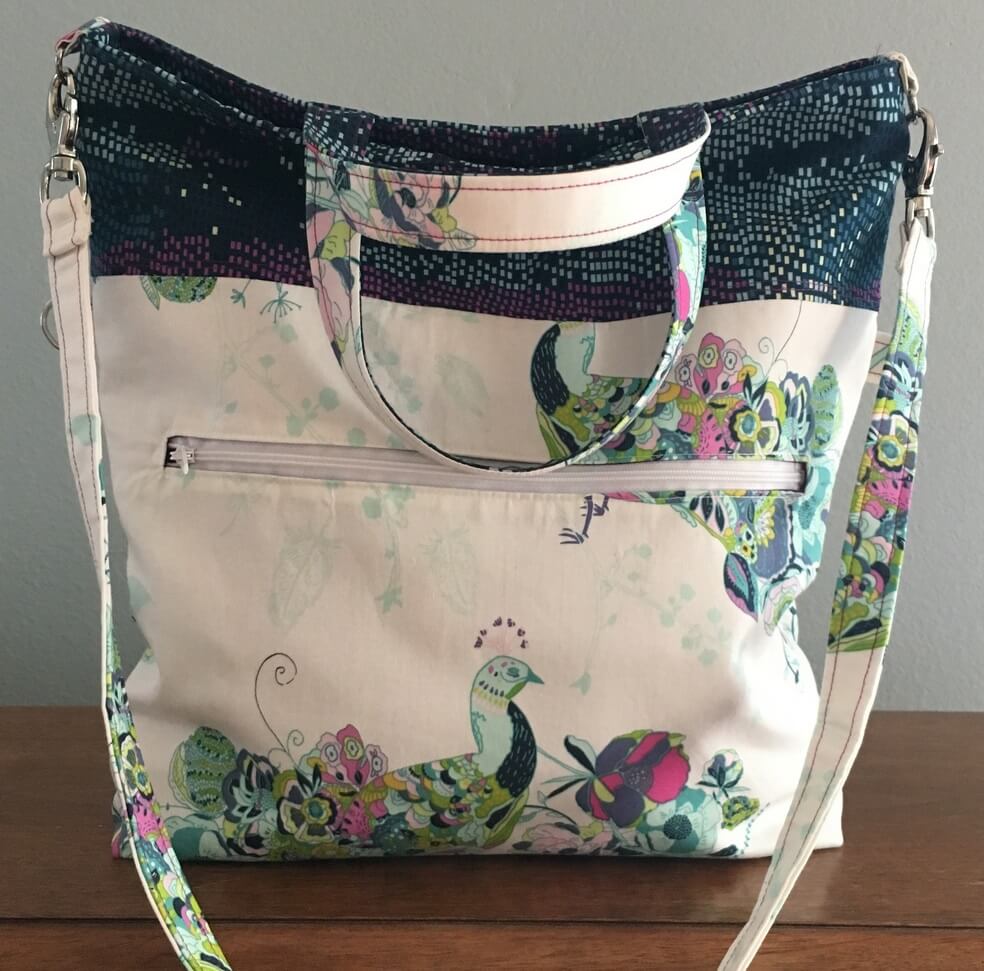
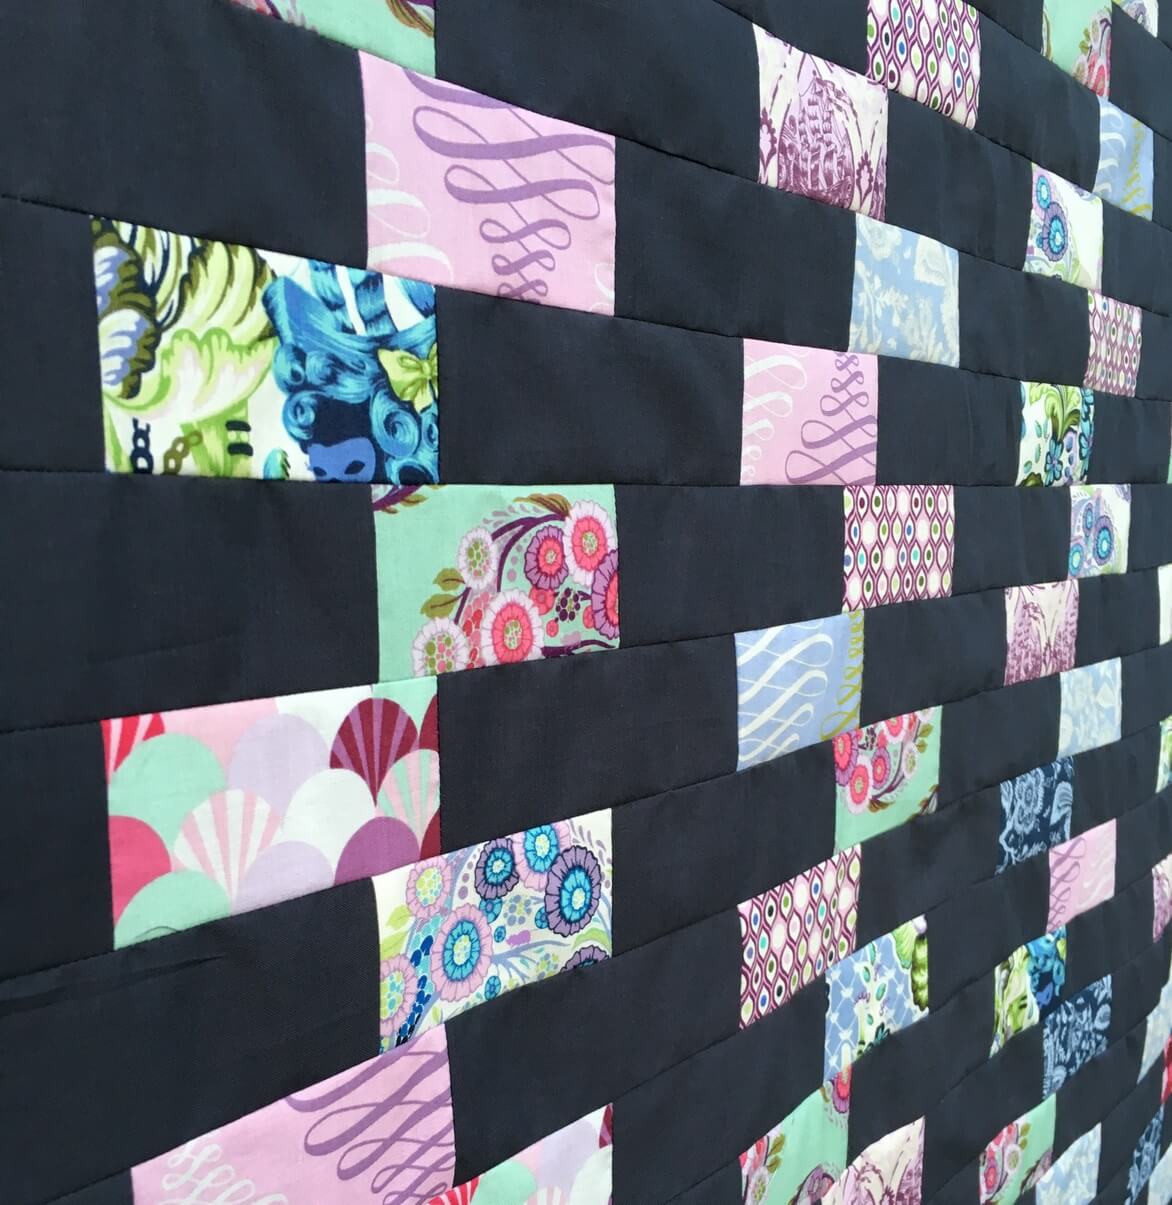
Here’s a few pictures to give you an idea of what I do around here:


Now let’s get to the real reason you’re here!

file_000-1

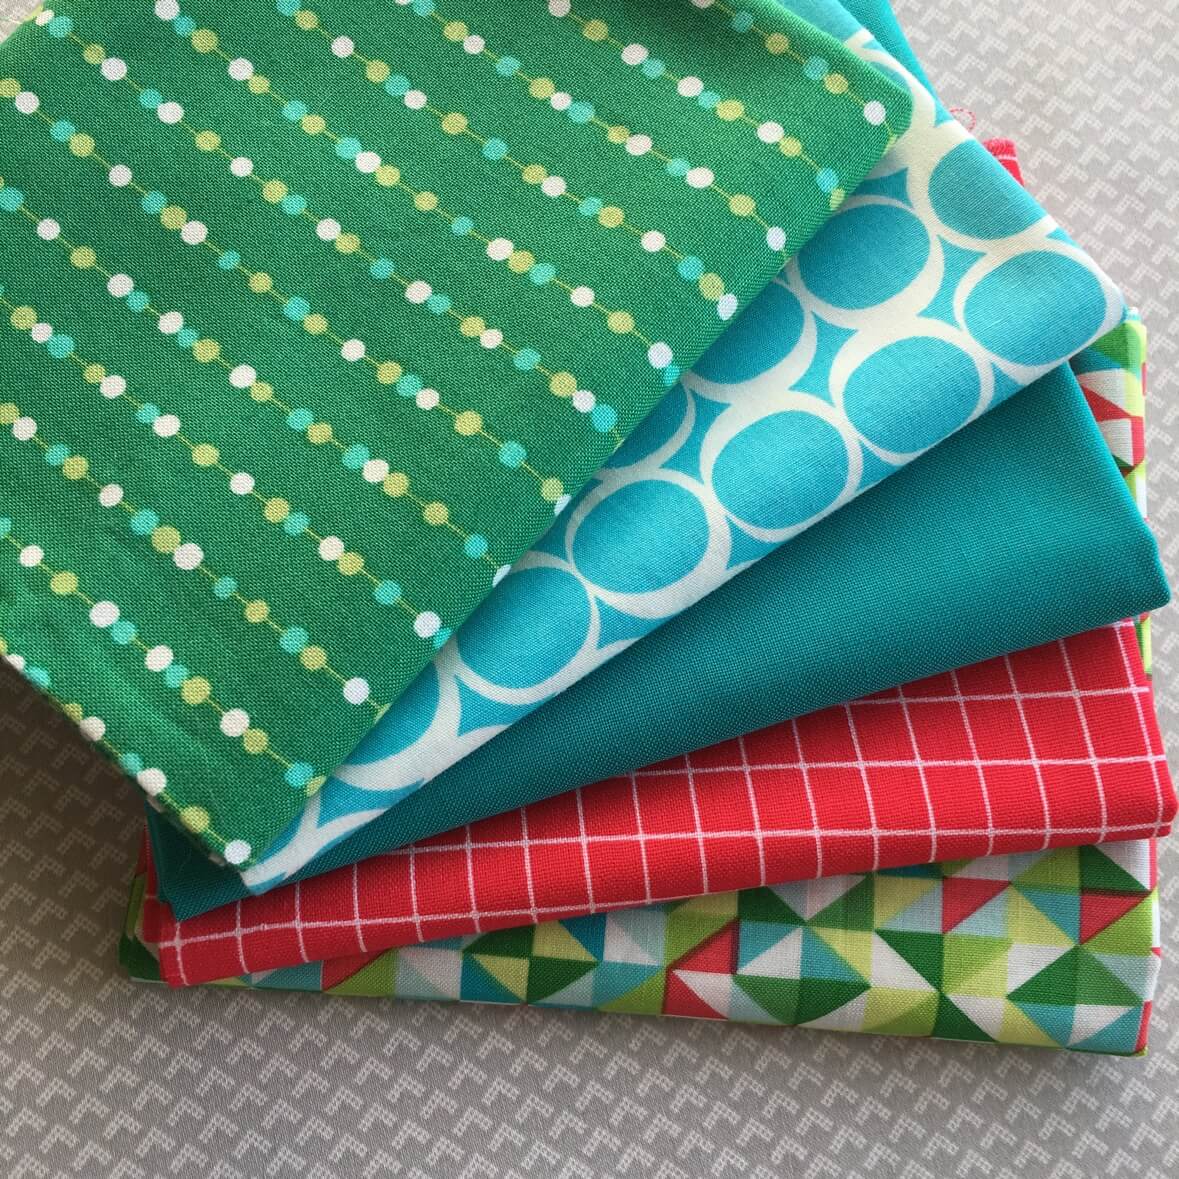
I’ve been doing a ton of Christmas sewing lately, so today I’m giving away this adorably modern Christmas FQ bundle.

Entering is simple- just leave me a comment telling me a project you have planned for next year!

US entrants over 18 only, please.

The giveaway closes on Sunday, December 11th at 9pm Pacific time. A winner will be selected via random.org on Monday, December 12th.

Our winner will announced on the blog and notified by email.

If you’re a “no reply” or an anonymous commenter, PLEASE include your email address in your comment! If I am unable to contact the winner by December 14, another winner will be selected via random.org

Thanks for entering! Head back to the rest of the giveaways here. 


Happy Sewing! ~L

No purchase is necessary. Odds of winning are based on number of entries. One entry per person. Giveaway value is approximately $17. Void where prohibited by law.

Buttercup Gown

Hello friends! I’ve been sewing up a storm lately, and am really excited to show you some things in the next couple of weeks, but first I really need to catch up!
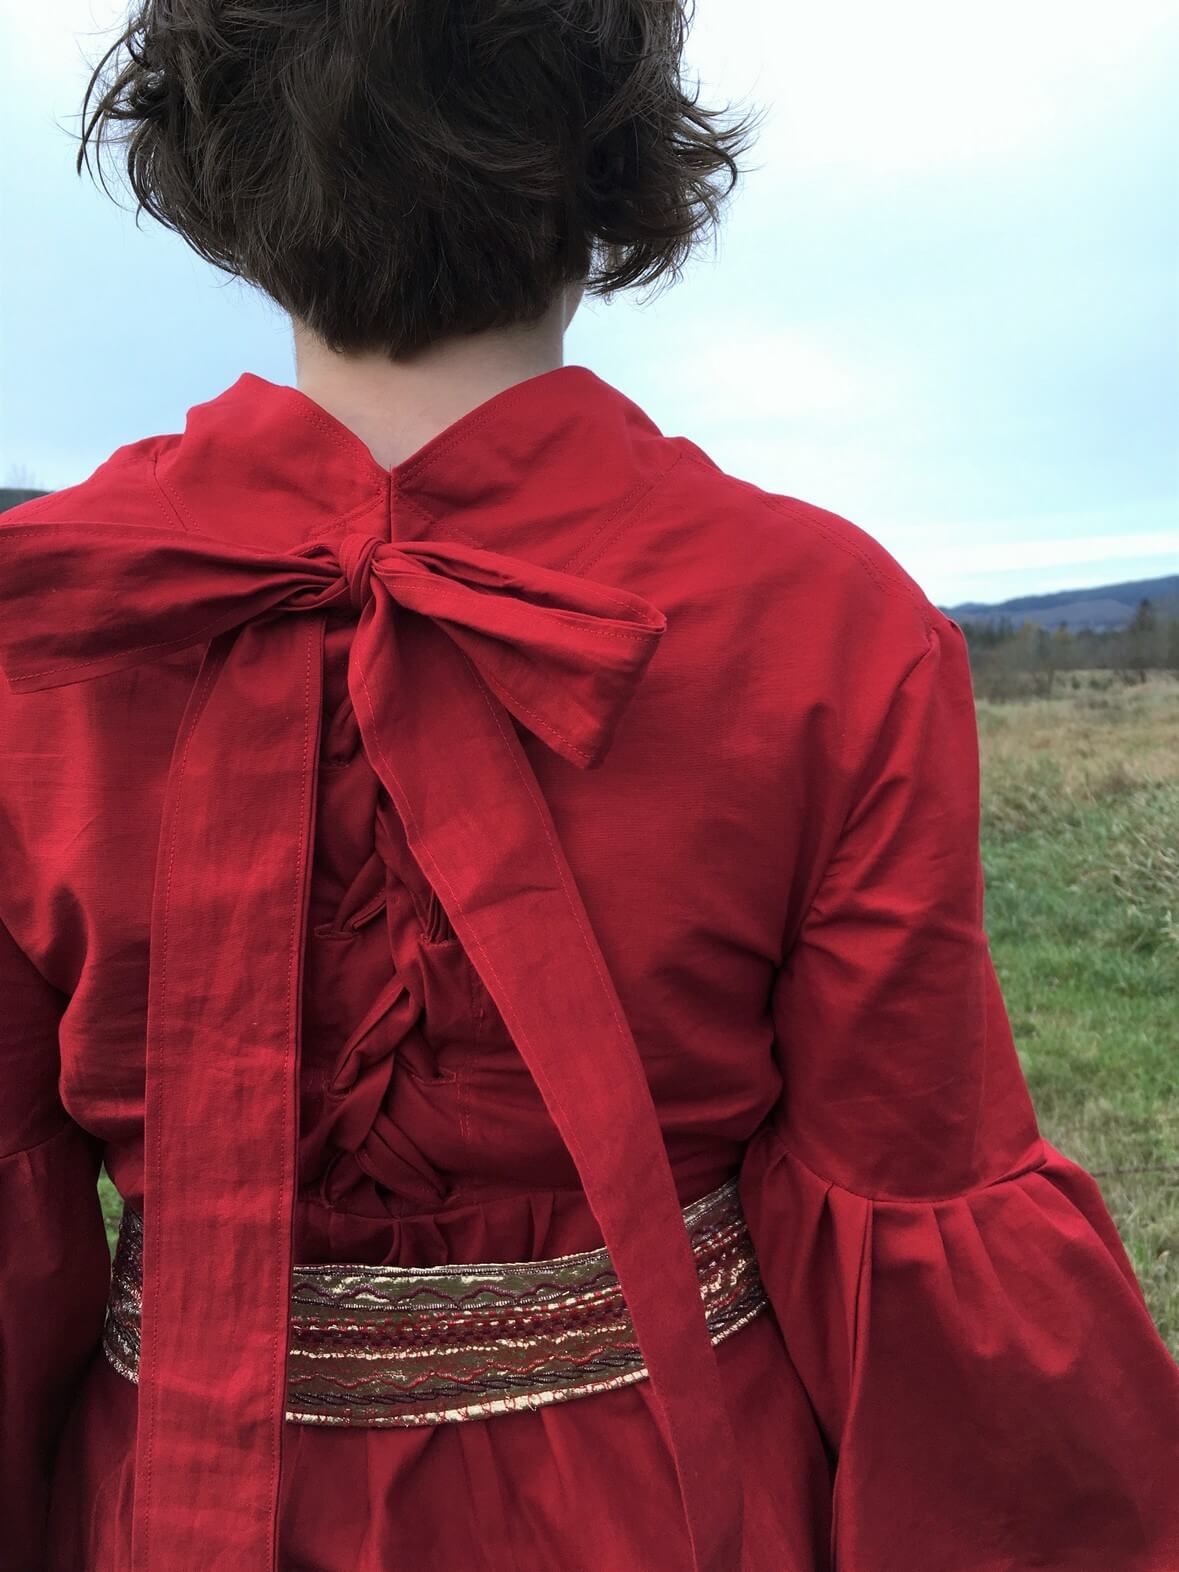
file_001

If you follow me in Instagram, you’ve seen some pictures of this already, but I wanted to do a blog post to show some final pictures and share a bit about my experience of making it.

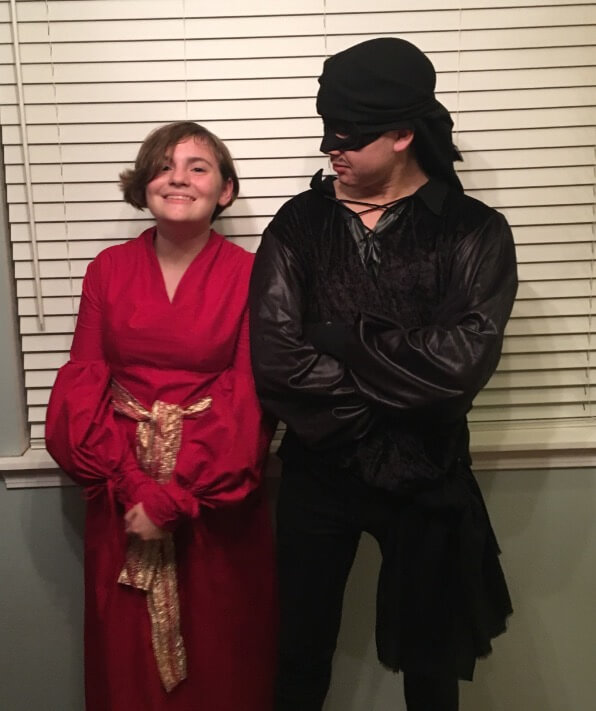
My two older kids are just one grade apart and are part of the same ‘squad’. (For my fellow non-teenagers, your ‘squad’ is your closest group of friends). Sometime in late September, they all decided that a group Princess Bride costume would be a ton of fun. Since my daughter is the only girl in the group (and given the fact that the boy dressing as Wesley was her Homecoming date), it was quickly decided that she would be Buttercup.

(Incidentally, my son was the six-fingered man. I made a tunic and gloves for him which I may share later… It was not nearly as fun as this dress, though!)

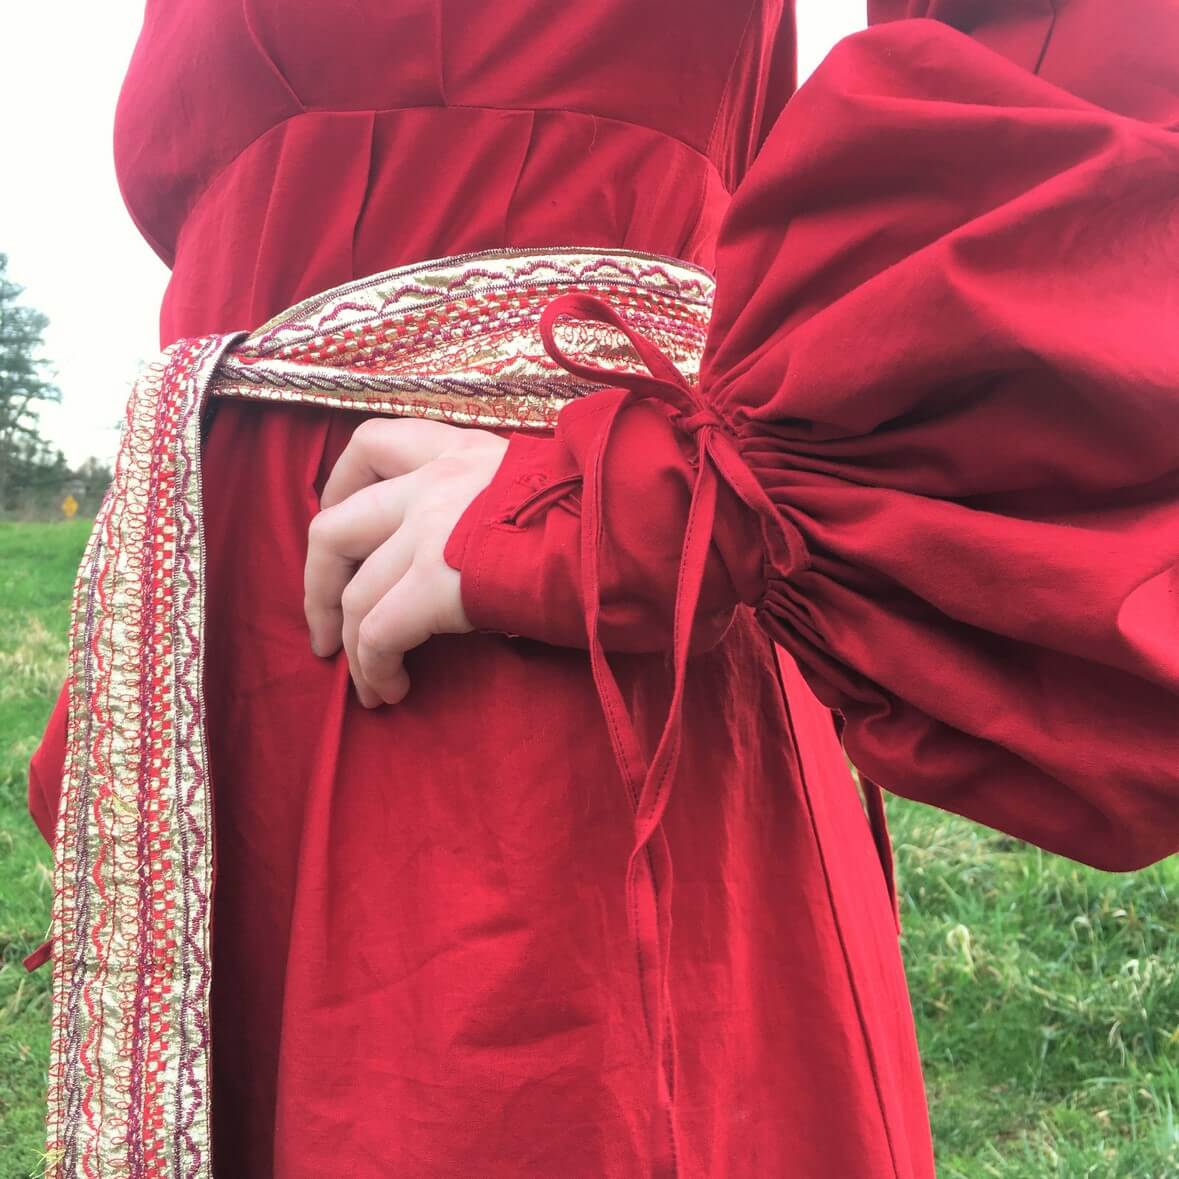
I love designing costumes, and had made a few things along those lines, but up until I did this dress, didn’t consider myself a garment sewist. I suppose I figured since I had never made sleeves, I couldn’t say I could sew a garment. So I chose to see this as an opportunity to stretch my garment-sewing skills. Because if I could figure out those Buttercup sleeves, I could do anything!file_000file_009
My first step was to check just in case someone had done the hard work for me and made a pattern for this dress…. no luck.  I didn’t figure there was a pattern out there, but I was hoping!

Next step- start figuring out how in the world I was going to reverse-engineer the thing. I found The Costumer’s Guide to Movie Costumes to be VERY helpful. I was able to get a good, close look at the dress and start to assemble it in my head.

I chose Kona Solid in Rich Red for this dress. It’s much less expensive than most apparel fabric, and it was readily available at my local box-fabric store (hello, 50% off coupon!).
file_000-2

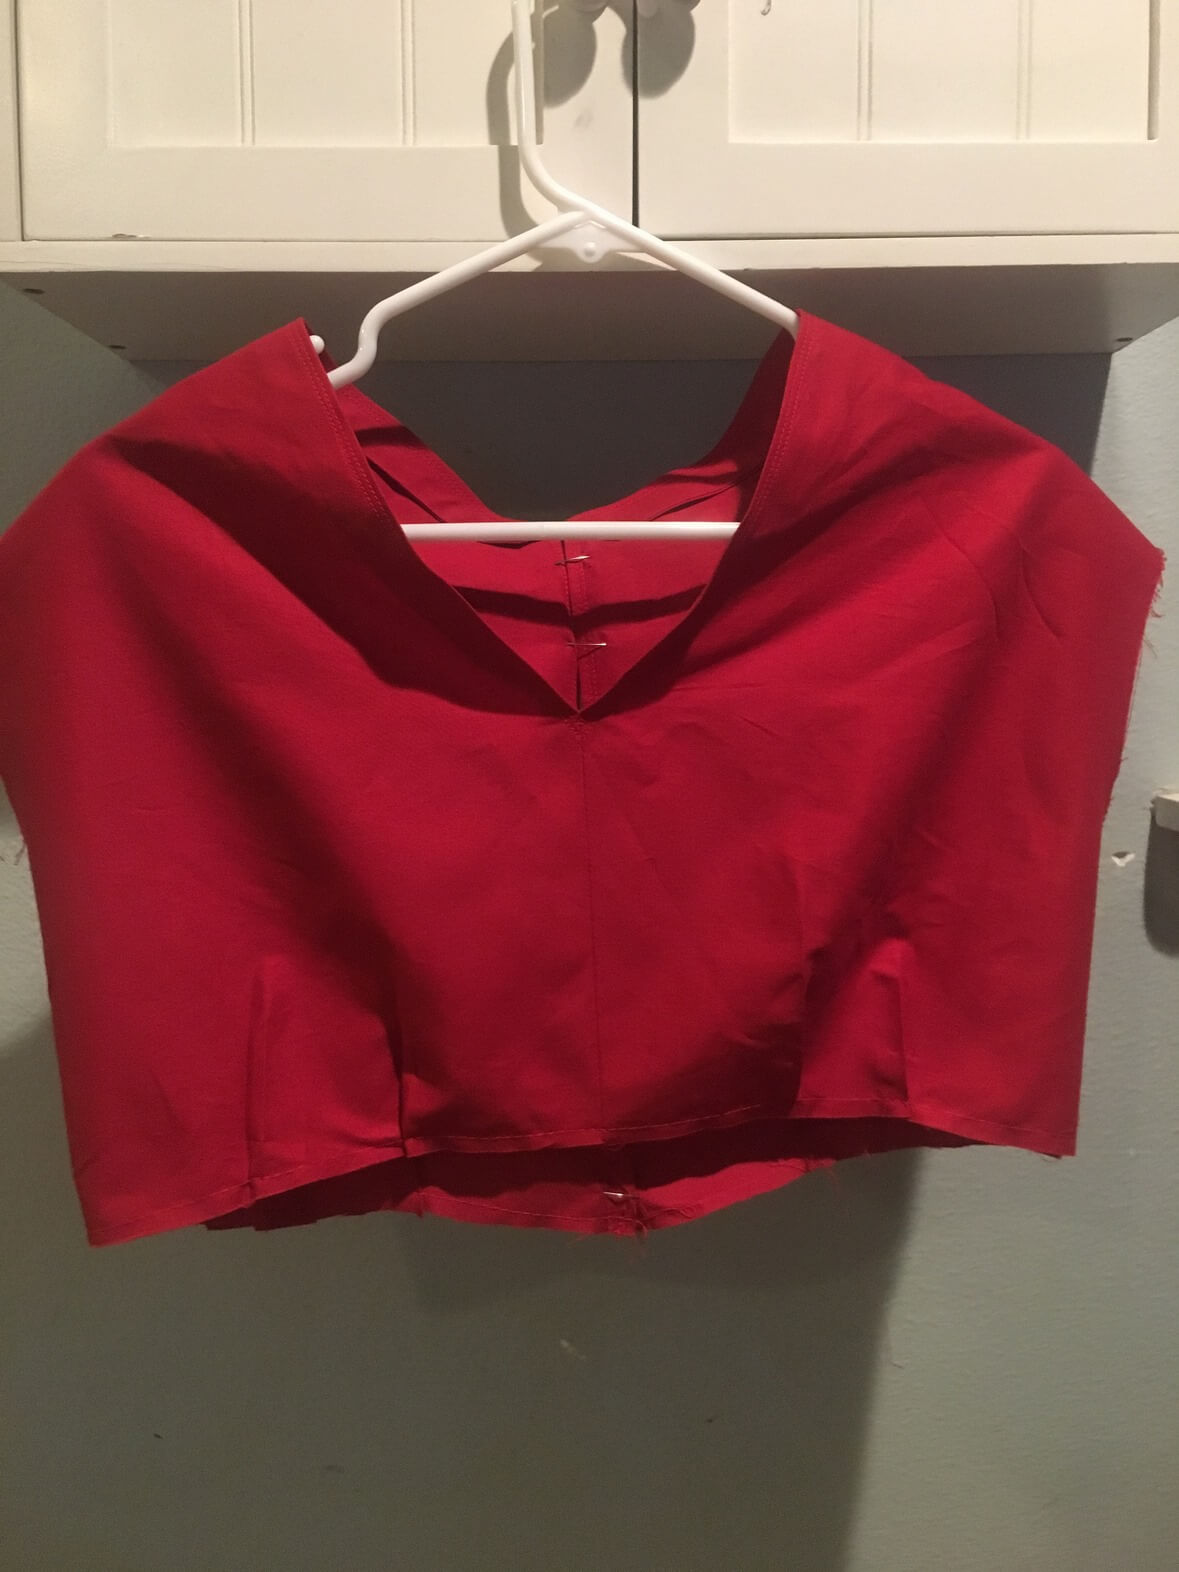
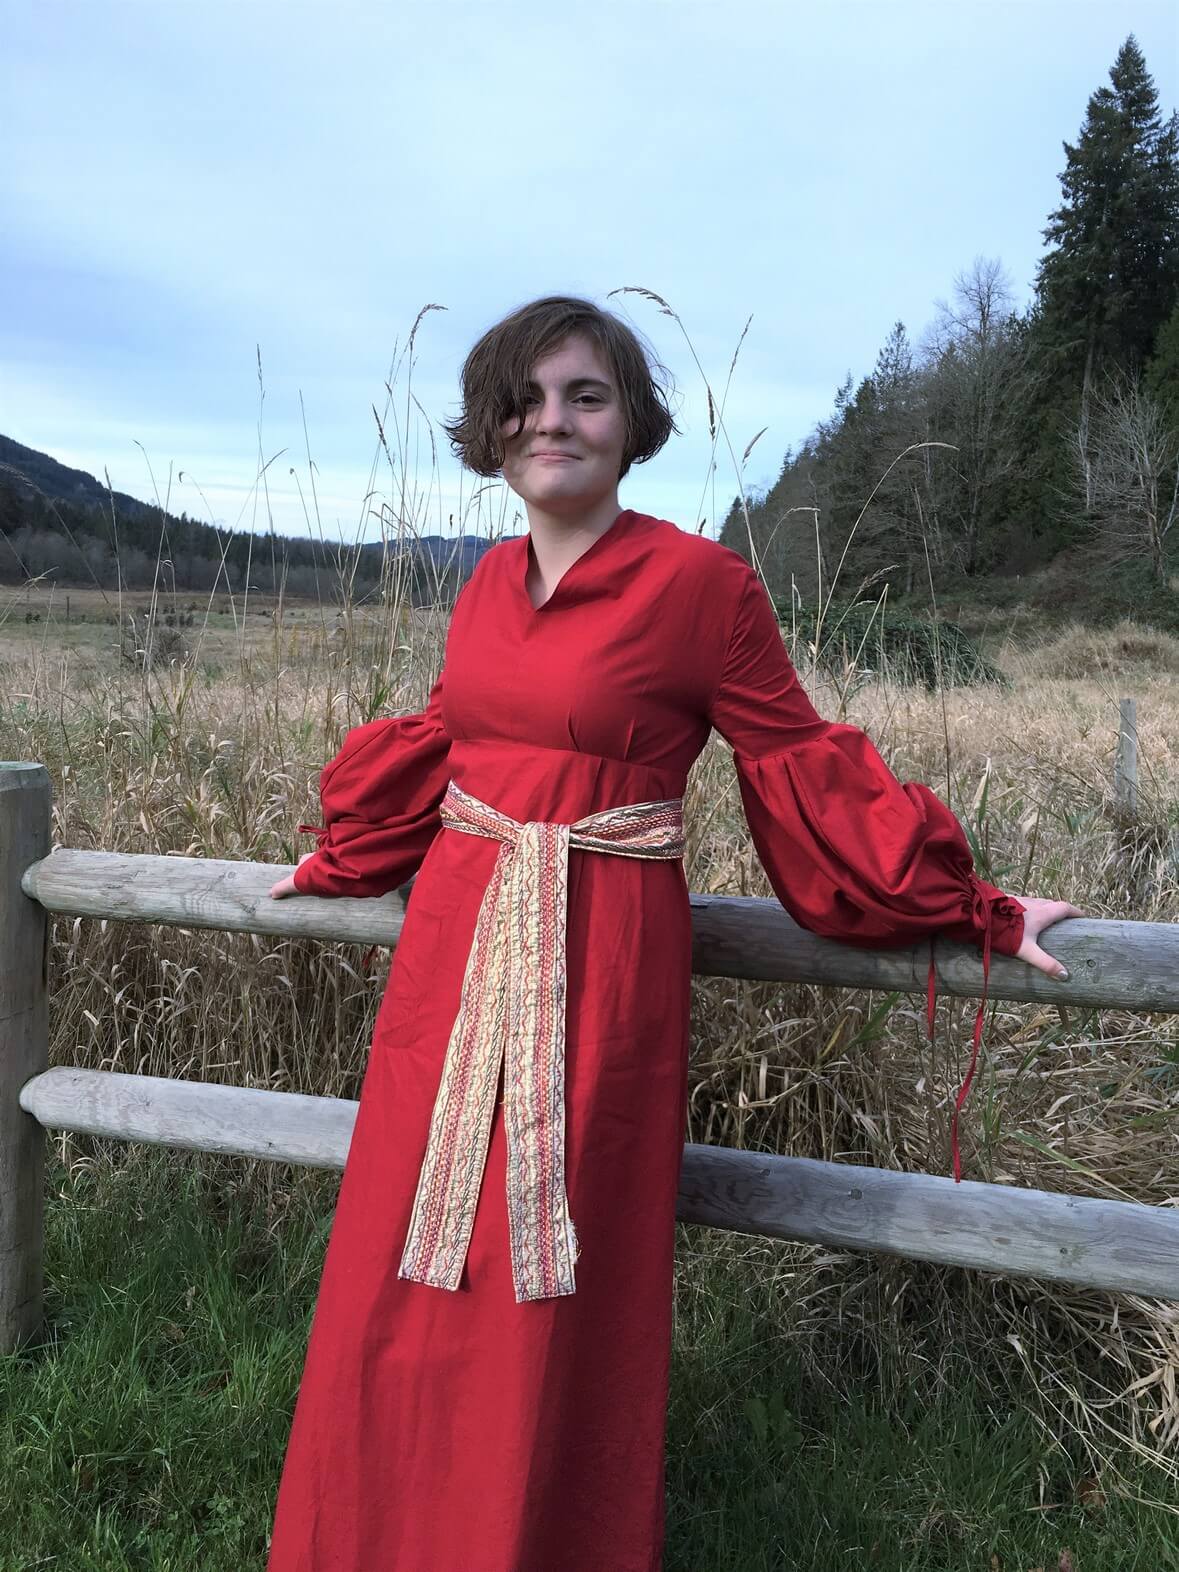
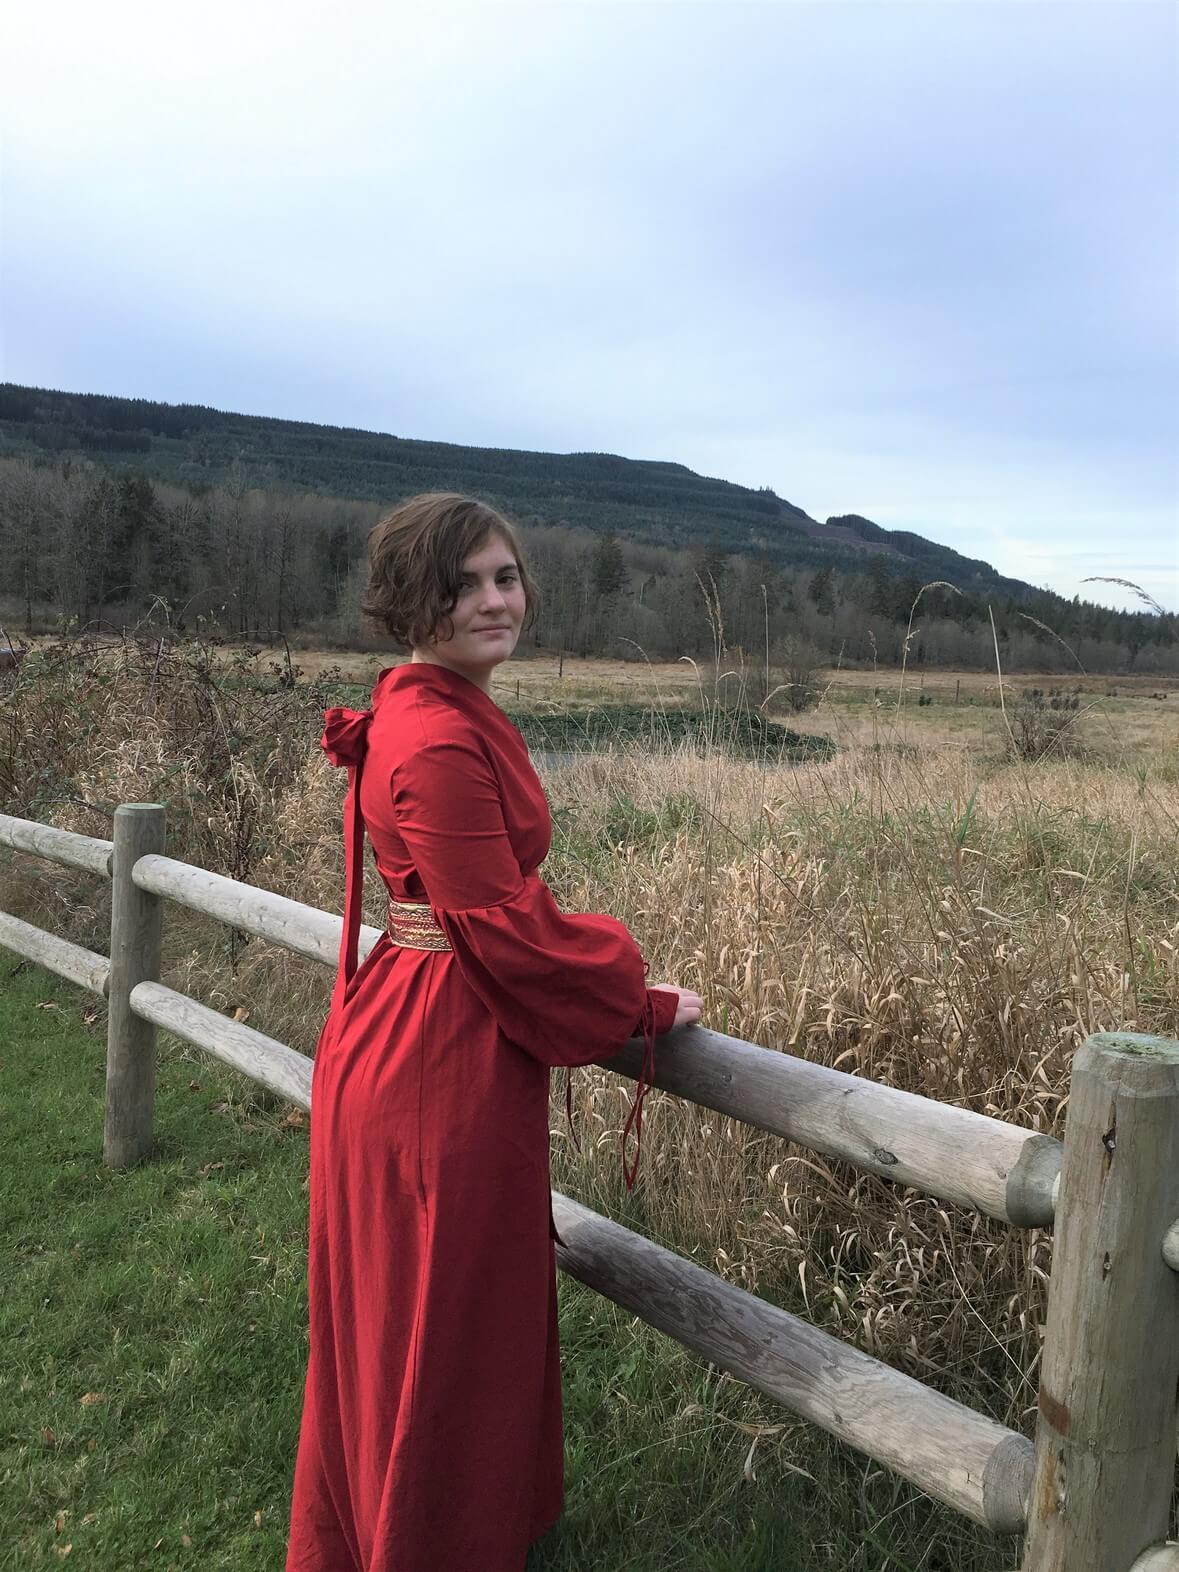
First up was the bodice. Honestly, this was a lot of trial and error with paper and muslin. I’ve done simple bodices before, but on this one I really wanted to stay true to the original, which had really unique neckline. The front part of the v-neck collar line extends around the top of the shoulder and meets in the back in a deep V, forming a good portion of the back of the bodice. I wish I could tell you I was a good blogger and took pictures of this whole trial-and-error process, but I was too focused on the task at hand. My only advice is to use a muslin and start big. That way, you can continue to make adjustments to the muslin as needed and use that as your pattern.

One more bit of advice when reverse-engineering a costume: pay attention to the details. On the bodice for this dress, it was the height of the collar, the depth of the neckline, the dropped shoulder sleeve, and the waistline being higher in the front than in the back. Those little details really add up!
file_001

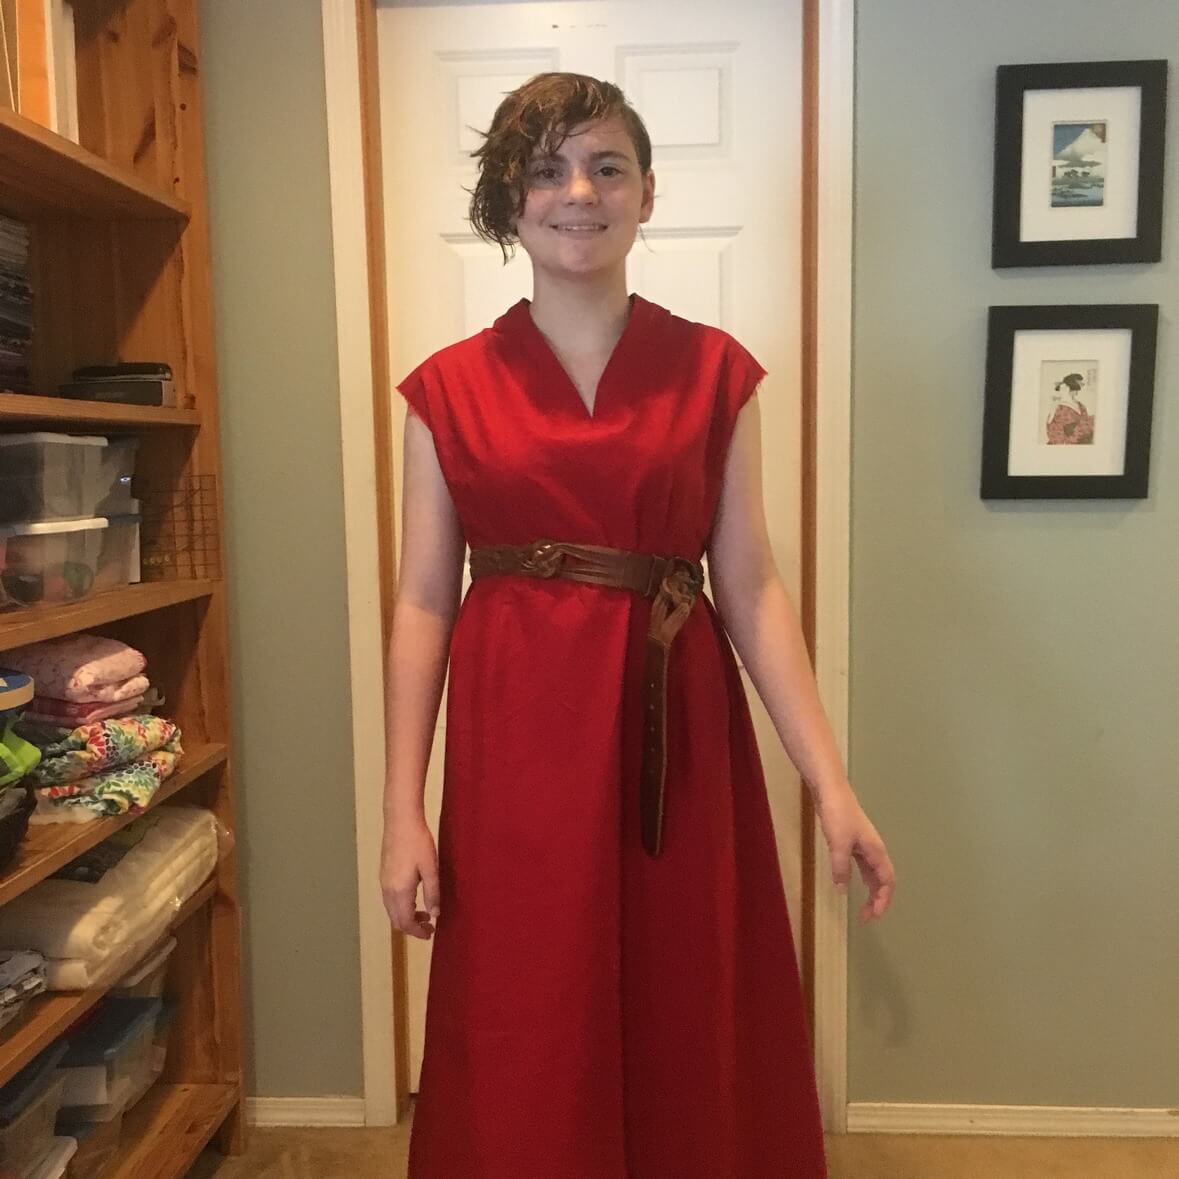
Once the bodice was done, adding the skirt was quite simple. I started with giving her enough room along the hemline to comfortably walk, and then calculated a measurement for the waistline that would give her some pleating without adding too much bulk. I divided by two and cut two wedges from my yardage to make the skirt front and back.  Sewing those together down each side, I had my skirt! Note that the front pleats are closer to the sides of the dress, further out than the bust pleats. This is part of the original design and helps keep the front of the dress fairly flat. file_002-1
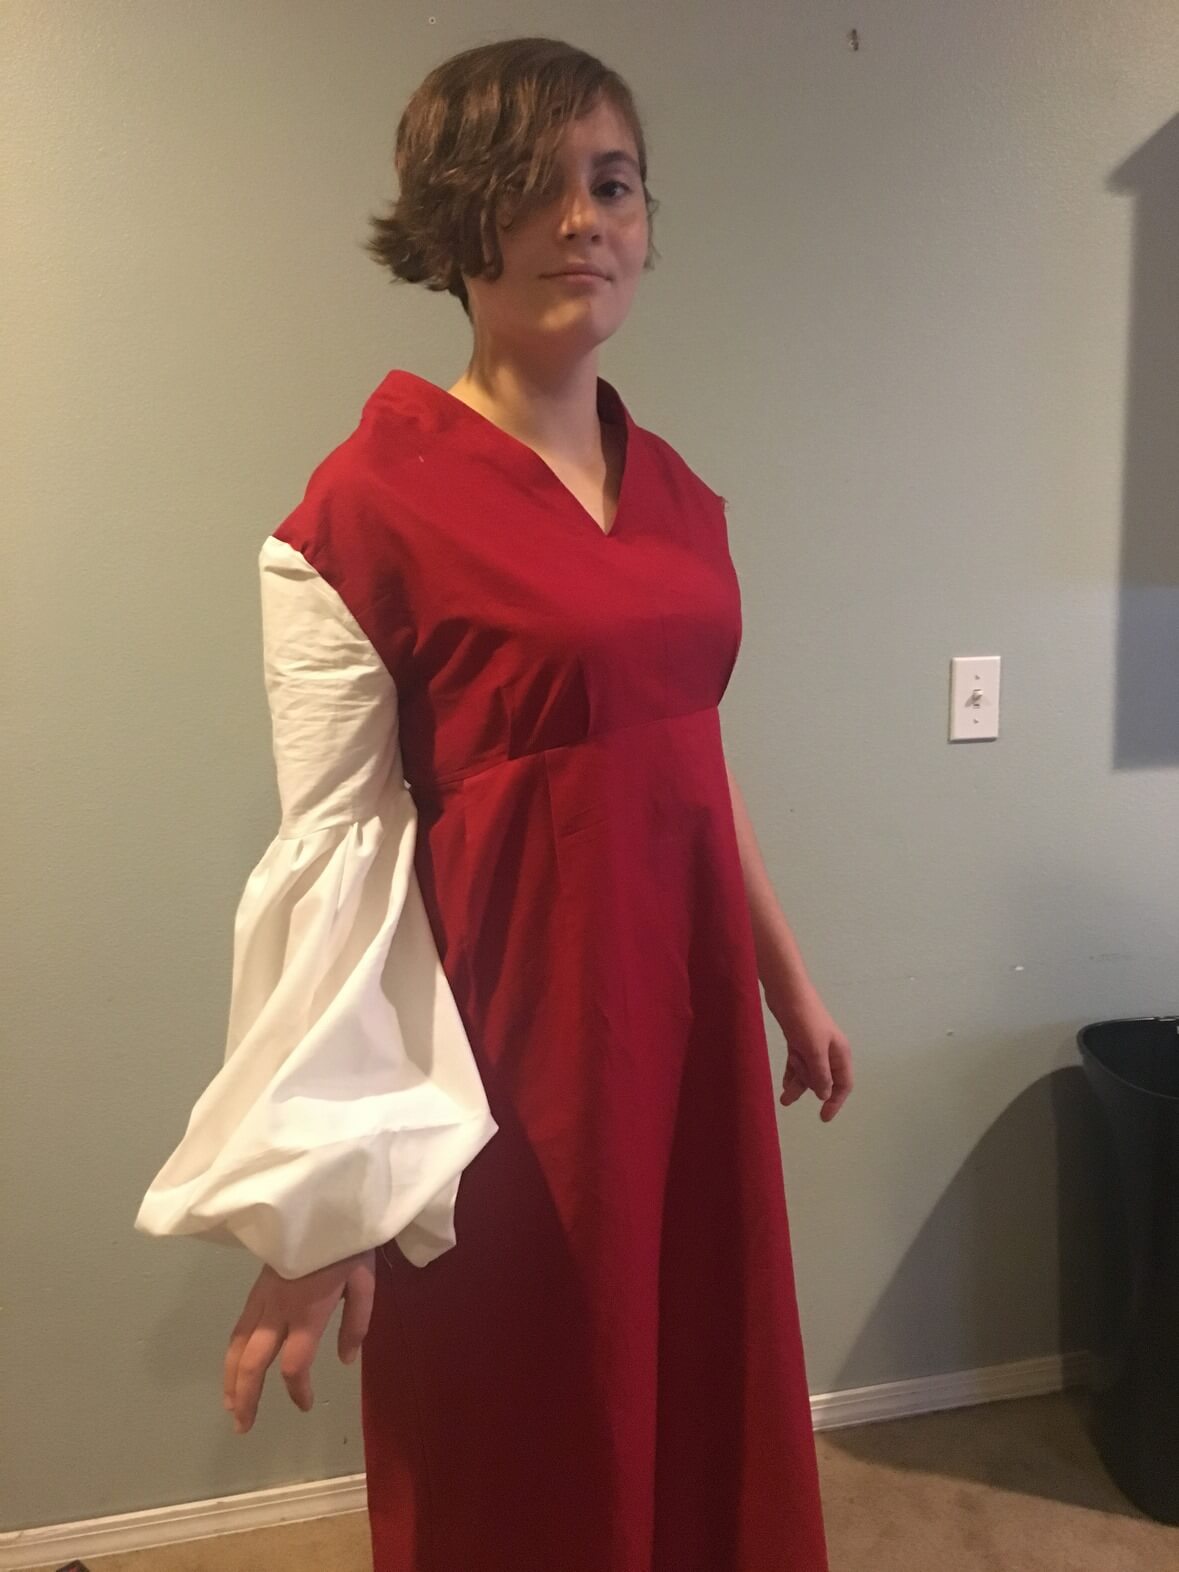
Next up were those fabulous sleeves. At this point, I took a pause from this costume to focus on learning how to draft inset sleeves and practicing my skills on my son’s Six-Fingered Man tunic.  I also needed to finish up some work on the Wesley costume (oh, did I not mention that I was doing that too?!).

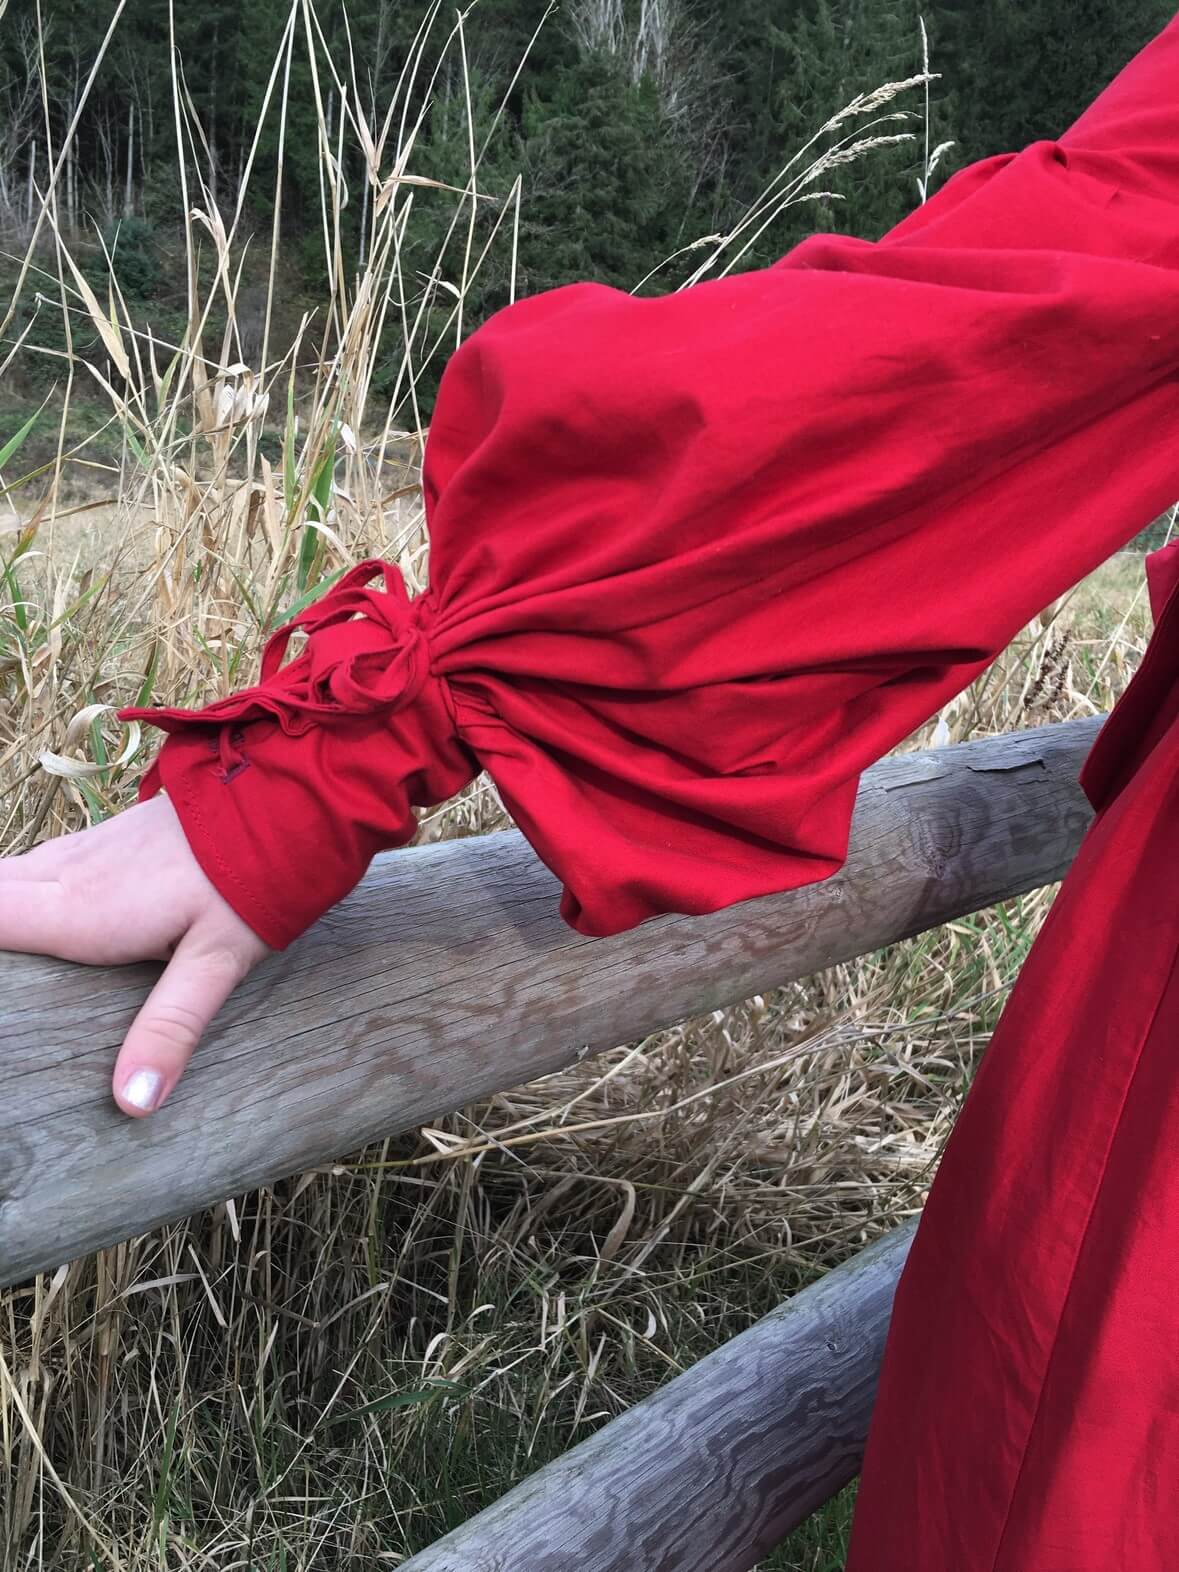
There are three portions to these sleeves: The upper part which is fitted, the lower portion that billows out and has lots of bulk, and then the cuff. The upper portion was easy, but the lower section took a bit more trial and error. Again, the muslin was helpful for this step.

First, I created bulk at the hem of the upper and lower sleeves by making the lower sleeve top twice and wide as the upper sleeve bottom and working that bulk into the seam using pleats. Second, I made those lower sleeves the same way I did the skirt, with two wedges that were wider along the bottom (in this case, the wrists) than the top (mid-arm). This created those gorgeously huge sleeves. Once I was happy with the muslin, I felt comfortable cutting into my remaining red yardage.
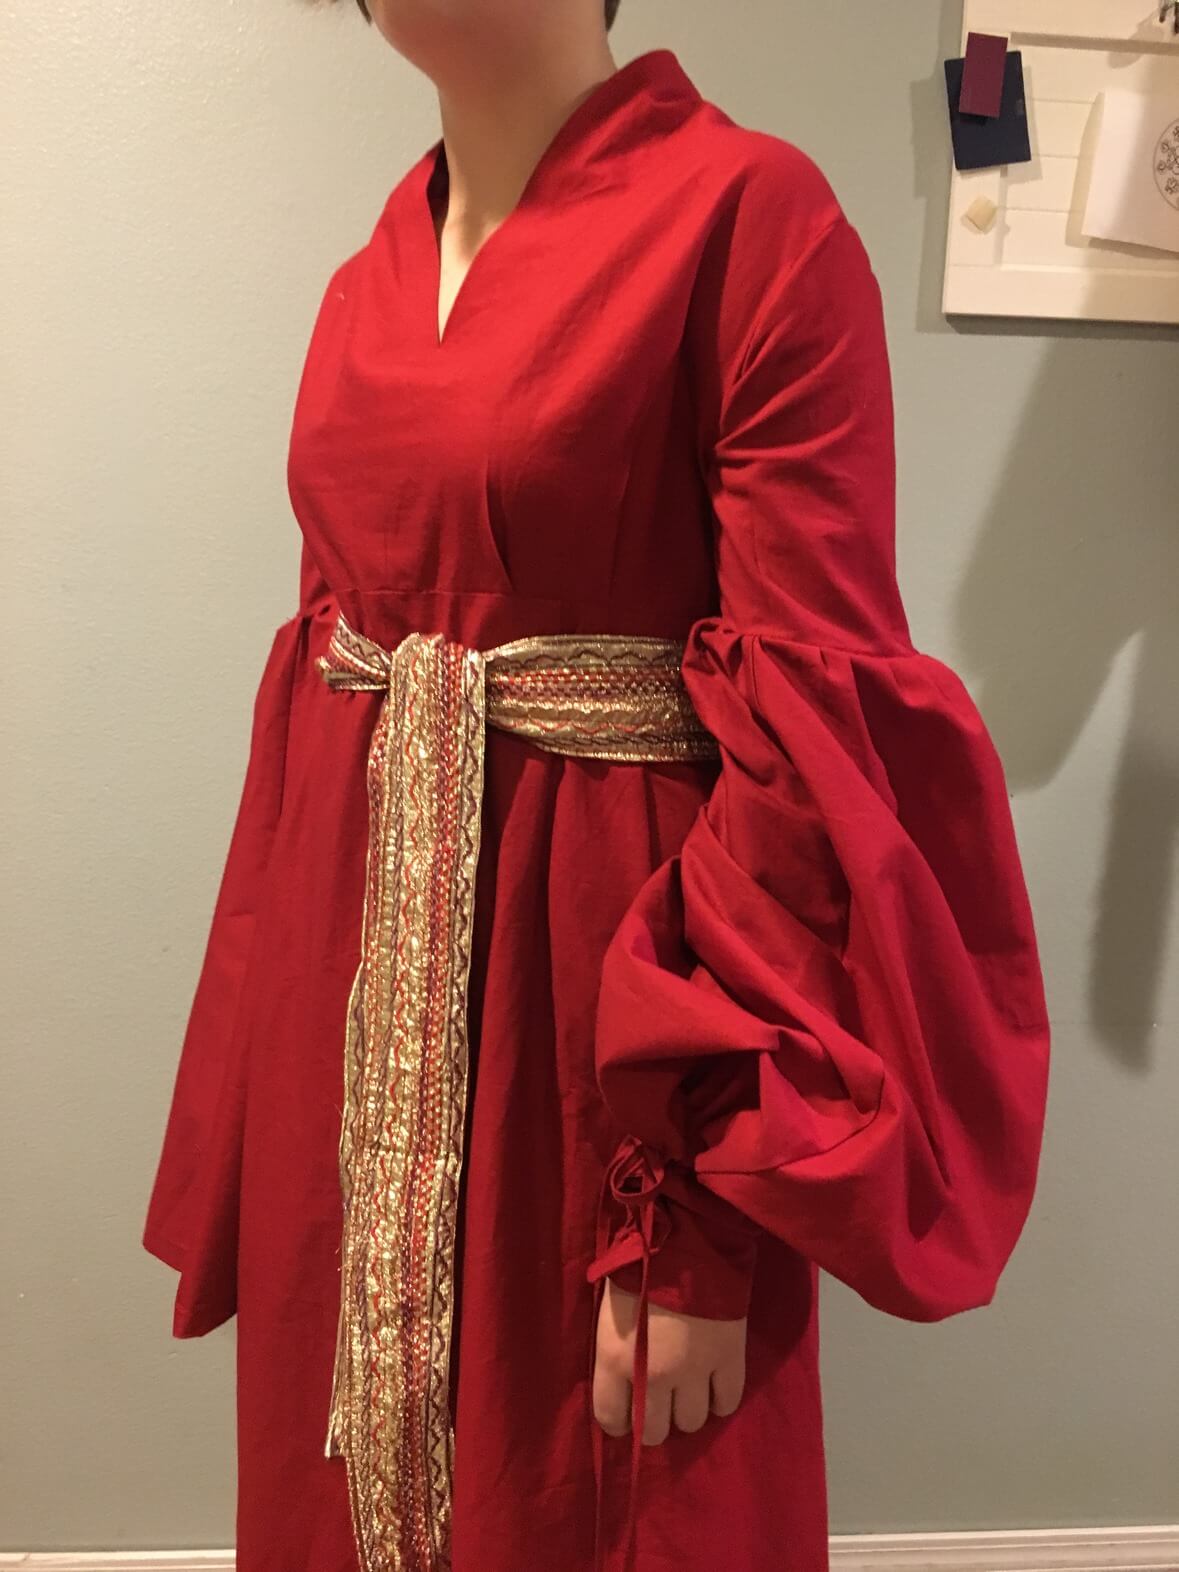
file_003-5

Here you can see the lower sleeve portion sewn to the cuff on the left arm.

At the point the above picture was taken, I started to feel a little unhappy with the way the sleeves were looking. As you can see, I had the pleating of one sleeve done, and the other sleeve is still ungathered. I noticed on the gathered sleeve that there was a bit too much fabric hanging over the front part of the wrist hiding the pleating detail and creating a strange twisting in the fabric. There was just so much bulk that the fabric didn’t know where to go.

At this point, I had to make a choice: Take out my work and course-correct, or go ahead with what I was doing. Knowing that I would never be happy if I didn’t at least TRY to correct the sleeves, I started the unhappy task of picking out the pleat stitches.

It really didn’t take all that long, and I’m glad I did it.

Because the problem was too much length in the front, I folded and pressed (because I was too scared to cut anything at this point) the fabric to the inside of the sleeve, starting at a high point at the sleeve front down to the original sleeve length in the back. Essentially, I made the front of the sleeve about a foot shorter than the back. I was thrilled to pin the sleeves to the cuff and realize that my plan worked!

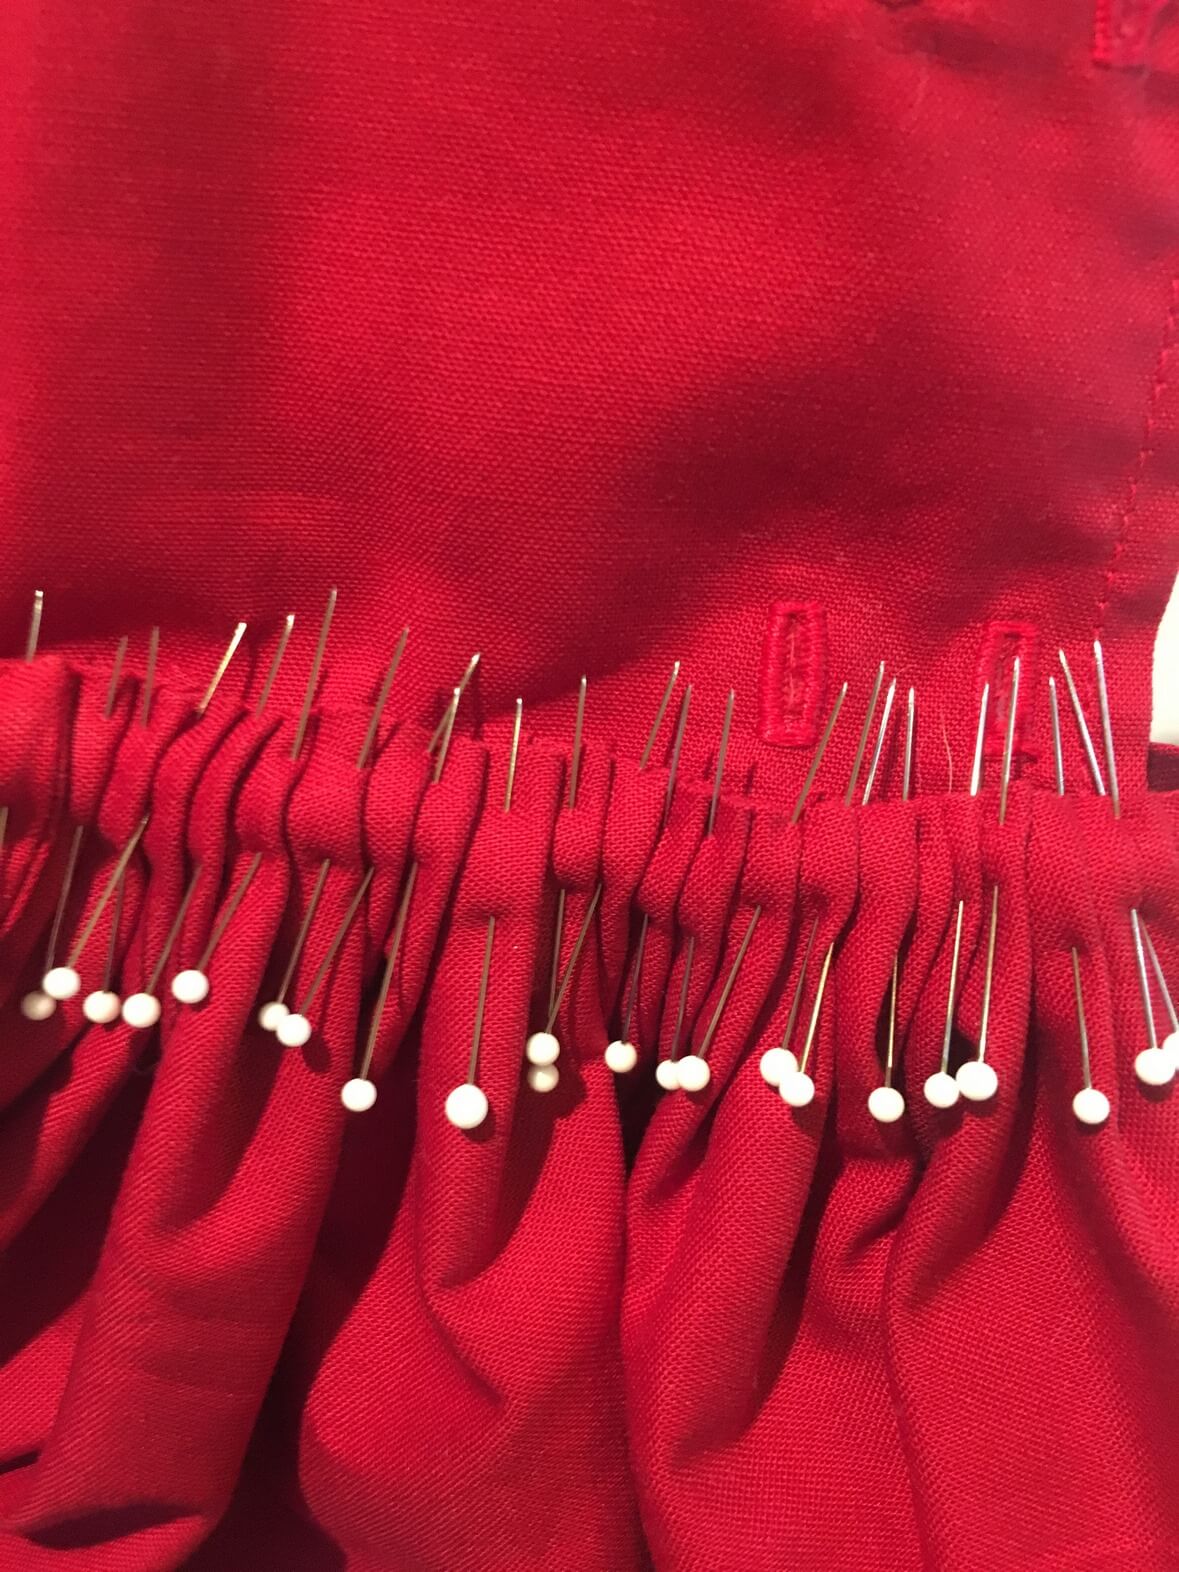
My final task on this dress was a big one- I had to take those giant sleeves and pleat them WAY down to fit on the wrist cuffs.
file_005-1

PINSANITY!

There was a lot of finger stabbing happening that afternoon.  Mind you, this was also only a few hours before my daughter was scheduled to wear this costume for a party in which they were entering a group costume contest. But I just tried to stay calm and focus on the task at hand! The work was going relatively fast, so I took the time for a 20 minute nap between sleeves so I didn’t go crazy.
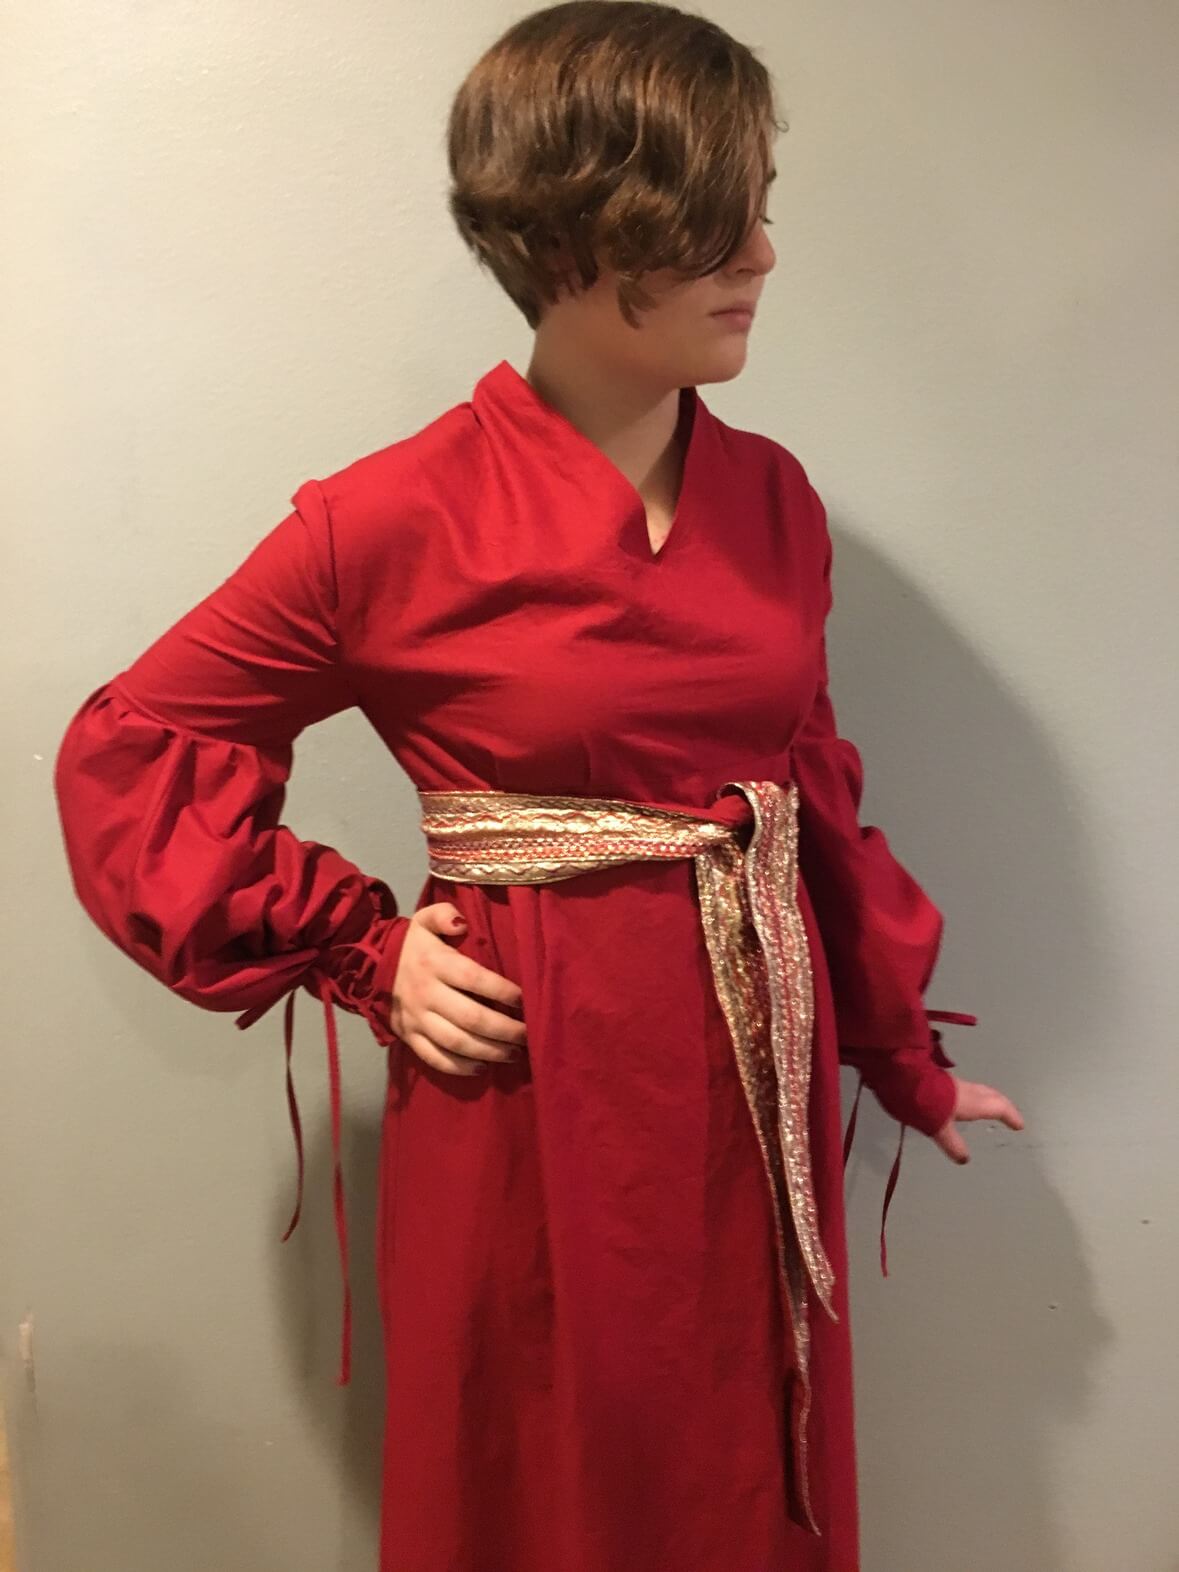
file_006-5

Here she is in the dress shortly after completion. I had to sew stitches at the back neckline, the back waist, and at each wrist to keep everything lined up nicely.
file_000-7

A blurry Buttercup and Wesley picture right before leaving for our party.


At the very end of the day on Halloween, she stretched her arm too far forward and got a tear on the seam line where the inset sleeve met the bodice (not much stretch room with this dress!). It was at the point that I realized in all the rush to finish the sleeve pleats, I forgot to reinforce the stitches around the arms and waist…. oops! Fortunately, it was along the seam and an easy fix.
file_008file_002

This dress was a lot of work…. and so worth it. Being able to make my daughter a costume that fit her perfectly was nice, but the SKILLS I gained along the way were the real reason behind me wanting to do this.

I’ve always been pretty brave about trying new skills and sewing techniques, but now I really do feel like I can figure out how to make anything I want. Sometimes you just have to jump in and TRY.

Happy Sewing! ~L


Color Play Friday: Imagine Children’s Museum

Hi Friends!  I hope all my American followers had a fabulous Thanksgiving! Like most, we enjoyed our day with family and food. In fact, I enjoyed my holiday weekend so much that I’m getting CPF to you two days late! Oops!

Color Play Friday is hosted by Trina from In An Otter Life and myself. If you’re new to Color Play Friday, head over to my Color Play Friday page to see the rules and my palettes and bundles from previous weeks. You can also search #colorplayfriday on Instagram to see lots of past palettes and bundles.

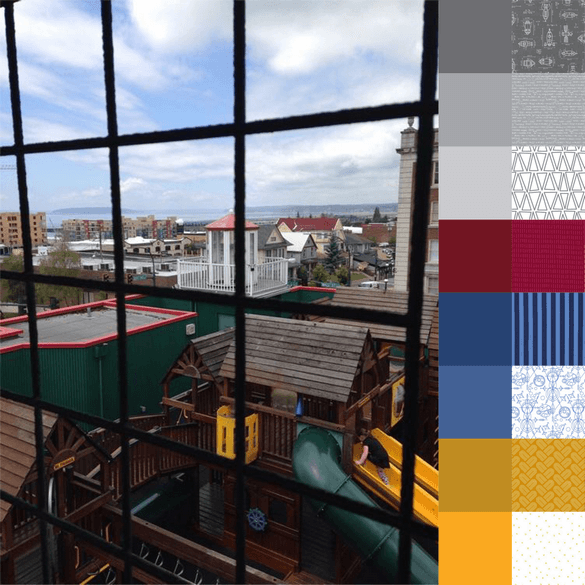
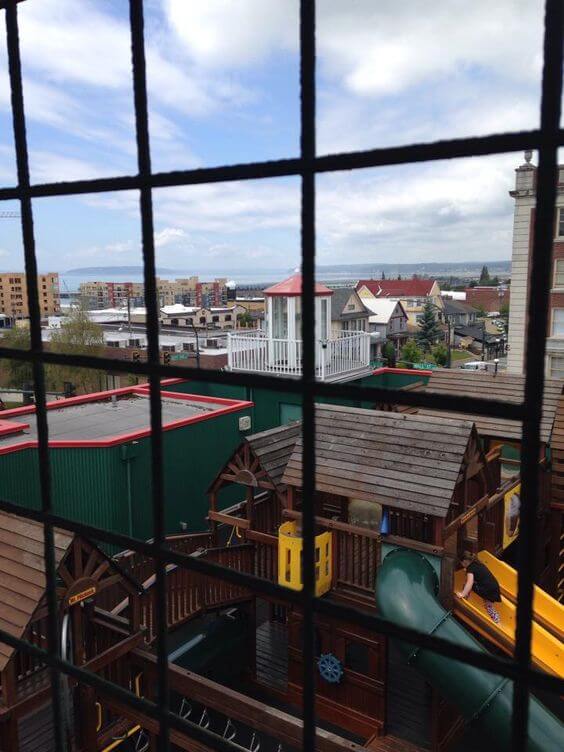
This picture is one of Trina’s, but was taken at a children’s museum that we went to all the time when my kids were young. We spent countless hours there dressing up, pretending to be farmers or vets, building, drawing, learning and discovering new things. This picture is of the rooftop playground. It as a great place to run off some energy.

Imagine Center Palette and Bundle.png


In keeping with the theme of discovery, I chose several science-inspired prints for my bundle.  I also chose to stick with primary colors and simple designs as a nod to the time in my life when I had preschoolers.

This week, I used the design Wall feature on Stash Fabrics. I love using that to put together a great bundle so quickly.


Here are the fabrics I chose:

Caleb Gray, Spaced Out, Rocket Schematics in Grey

Riley Blake Designs, Riley Blake Novelty, Chemistry Equation in Gray

Riley Blake Designs, Creative Rockstar, Rockstar Rhythm in Gray

Me + You, Indah Batiks, Stitches in Burgundy

Tula Pink, Tabby Road, Tent Stripe in Blue Bird

Alison Glass, Abacus, Mercury in Colbat

Rashida Coleman-Hale, Macrame, Braindy in Mango

Riley Blake Designs, Creative Rockstar, Rockstar Solo in Yellow


A note about scale:

  • While I believe scale is a very important part of fabric selection, the fabrics shown in my Color Play images are not always perfectly to scale. I do my best, by you should always double check scale before ordering!

Don’t forget to head over to the other blogs and see what they came up with! The fun of Color Play Friday is seeing the differences and similarities between everyone’s bundles.

Participants this week:

Laurel and Pine (that’s me!)

In An Otter Life

Shimmy and More

This is usually where I show you the photo for the following week, but Trina and I have decided to take the whole month of December off from Color Play Friday! We wil be taking the time to finish up Christmas projects, enjoy or families, and focus on other areas of our blogs and businesses.

I’m hoping to share with you in the next few weeks a bit of my Christmas sewing as well as catch up on showing you some projects I’ve completed.

Happy Sewing, ~L

Color Play Friday: Backyard Rest

Happy Friday, friends!

Color Play Friday is hosted by Trina from In An Otter Life and myself. If you’re new to Color Play Friday, head over to my Color Play Friday page to see the rules and my palettes and bundles from previous weeks. You can also search #colorplayfriday on Instagram to see lots of past palettes and bundles.

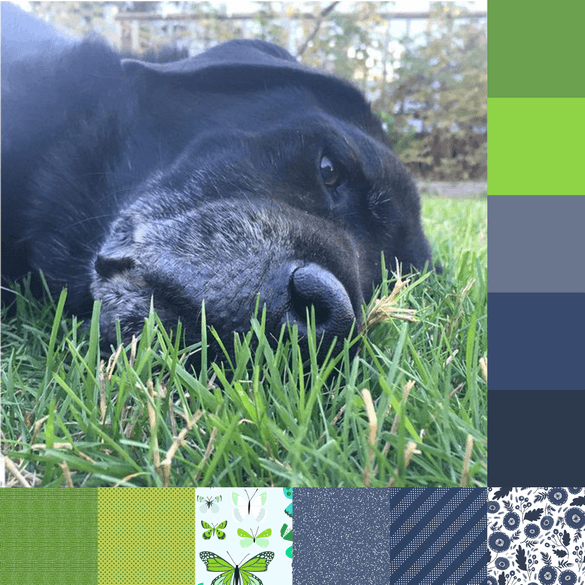
If you’ve been following my Instagram account for any length of time, you’ve seen this sweet face before. Ben is my faithful shadow and studio ‘assistant’. We adopted him from a shelter several years ago. He was skin and bones with all sorts of health issues, but -as you can see from this picture- with some TLC, he is now living the good life.

Backyard Rest Palette and Bundle.png

I loved the purplish blues of the sun reflecting on Ben’s fur, but also wanted to play with some of the bright greens I was seeing in the grass. I really like the resulting contrast.

Here are the fabrics I chose:

Cori Dantini, I Love Christmas, Seeds in Green

Cori Dantini, I Love Christmas, Check List in Green

Lizzy House, Natural History, Butterfly Box in Green

Hawthorne Threads, Celestial, Stardust in Midnight

Cotton and Steel Basics, Dottie in Jean Jacket

Rae Ritchie, Tea Party, China Floral in White


A note about scale:

  • While I believe scale is a very important part of fabric selection, the fabrics shown in my Color Play images are not always perfectly to scale. I do my best, by you should always double check scale before ordering!

Don’t forget to head over to the other blogs and see what they came up with! The fun of Color Play Friday is seeing the differences and similarities between everyone’s bundles.

Participants this week:

Laurel and Pine (that’s me!)

In An Otter Life

123 Quilt

538372b44cbf761570c03e0b26d9744c

Are you enjoying Color Play Friday? We’d love for you to get in on the fun and create your own Color Play post! You can create a bundle of fabric, select yarns or embroidery threads, or create a project inspired by our photo. Be sure to let Trina or I know so we can link up to you. You can get in contact with us at colorplayfriday@gmail.com

I hope you can join us next week!

Happy Sewing, ~L