Remember a back in May when I encouraged you to ‘see the future’ and embrace the creative possibility in the everyday things around you?
I showed you this…
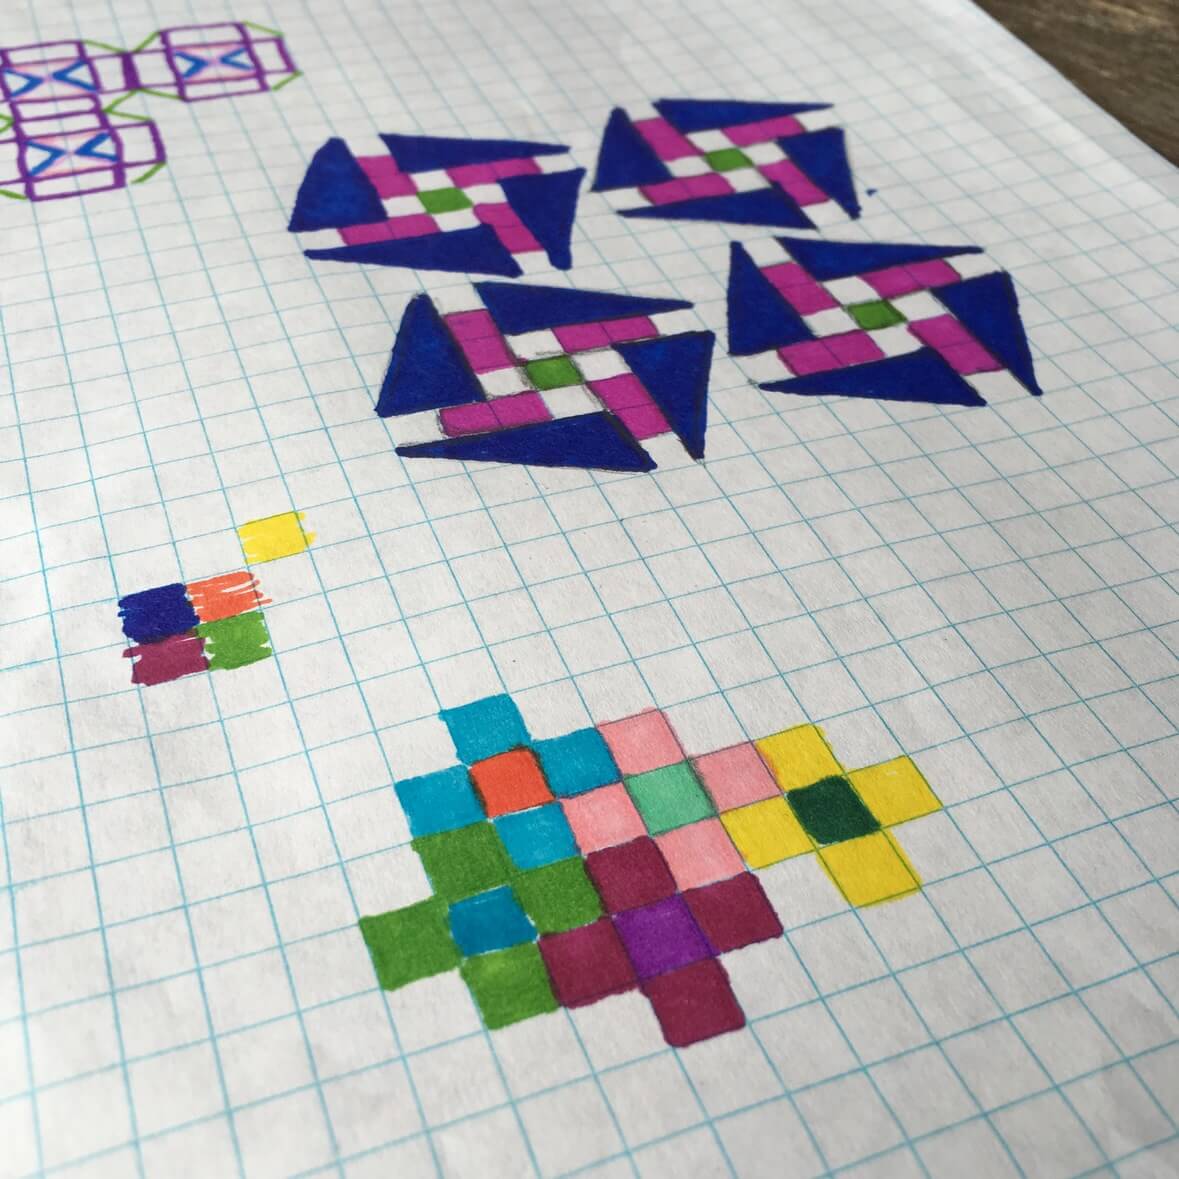
…some graph paper doodles of my daughter’s that got me thinking of a new quilt design. (I should note that I did get her permission before designing a quilt based on her drawings!)
Today, I’m thrilled to say that those doodles have become a block -aptly named Lauren’s Doodle Block- that will be appearing in the 2017 Quilter’s Planner.
If you didn’t get yourself a Quilter’s Planner in 2016, let me just tell you- the thing is amazing! This is not just a regular planner with calendar, to-do lists, etc. In there, you also get project planning pages, full quilt patterns from AMAZING designers, quilting reference pages, lots of doodling space, and a new block every week from members of the awesome online quilting community.
I’m so happy to be a part of that group this year!
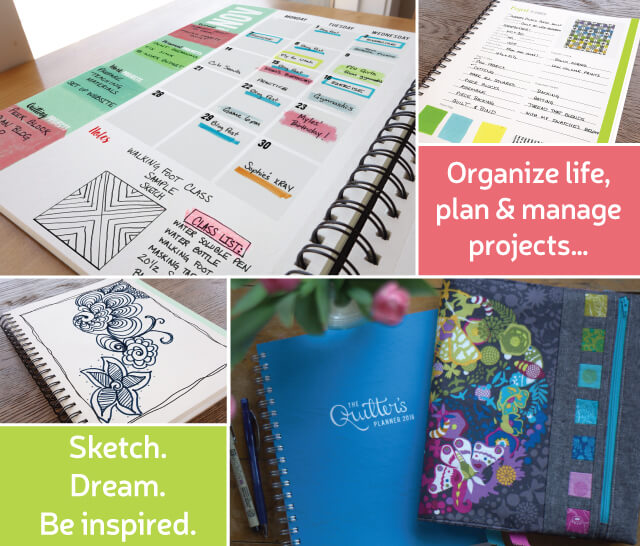
To learn more and to get on the mailing list for info about the 2017 Quilter’s Planner, visit quiltersplanner.com
So, let’s get to the block, shall we?
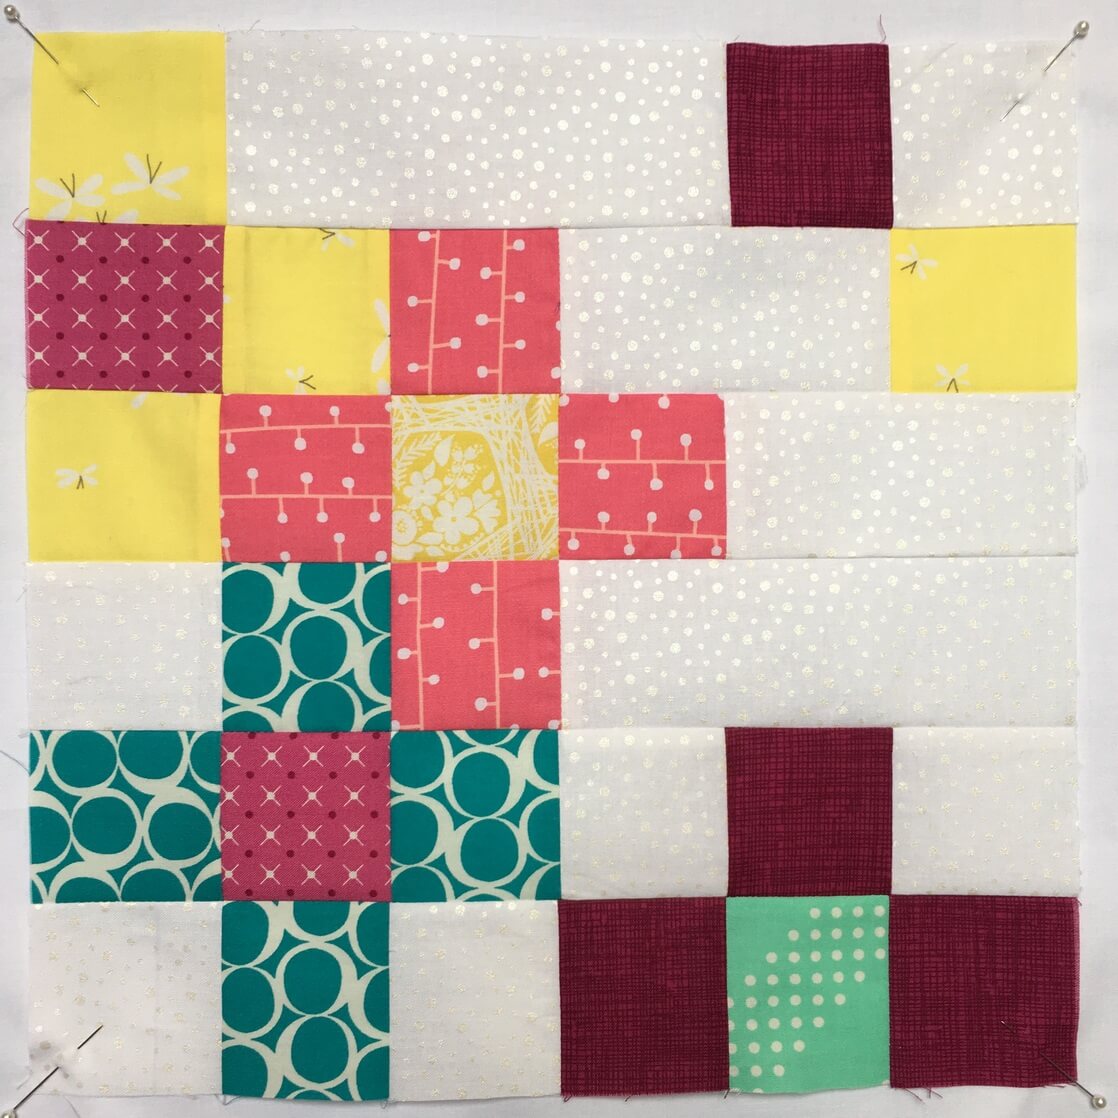
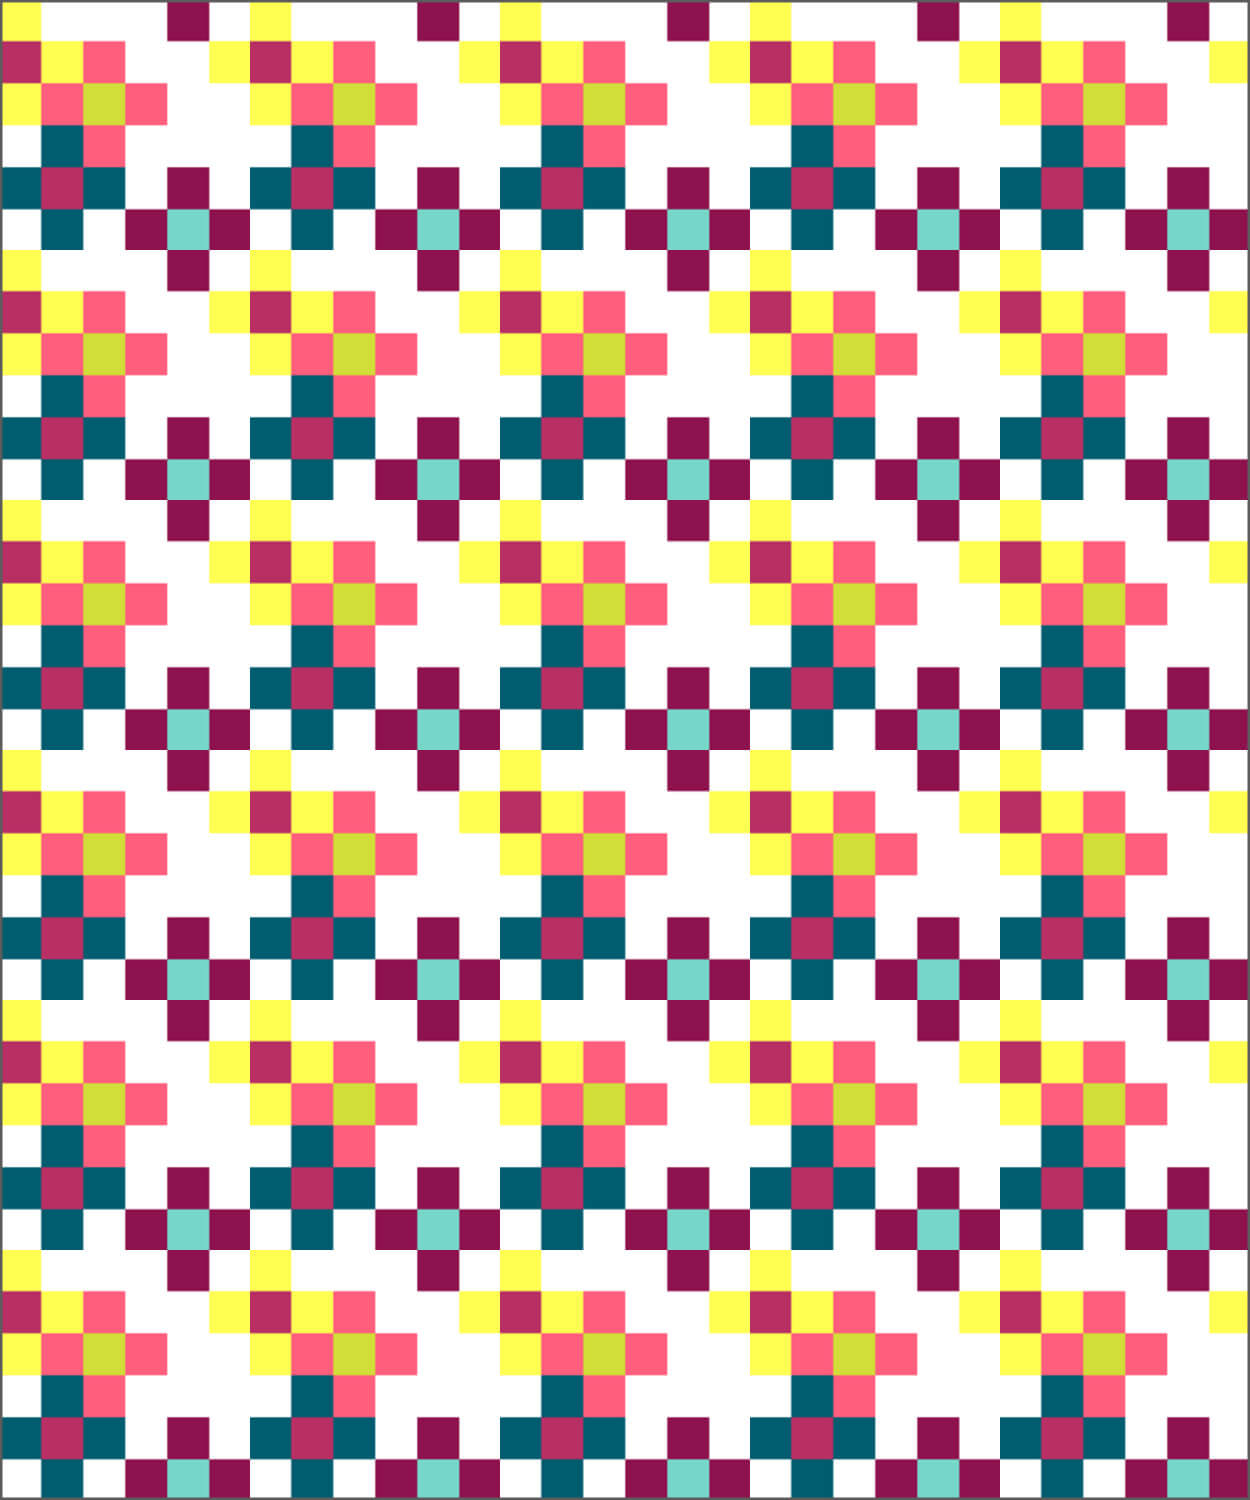
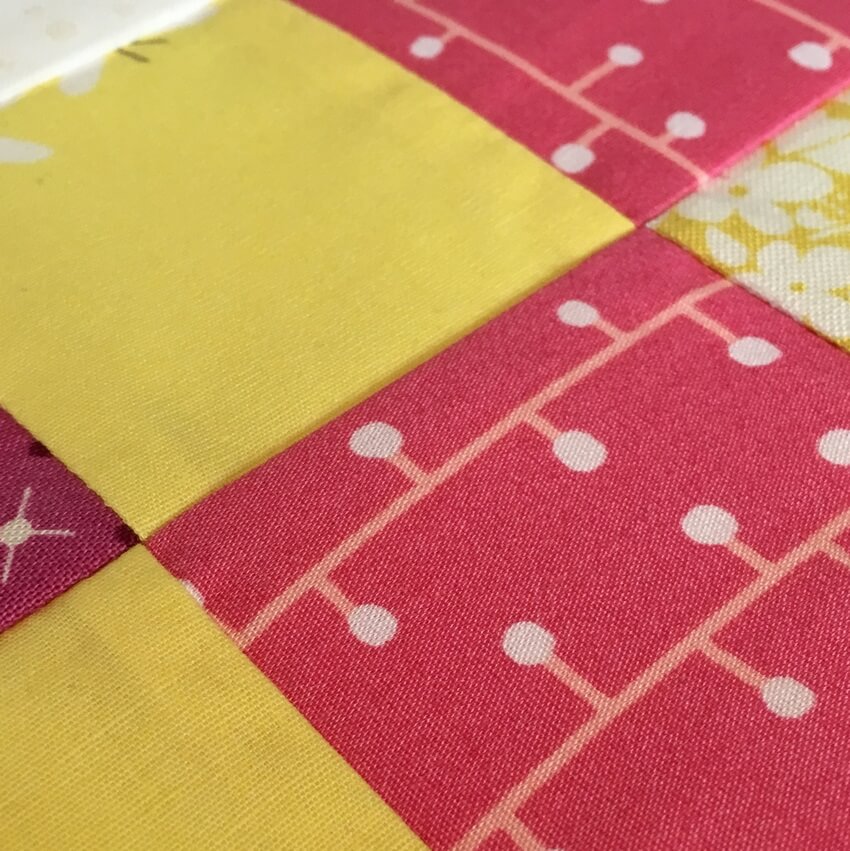
The magic in Lauren’s Doodle Block happens when you repeat the block and start to see all those plus signs come together. Here are nine blocks set into a 3×3 grid. This would make a perfect 36″ square baby quilt.
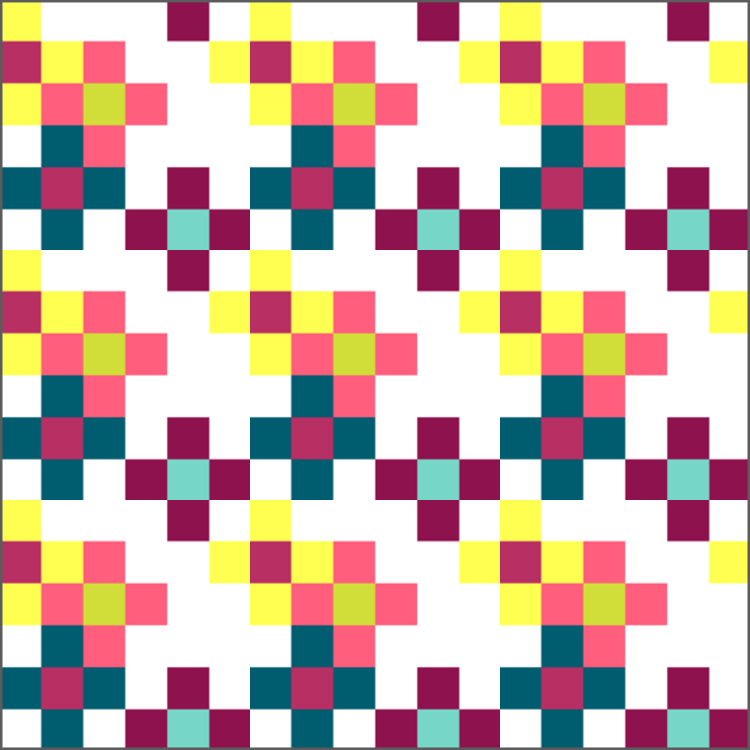
Or you could go for a lap quilt with a 5×6 block layout.
I’ll let you decide on a quilt size yourself, but here’s what you’ll need for one block:
The finished block will measure 12.5 inches.
From fabrics A, B, C and D
(4) 2.5″ squares of each
From fabrics E and F
(1) 2.5″ squares of each
From fabric G
(2) 2.5″ squares
From Fabric H
(6) 2.5″ squares
(2) 2.5″ x 6.5″ rectangles
(2) 2.5″ x 4.5″ rectangles
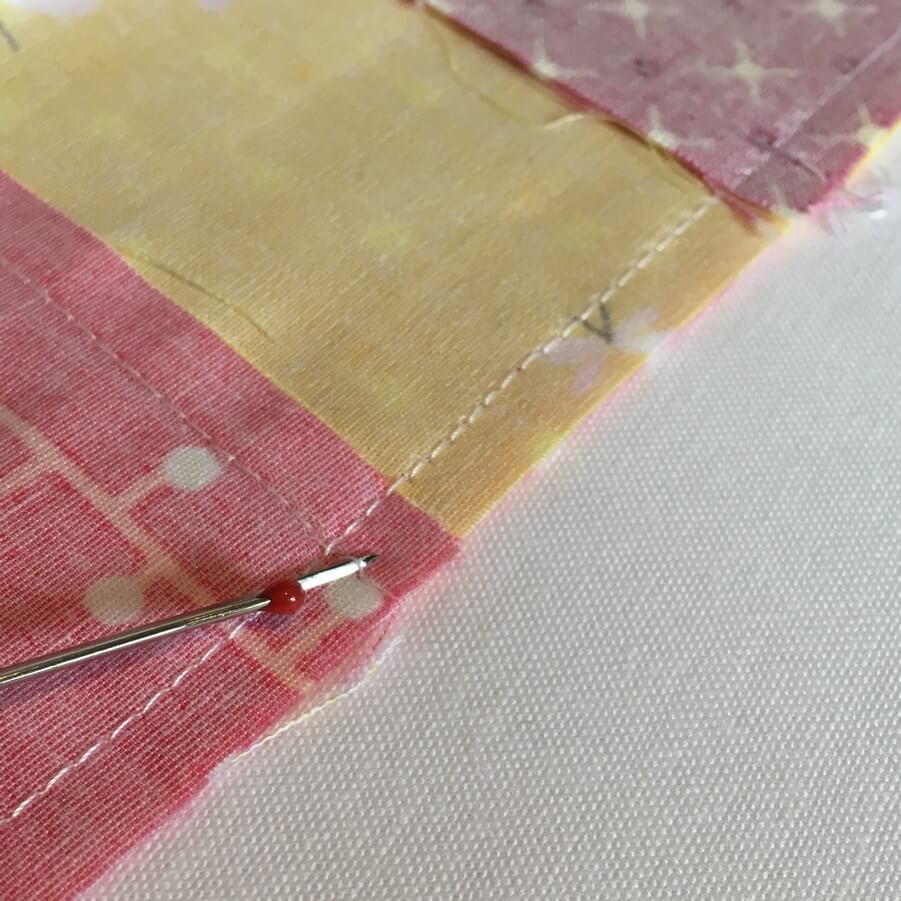
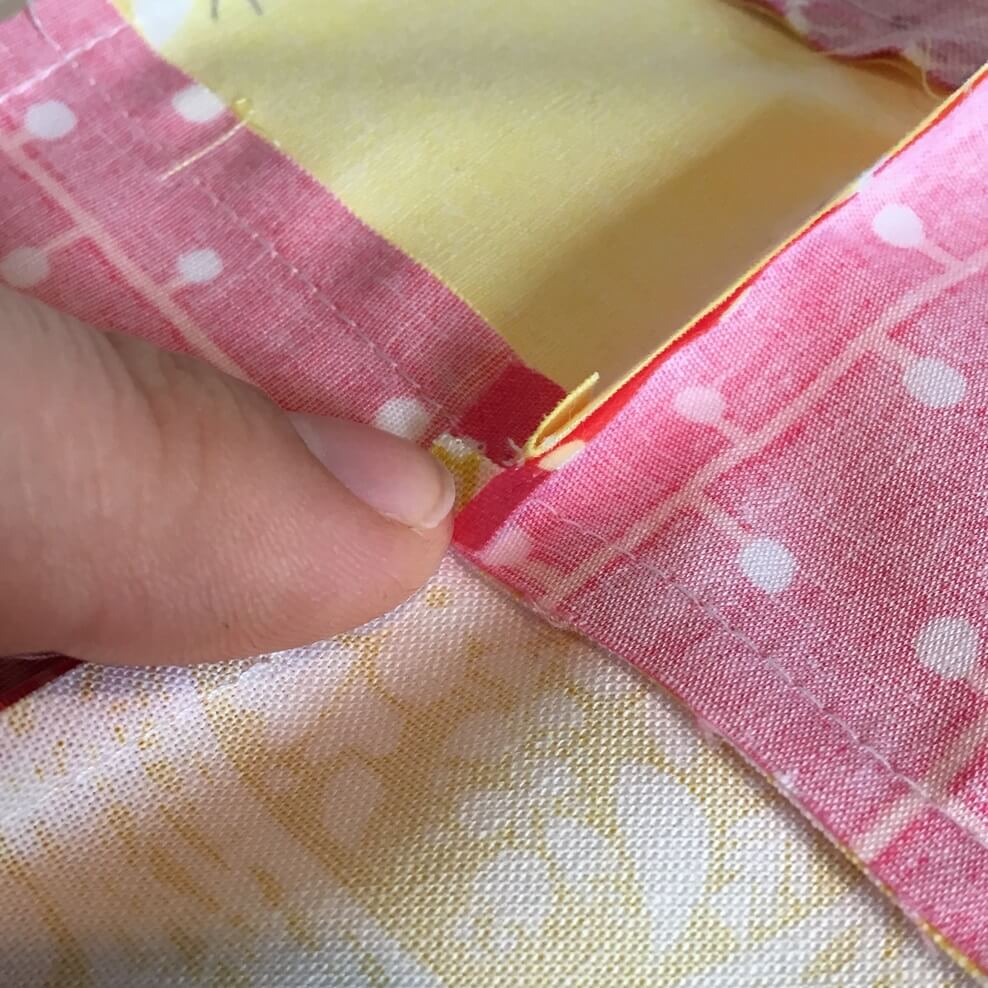
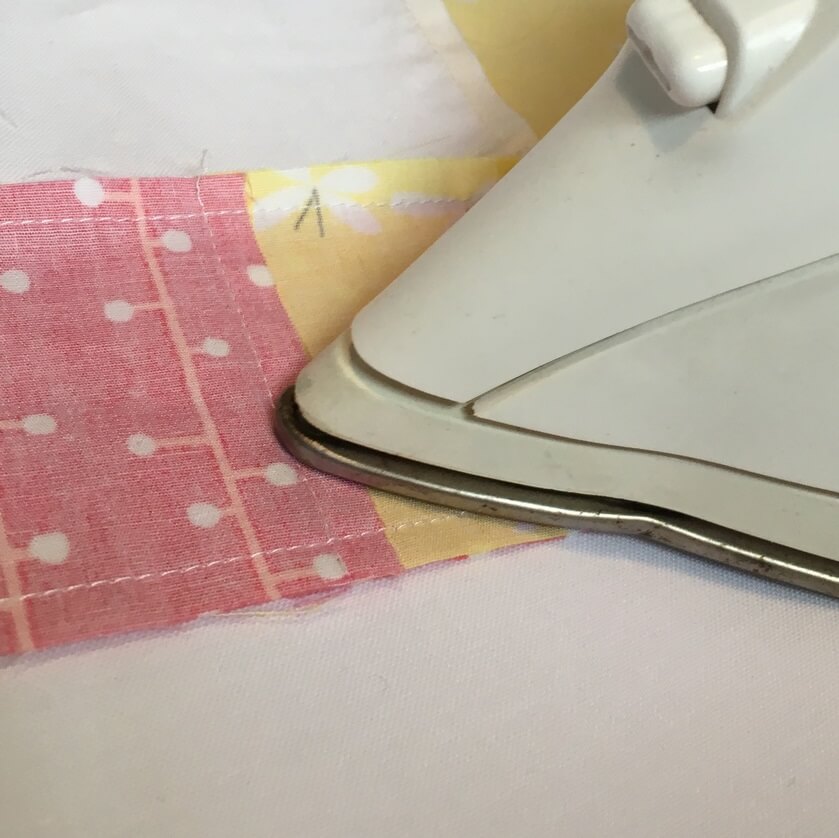
Using a scant quarter inch seam, assemble rows as shown in diagram, pressing as indicated by arrows.
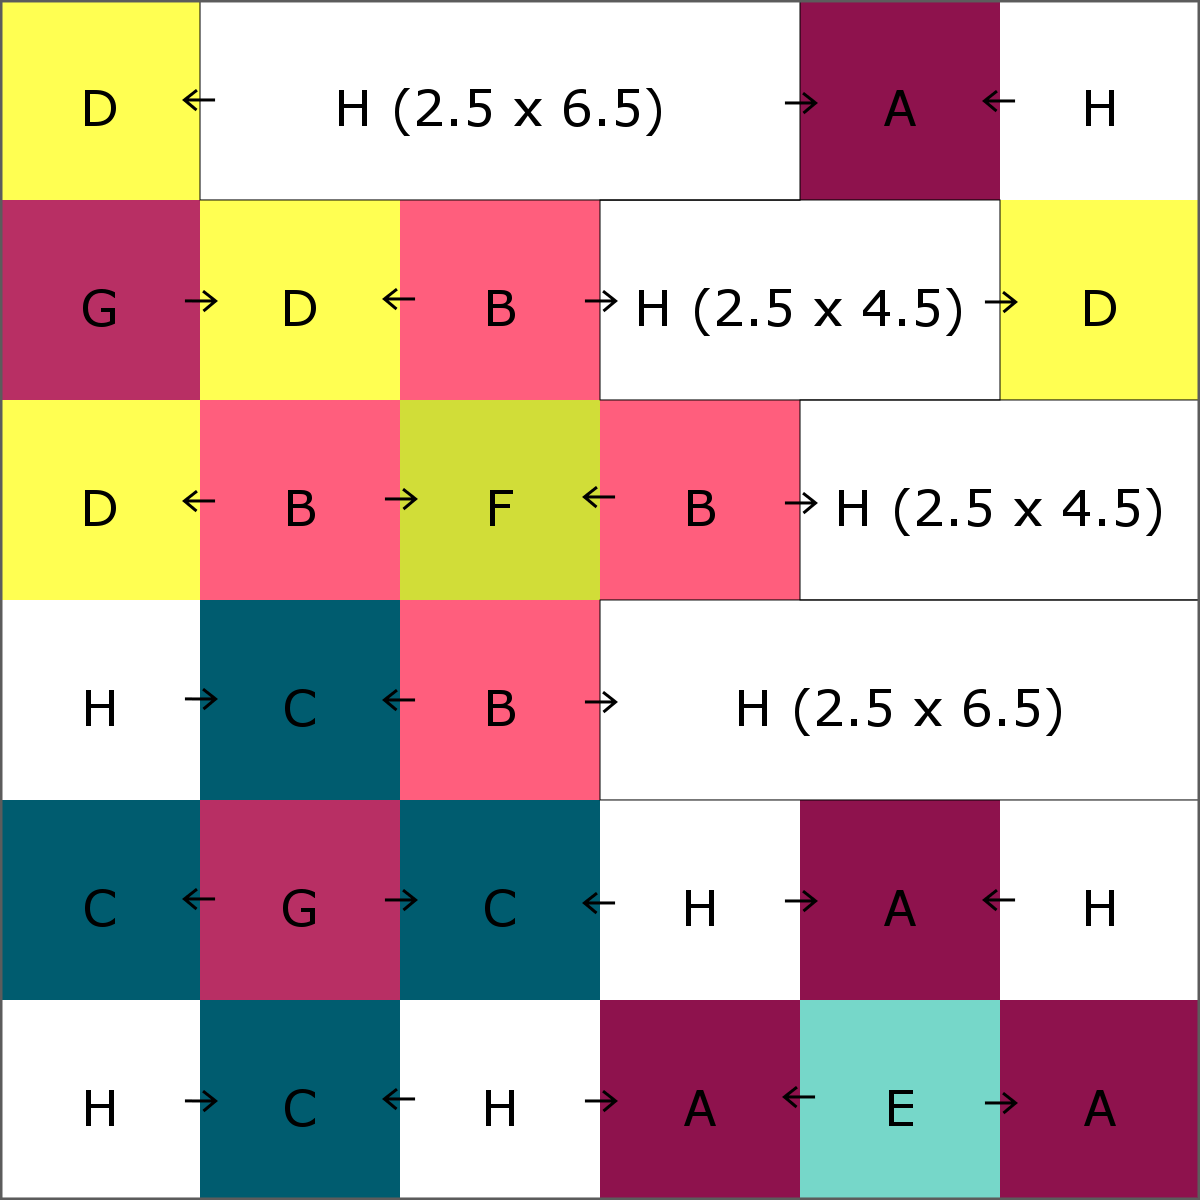
Sew rows together, nestling seams to line up points. Press open, spinning seams wherever possible.
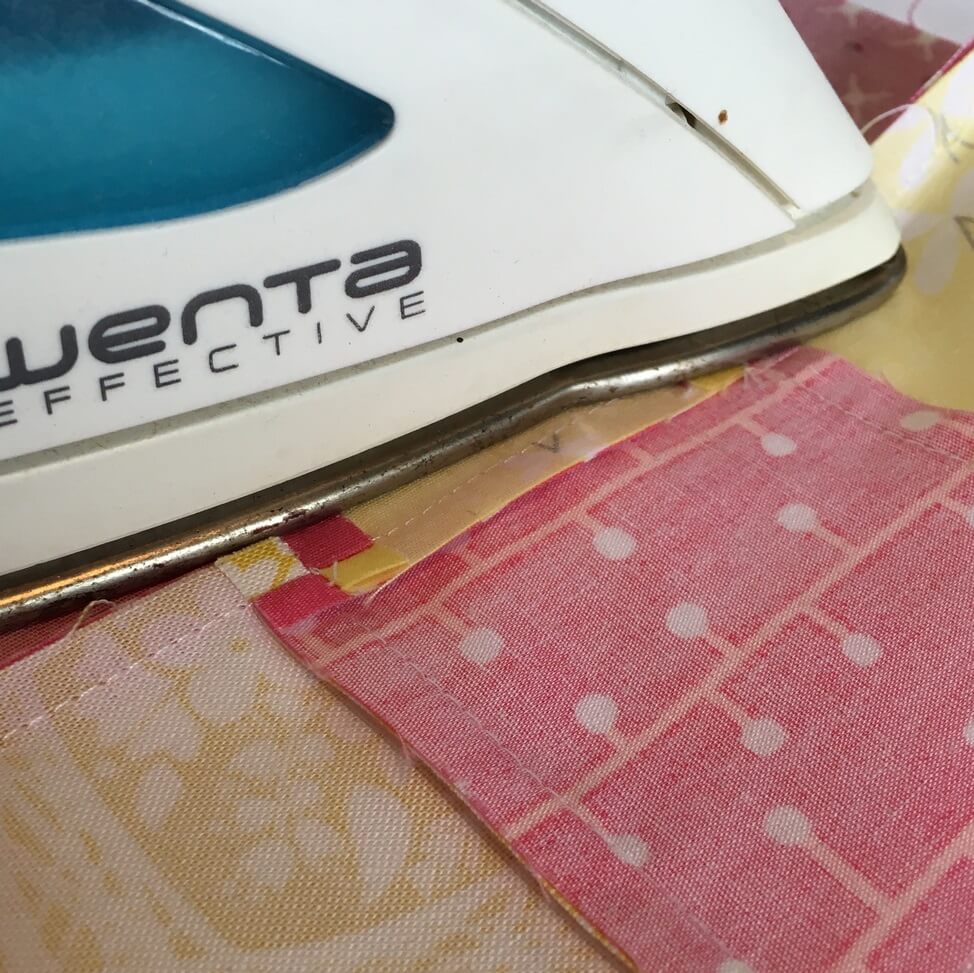
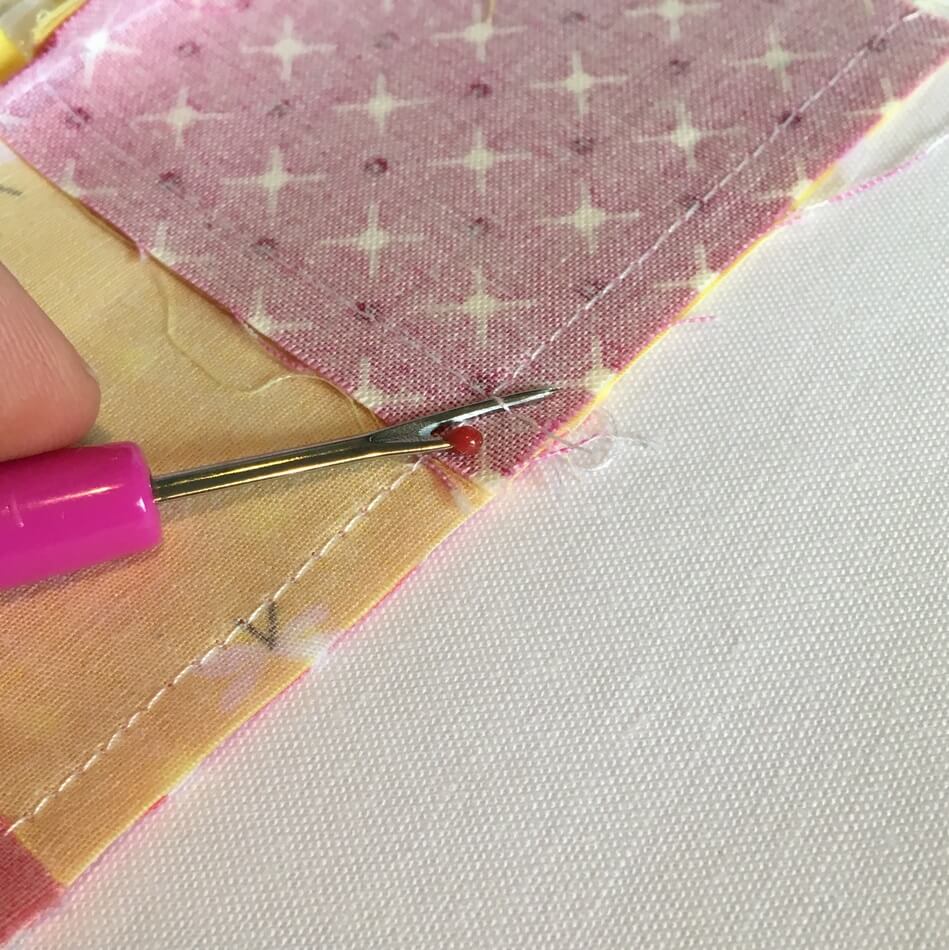
To spin seams:
Press seam to set. Cut the 2-3 stitches that are in the seam allowance. Start to finger press the seam, spinning the seam allowance in the direction the nestled seams are already pressed. Press seam from back of the block, then front.
And I figured while I was making one block, I might as well make eight more and get a baby quilt out of the deal!

Here are the fabric requirements for the 36″ square baby quilt shown here:
Fabrics A, B, C, and D
1 FQ or quarter yard
Fabrics E, F and G
Scraps or 5″ x WOF
Fabric H
3/4 yard
I hope you enjoy the block, and I’d love it if you tagged me on Instagram (@laurelpoppyandpine) if you make one!
Happy Sewing! ~L

Oh wow! I love this. Can’t believe that’s just 8 blocks in the baby quilt. Bet your daughter loves this! Hoping to treat myself to a quilters planner this year!!
LikeLike
Thank you so much for contributing to the Quilter’s Planner this year!! I love this block – we all need more blocks like this in our life!! Thanks, Lorinda!
LikeLiked by 1 person
Oh this is just lovely – so glad it became reality! I have some doodles of my girls that I keep for this same reason but they haven’t materialised into being yet!
LikeLike
I’m glad you like it, Abigail! You really should get those doodles made into something quilty!
LikeLike