Author: Lorinda Davis

I’m a sewist, designer and sewing instructor living in the beautiful Pacific Northwest. If you have any questions, would like to commission a one-of-a-kind quilt, or are local and would like to set up lessons, please email me at laurelpoppyandpine@outlook.com

Finished Quilt: Scrappy Kayak Point

Way back when, before I ever made the cover quilt for my Kayak Point pattern, I made up a sample using some scraps from my studio. The colors of this quilt reminded me of summer heat, beach days and creamsicles. They just make me so happy!

I quilted this on the long arm at work using Aurifil 2515. The purpley/pink color over the white really added a lot of fun to the top. I stippled in the white space and outlined the little ‘kayak’ shapes. I wasn’t super accurate on my outlining, but I’m still learning and decided to extend myself some grace!


I will be gifting this quilt, and because I think it will get a lot of washing, I decided to machine bind it. I’ve been working on using my quarter inch foot to help me machine bind with more accuracy. I’ll eventually write a post if I can perfect the technique!

Happy Sewing!

~L

Finished Quilt: Arrowhead

You may remember that earlier this year I participated in a Blog Hop to celebrate the release of Turnabout Patchwork by Teresa Down Under. I had so much fun making that quilt top, but never got around to finishing the quilt… until now!


I played with a palette of blues and purples from my stash and then added the chartreuse for a fun contrast. This year, I’ve been slowly learning to use a long arm (more on that in another post!) and I am having so much fun with it. I wanted the quilting on this really open and simple, so I did a wide stipple only inside the purple and blue portions, leaving the chartreuse unquilted.


I have a friend having TWINS (yay!), so this quilt will be set aside for her in case it fits her palette. Otherwise, you’ll be seeing a couple more baby quilts from me soon!

Happy Sewing! ~L

How-To: Back-to-School Book Bag

I love this time of year. Foggy mornings, cool nights, apple spice…

After the wonderful chaos of summer play and lack of scheduling, fall is the time to get back on a routine. Days in the sun make way for lovely evenings filled with family time, crafts, and reading.

There is something so nostalgic about fall. Call me crazy, but going back-to-school was one of my favorite things as a kid.

The excitement of a new start.

New school supplies.

And lots and lots of books from the library carried in my favorite book bag.

Remember book bags?

I loved my book bag when I was little. A little tote to carry all my books around everywhere I went? Perfection!

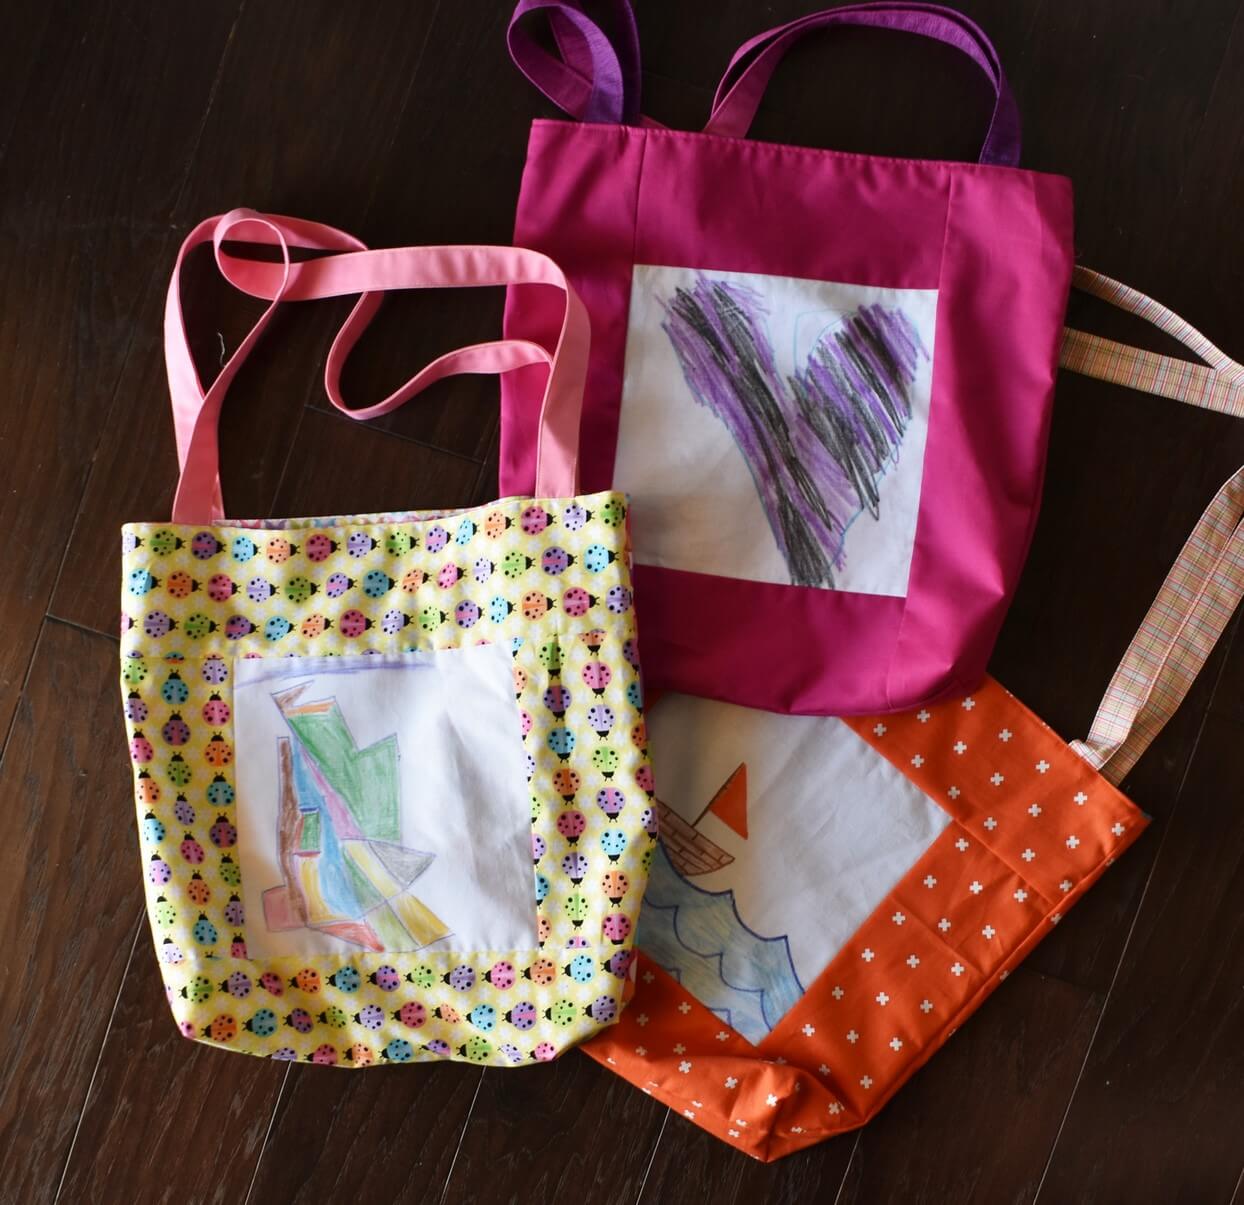
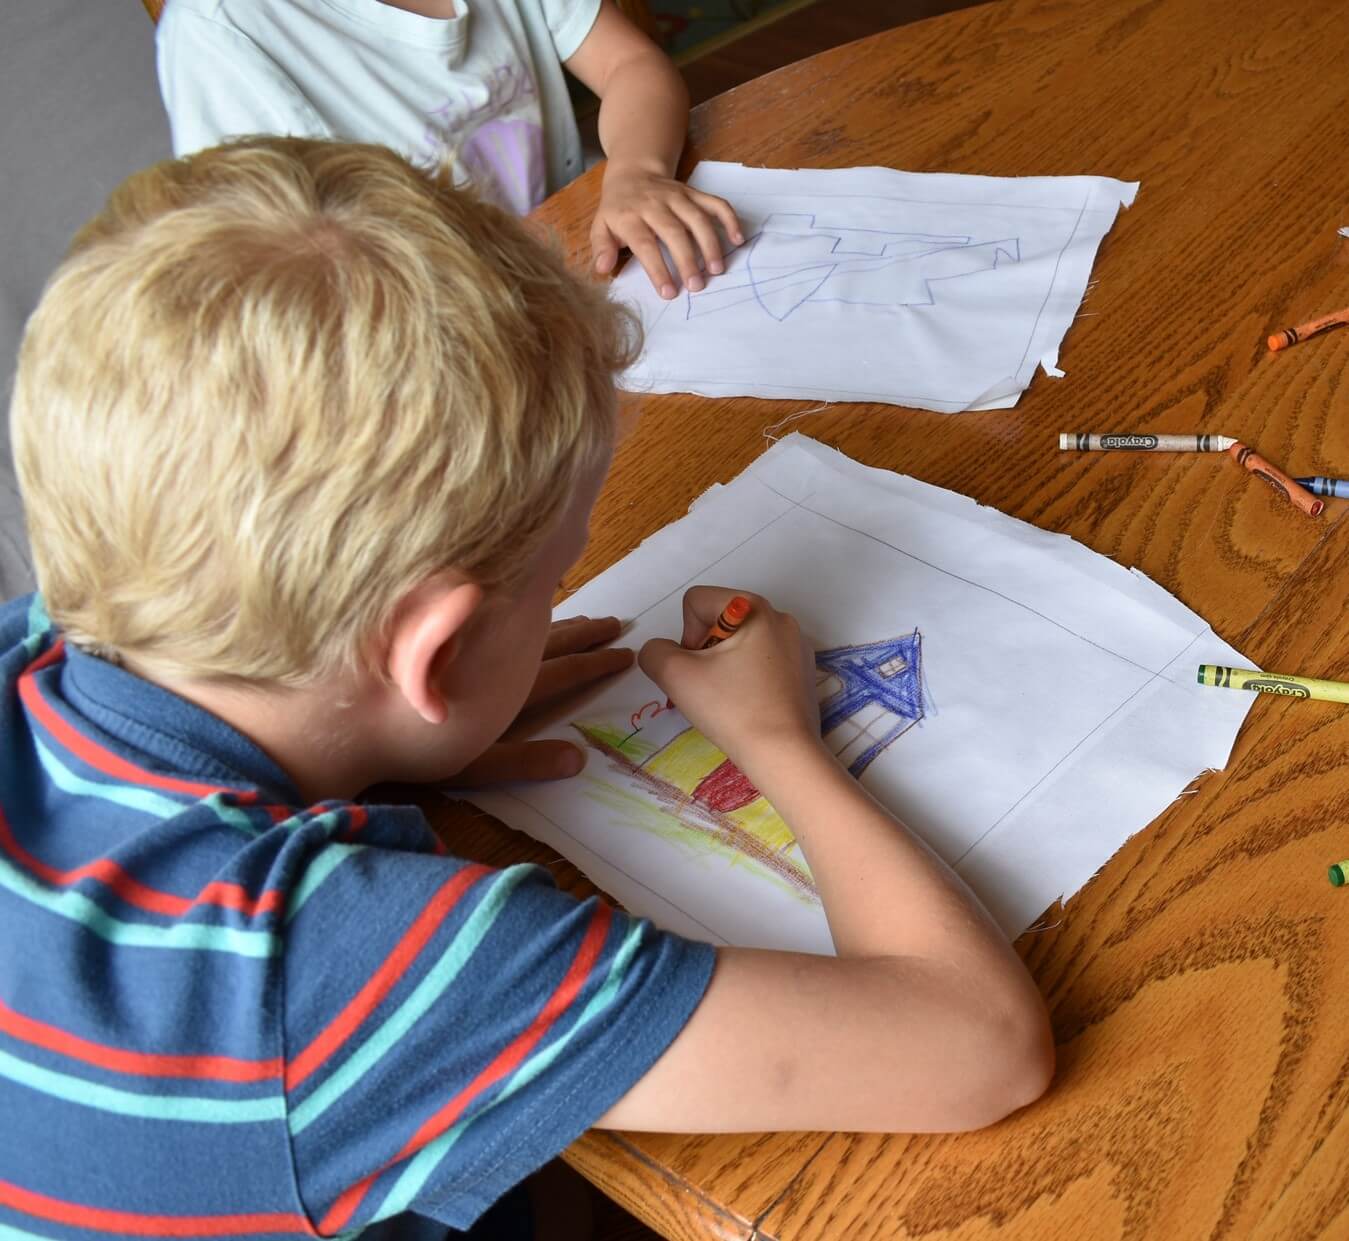
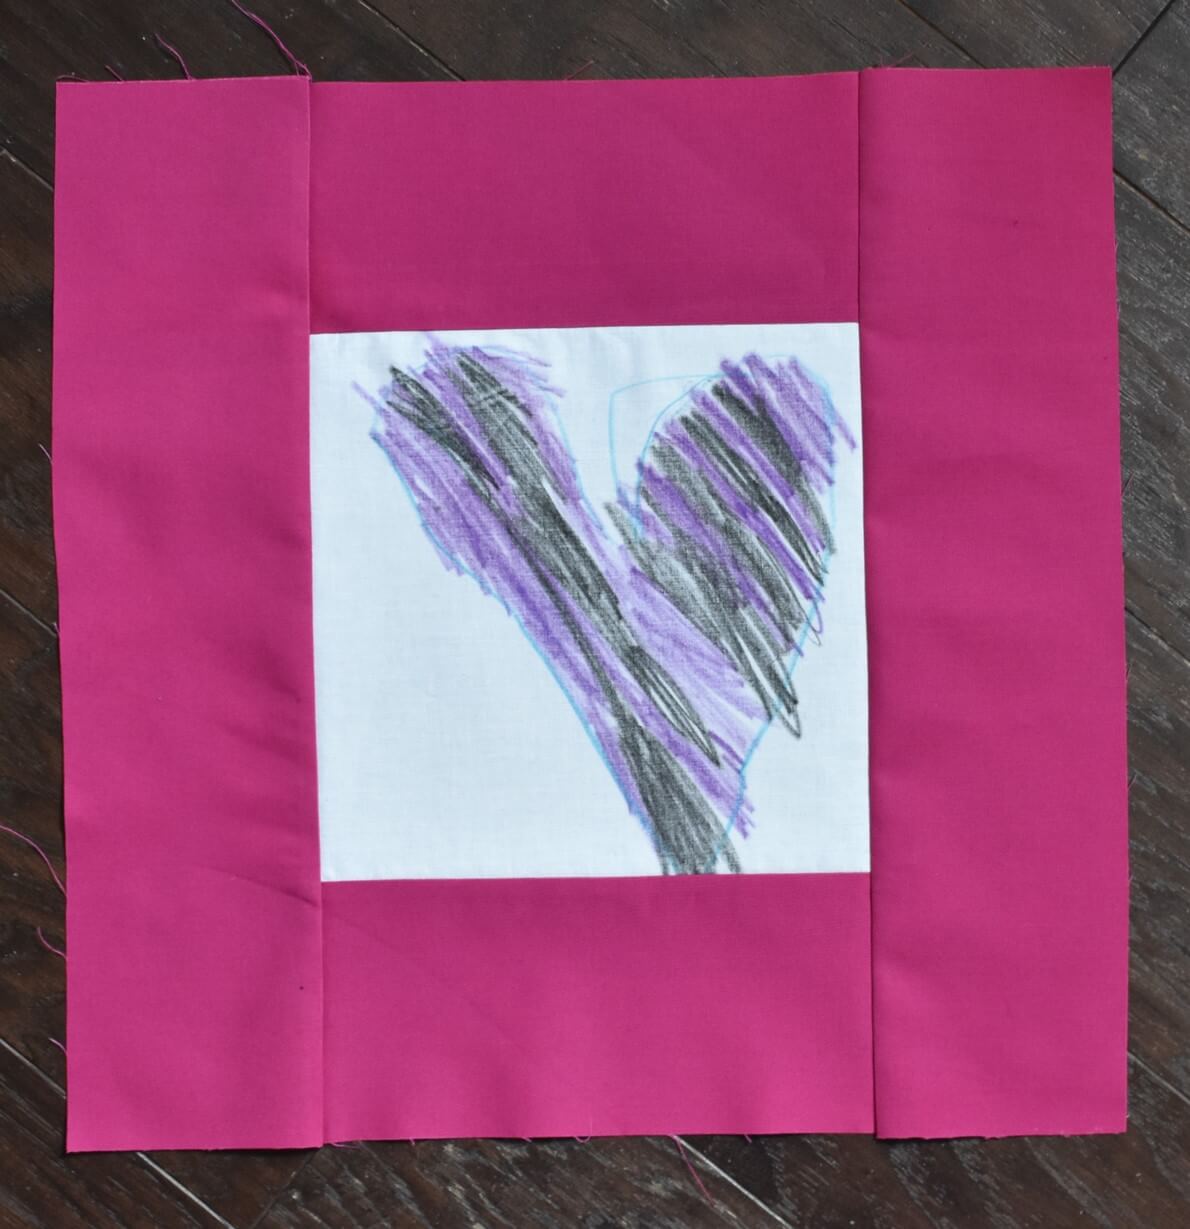
Since the onset of fall has me feeling nostalgic, I decided to make some sewn book bags for a friend’s kids. There are seven children in her family and they home school, so you can imagine that there are plenty of books in their world! And for a little extra fun, I decided the bags should be personalized, so I let each of them color their own picture for the front panel of the bag.

If you have little ones in your world who might like a fun tote that they get to customize, read on to find out how!


Making the colored panel:

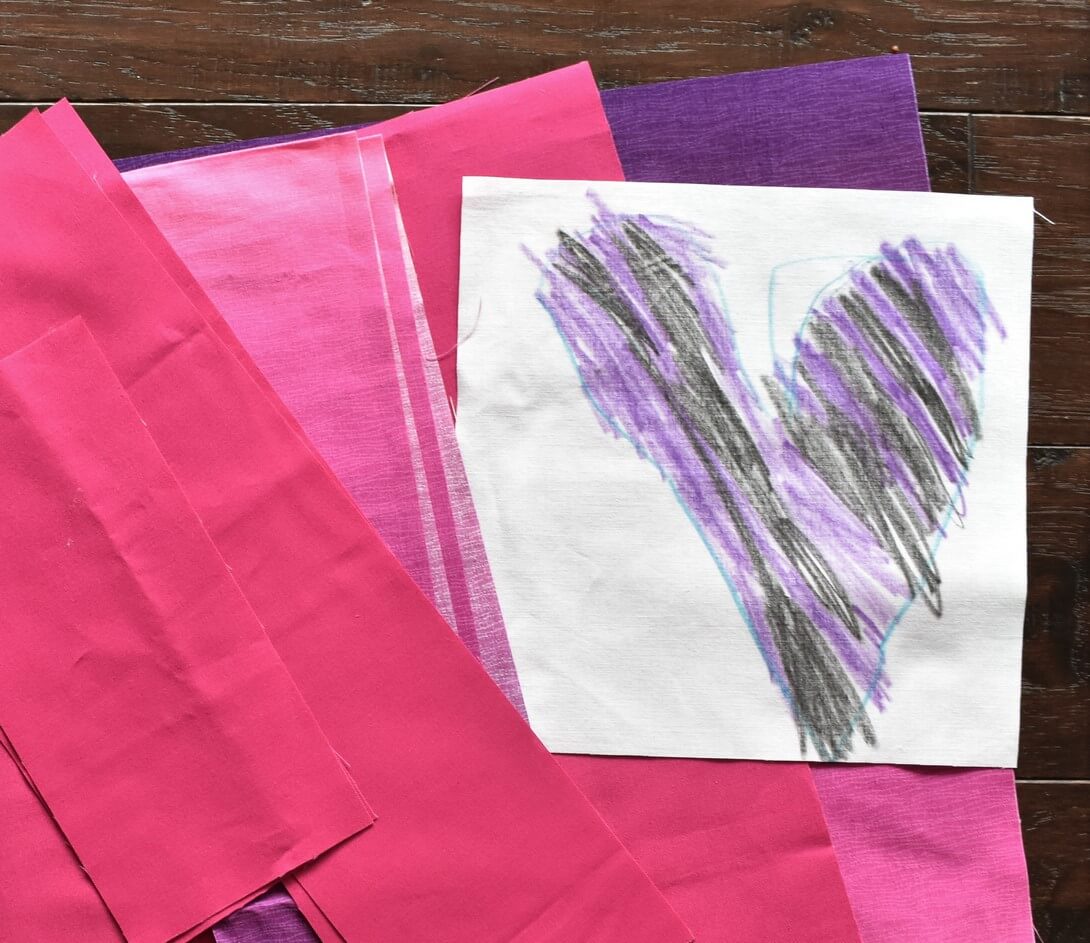
 Making the colored panels for this project is so easy and so much fun!

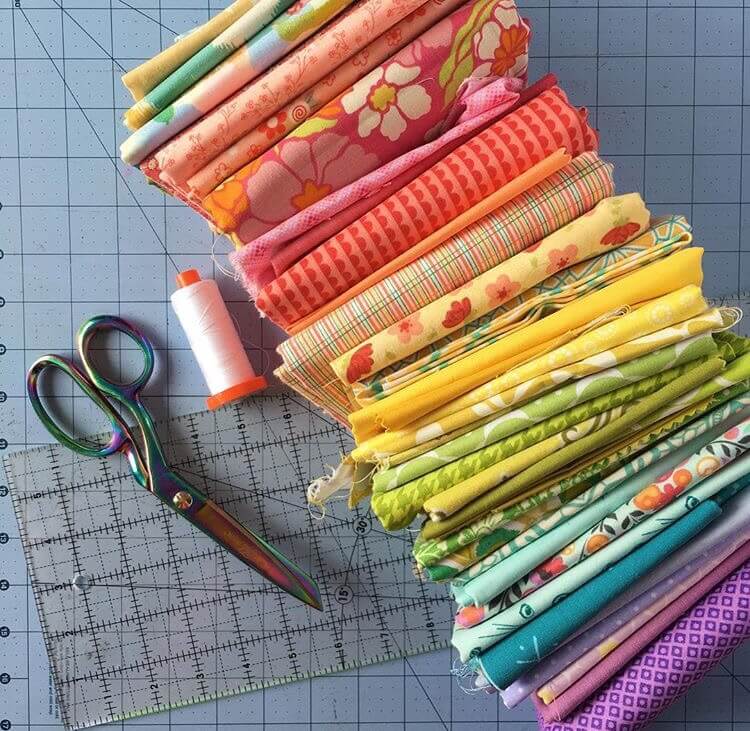
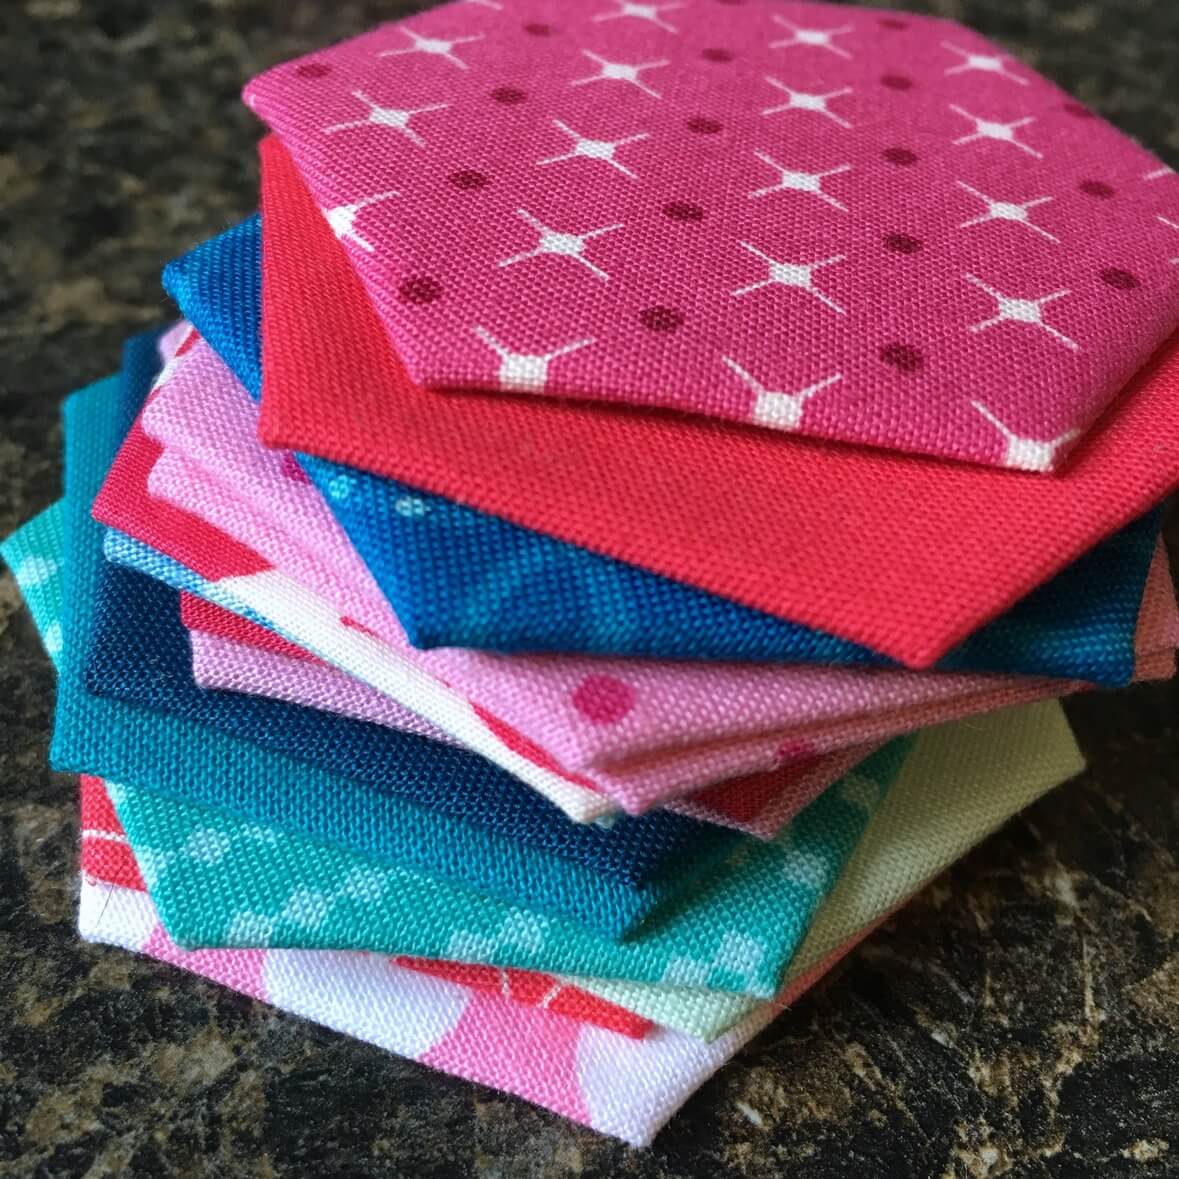
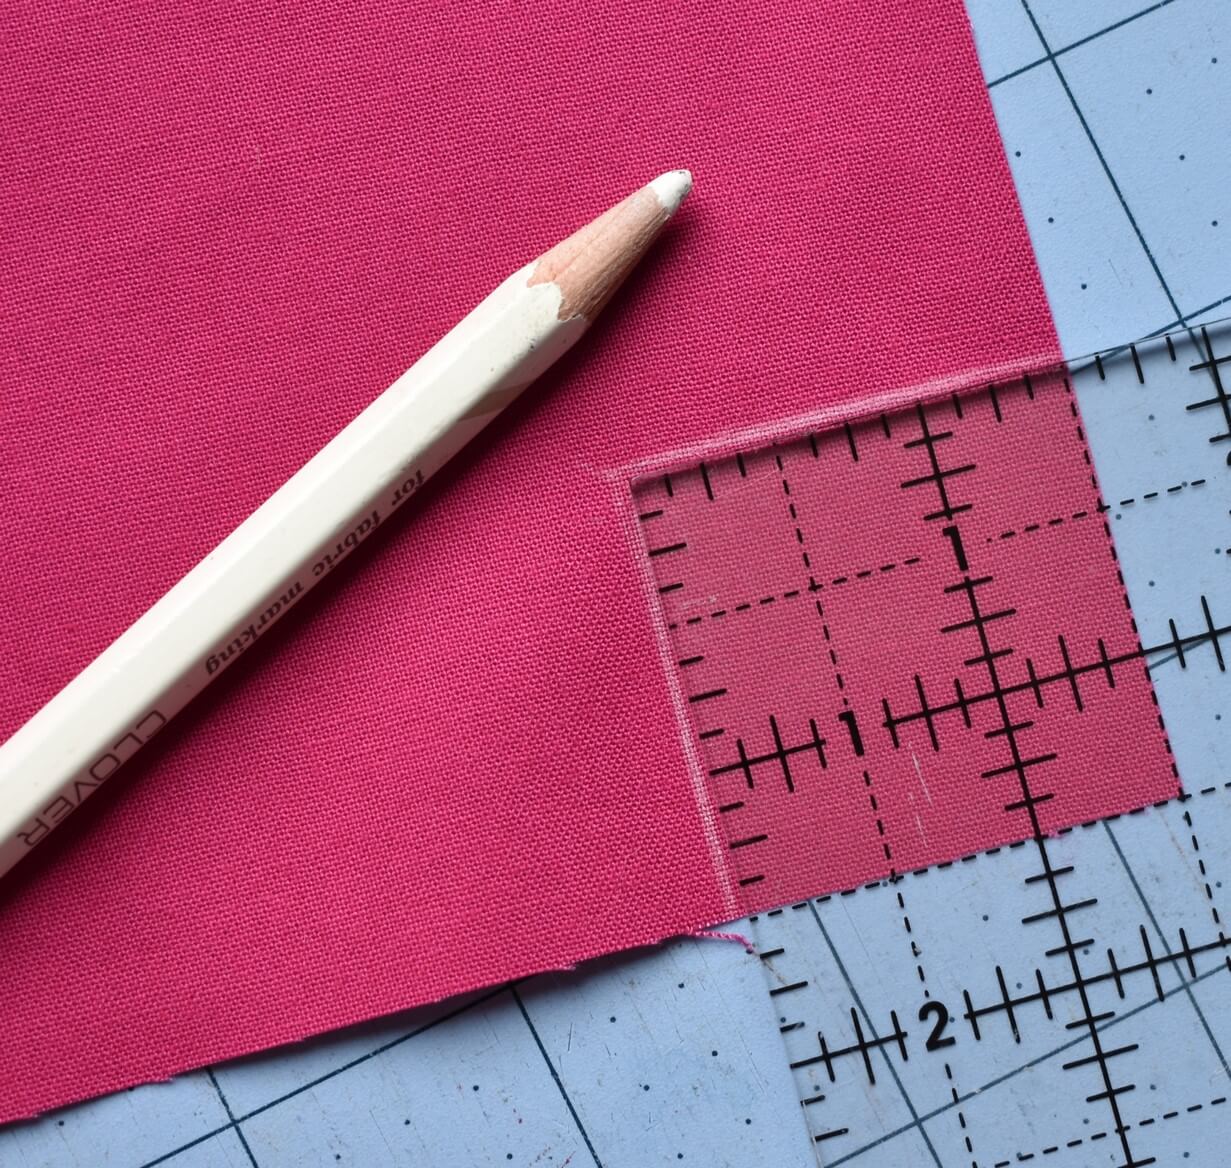
 Cut white fabric and freezer paper slightly larger than the intended cut size of your panel (in our bag, that will be an 8 ½” x 8 ½” square). Press the shiny side of the freezer paper to the wrong side of the fabric. Outline the area you will be cutting and tell whoever is coloring the panel to stay within those lines. Keep your seam allowance in mind and make sure they don’t put important details of their picture within that seam allowance.

Now the fun begins! Let your little ones color to their heart’s content! Encourage them to press hard with their crayons to get lots of vivid color on their panels.

Once the coloring is done, remove the freezer paper. Put several layers of paper towels on your ironing surface before laying your colored panel face down. Place another paper towel on top of your colored panel to protect your iron. With your iron on the ‘Cotton’ setting, firmly press your panel to melt the crayon wax.

The wax of the crayon will transfer onto the paper towels leaving the crayon’s color in your fabric. Keep putting new paper towels under your panel until there is no more wax or color transferring to them.

Trim up your panel to the specified cut dimensions in your pattern. For us, that’s  an 8 ½” x 8 ½” square

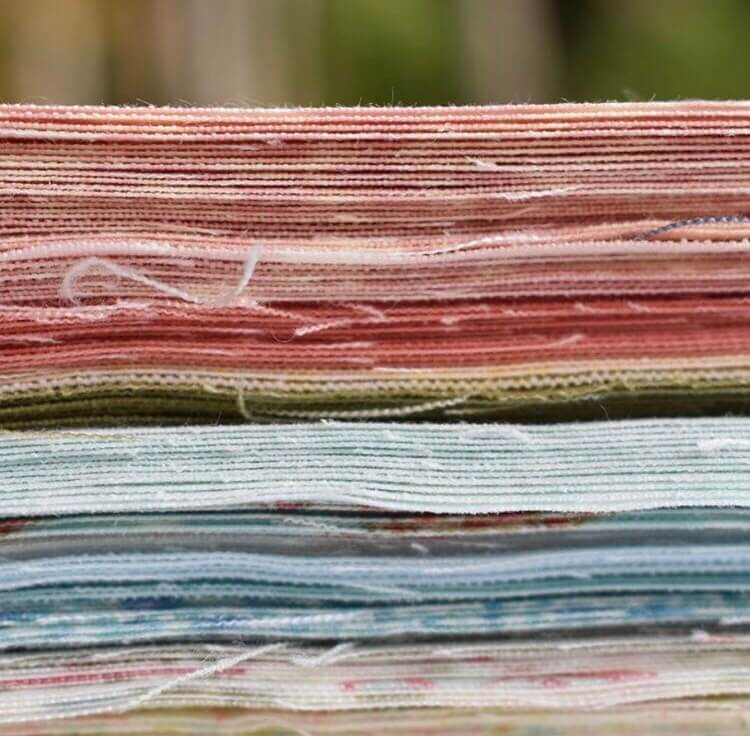
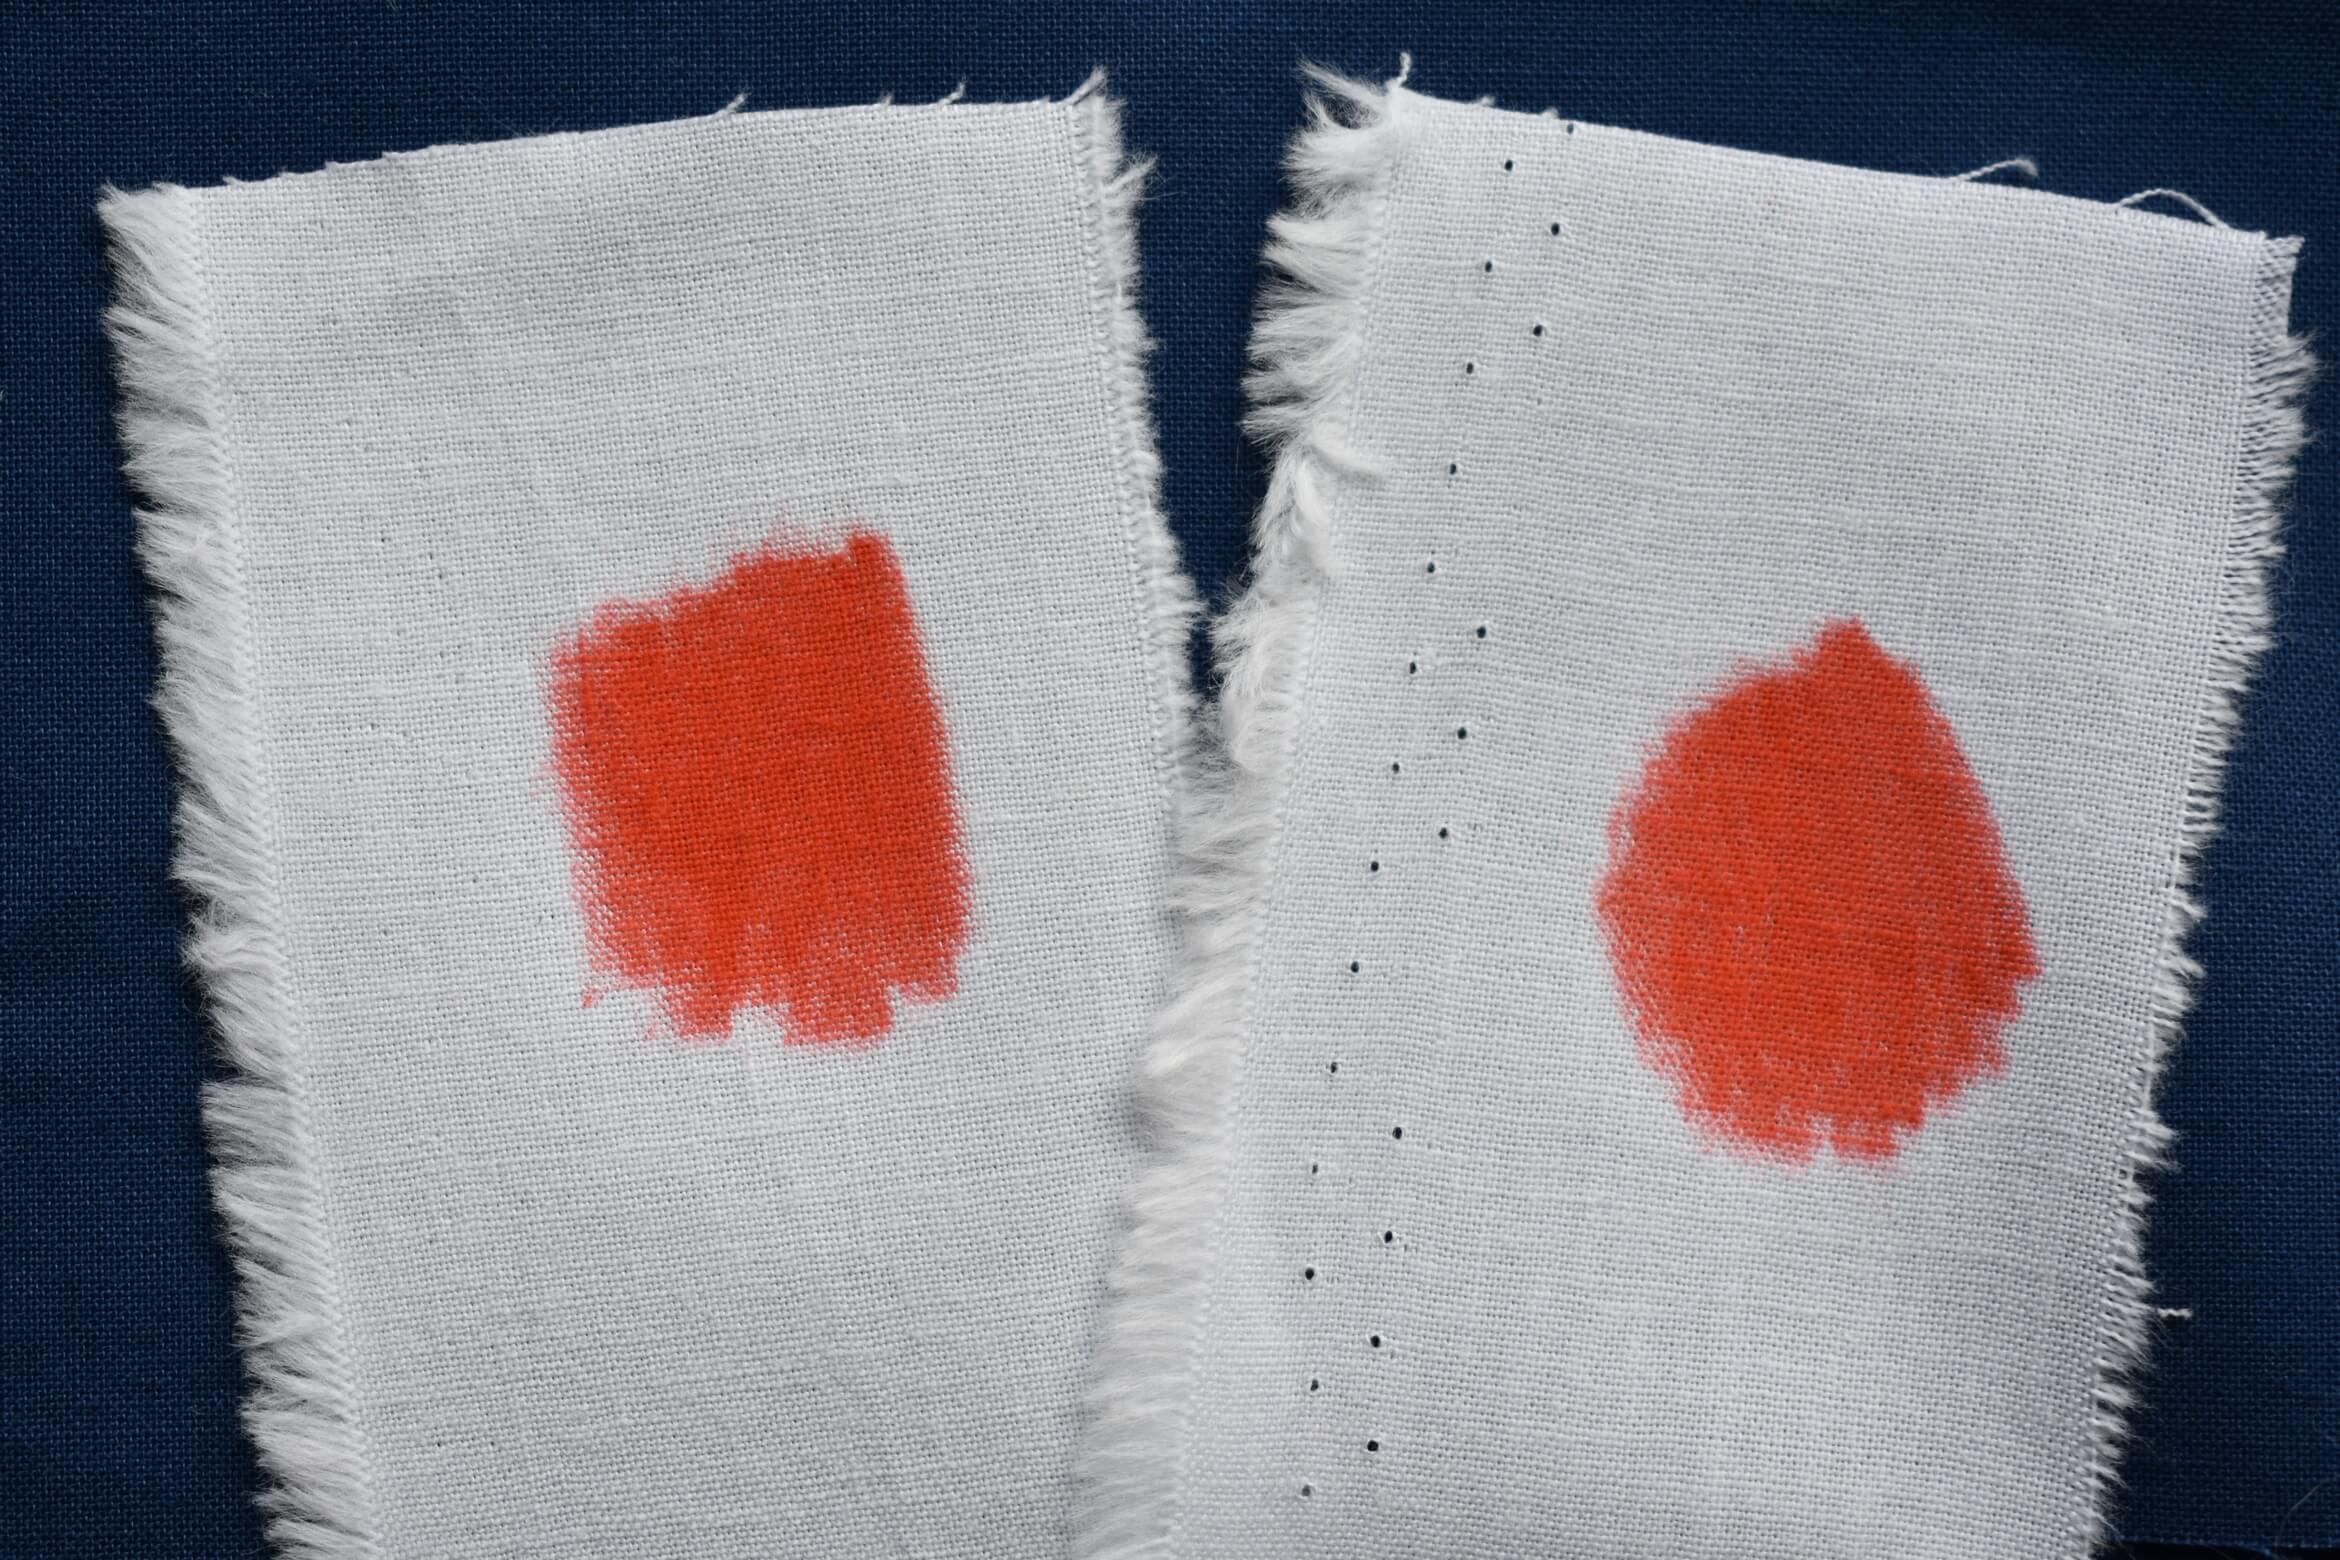
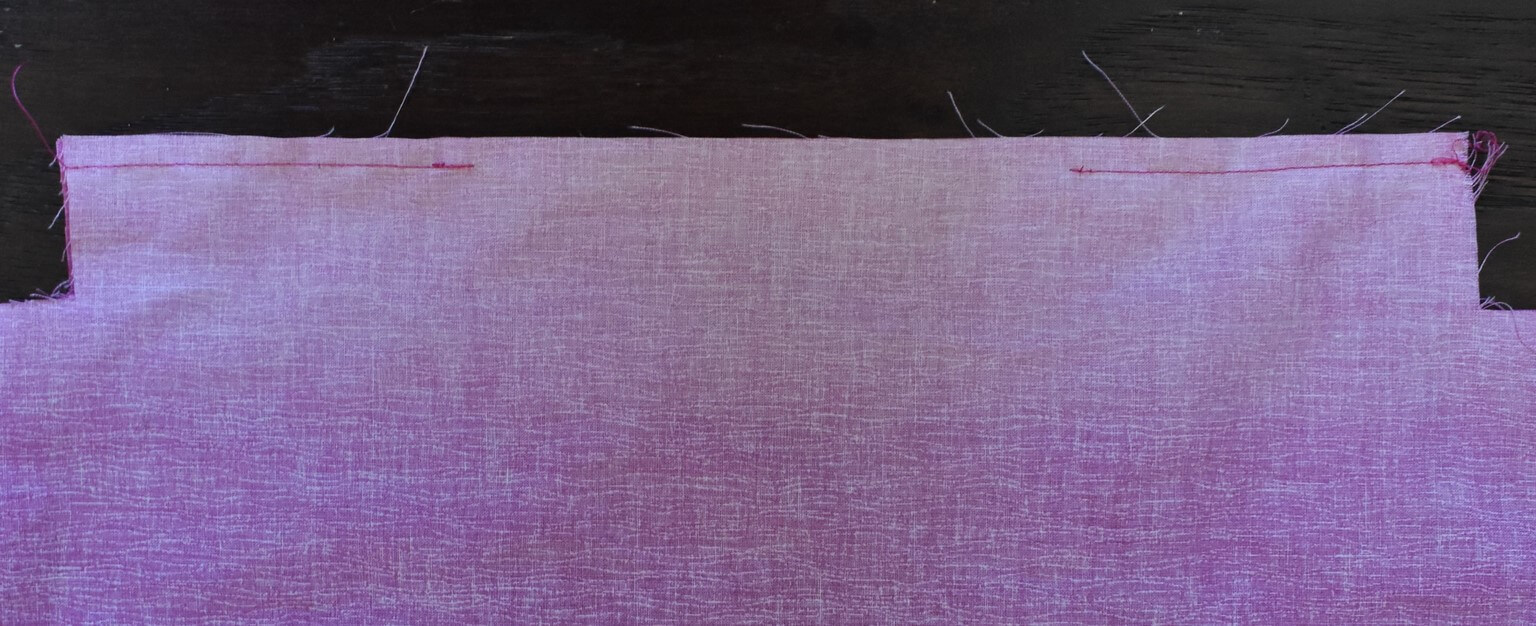
Note: Many people choose to pre-wash their fabric to fully prepare it to take in the color from the crayons. I did a test swatch both pre-washed and unwashed. The unwashed swatch (on the right) did lose just a little more color on the ironing step, so if you want really vivid color, pre-washing is best.
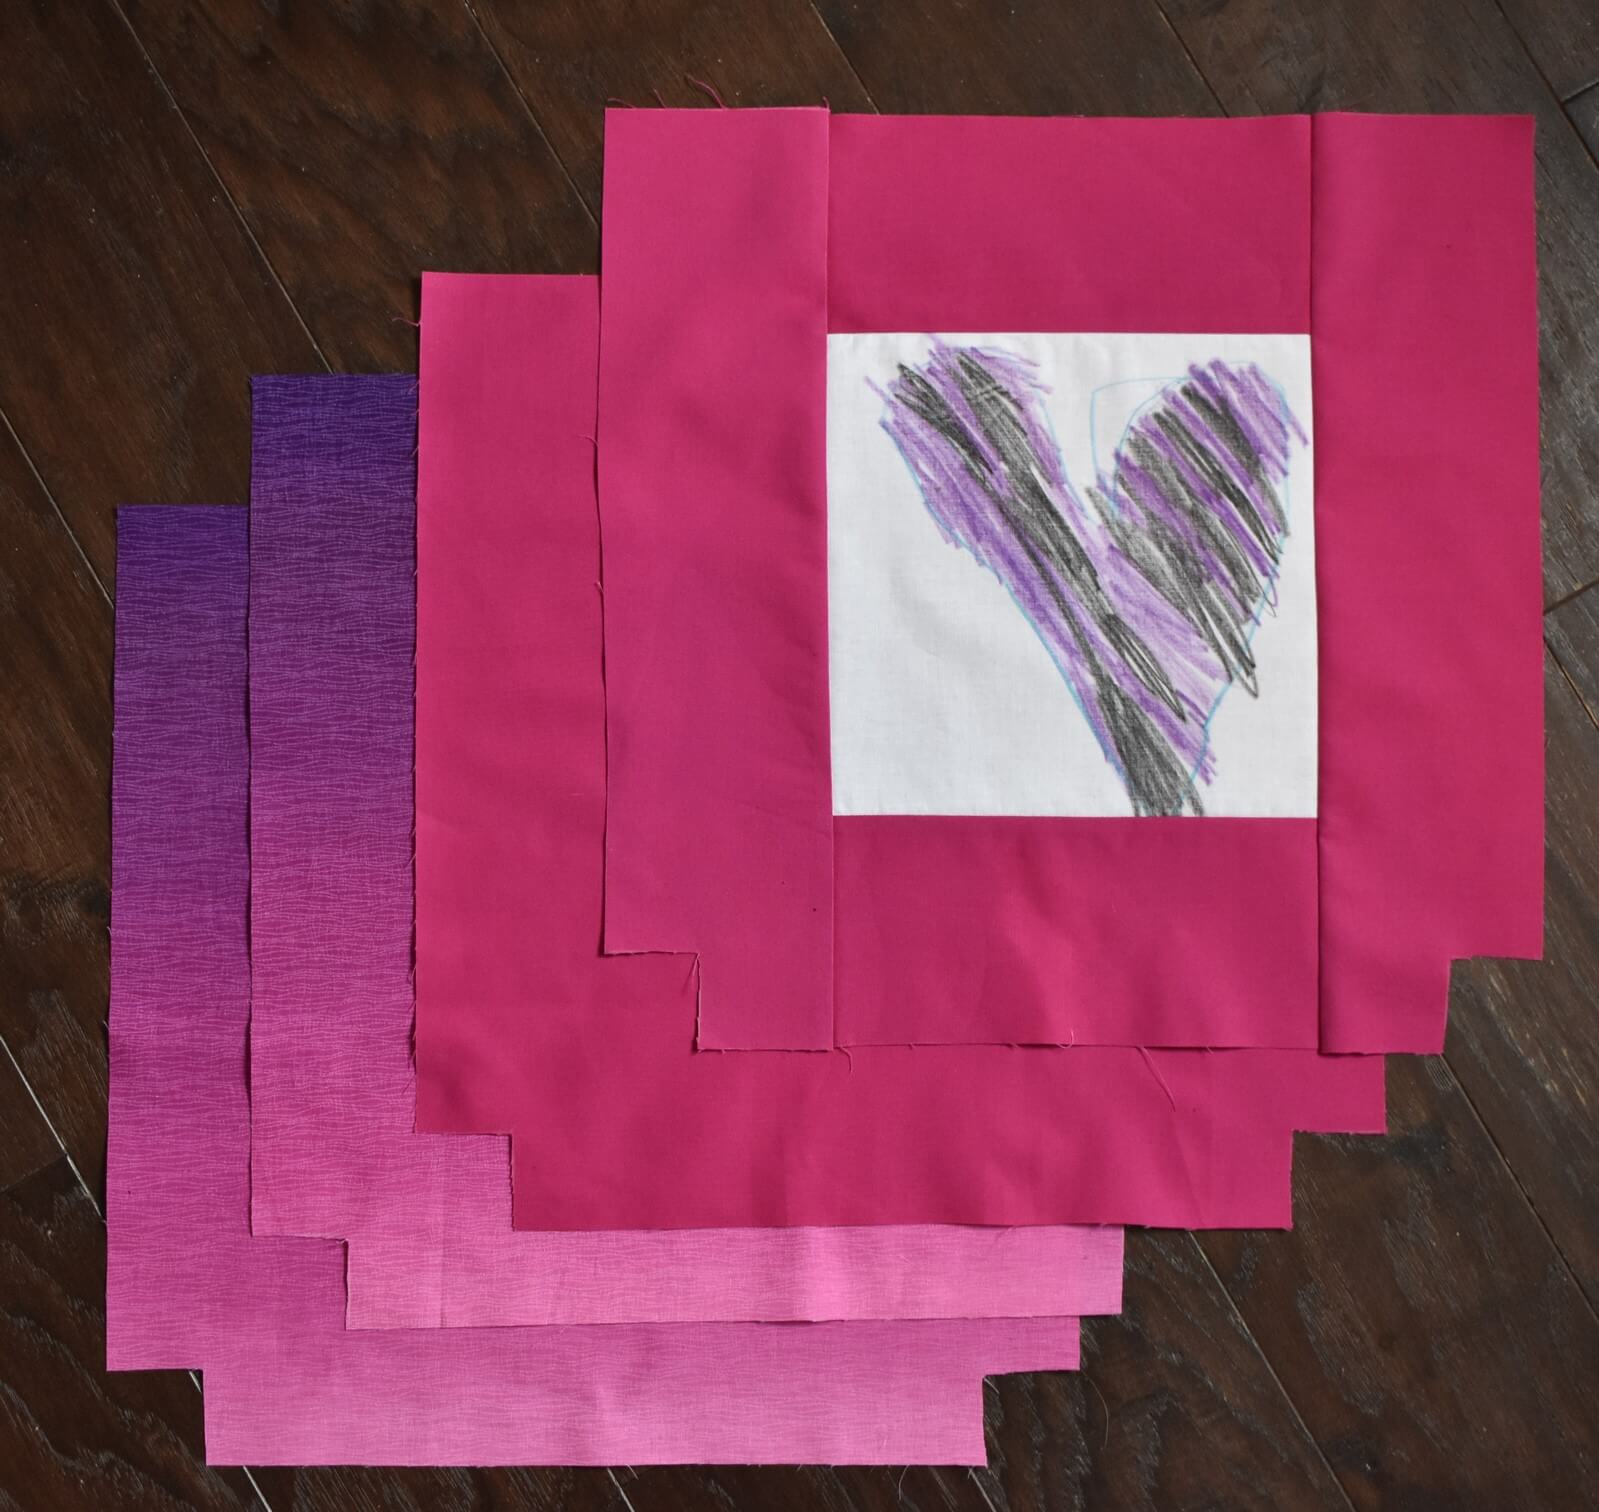
 

To cut:

For colored panel:

     (1) 8 ½” x 8 ½” square

For straps:

     (2) 4″ x 27″ strips (your may adjust strap length to best fit your child)

For Exterior front border and back:

     (2) 4” x 8 ½” rectangle

     (2) 4” x 15 ½” rectangle

     (1) 15 ½” x 15 ½” square

For interior:

     (2) 15 ½” x 15 ½” square
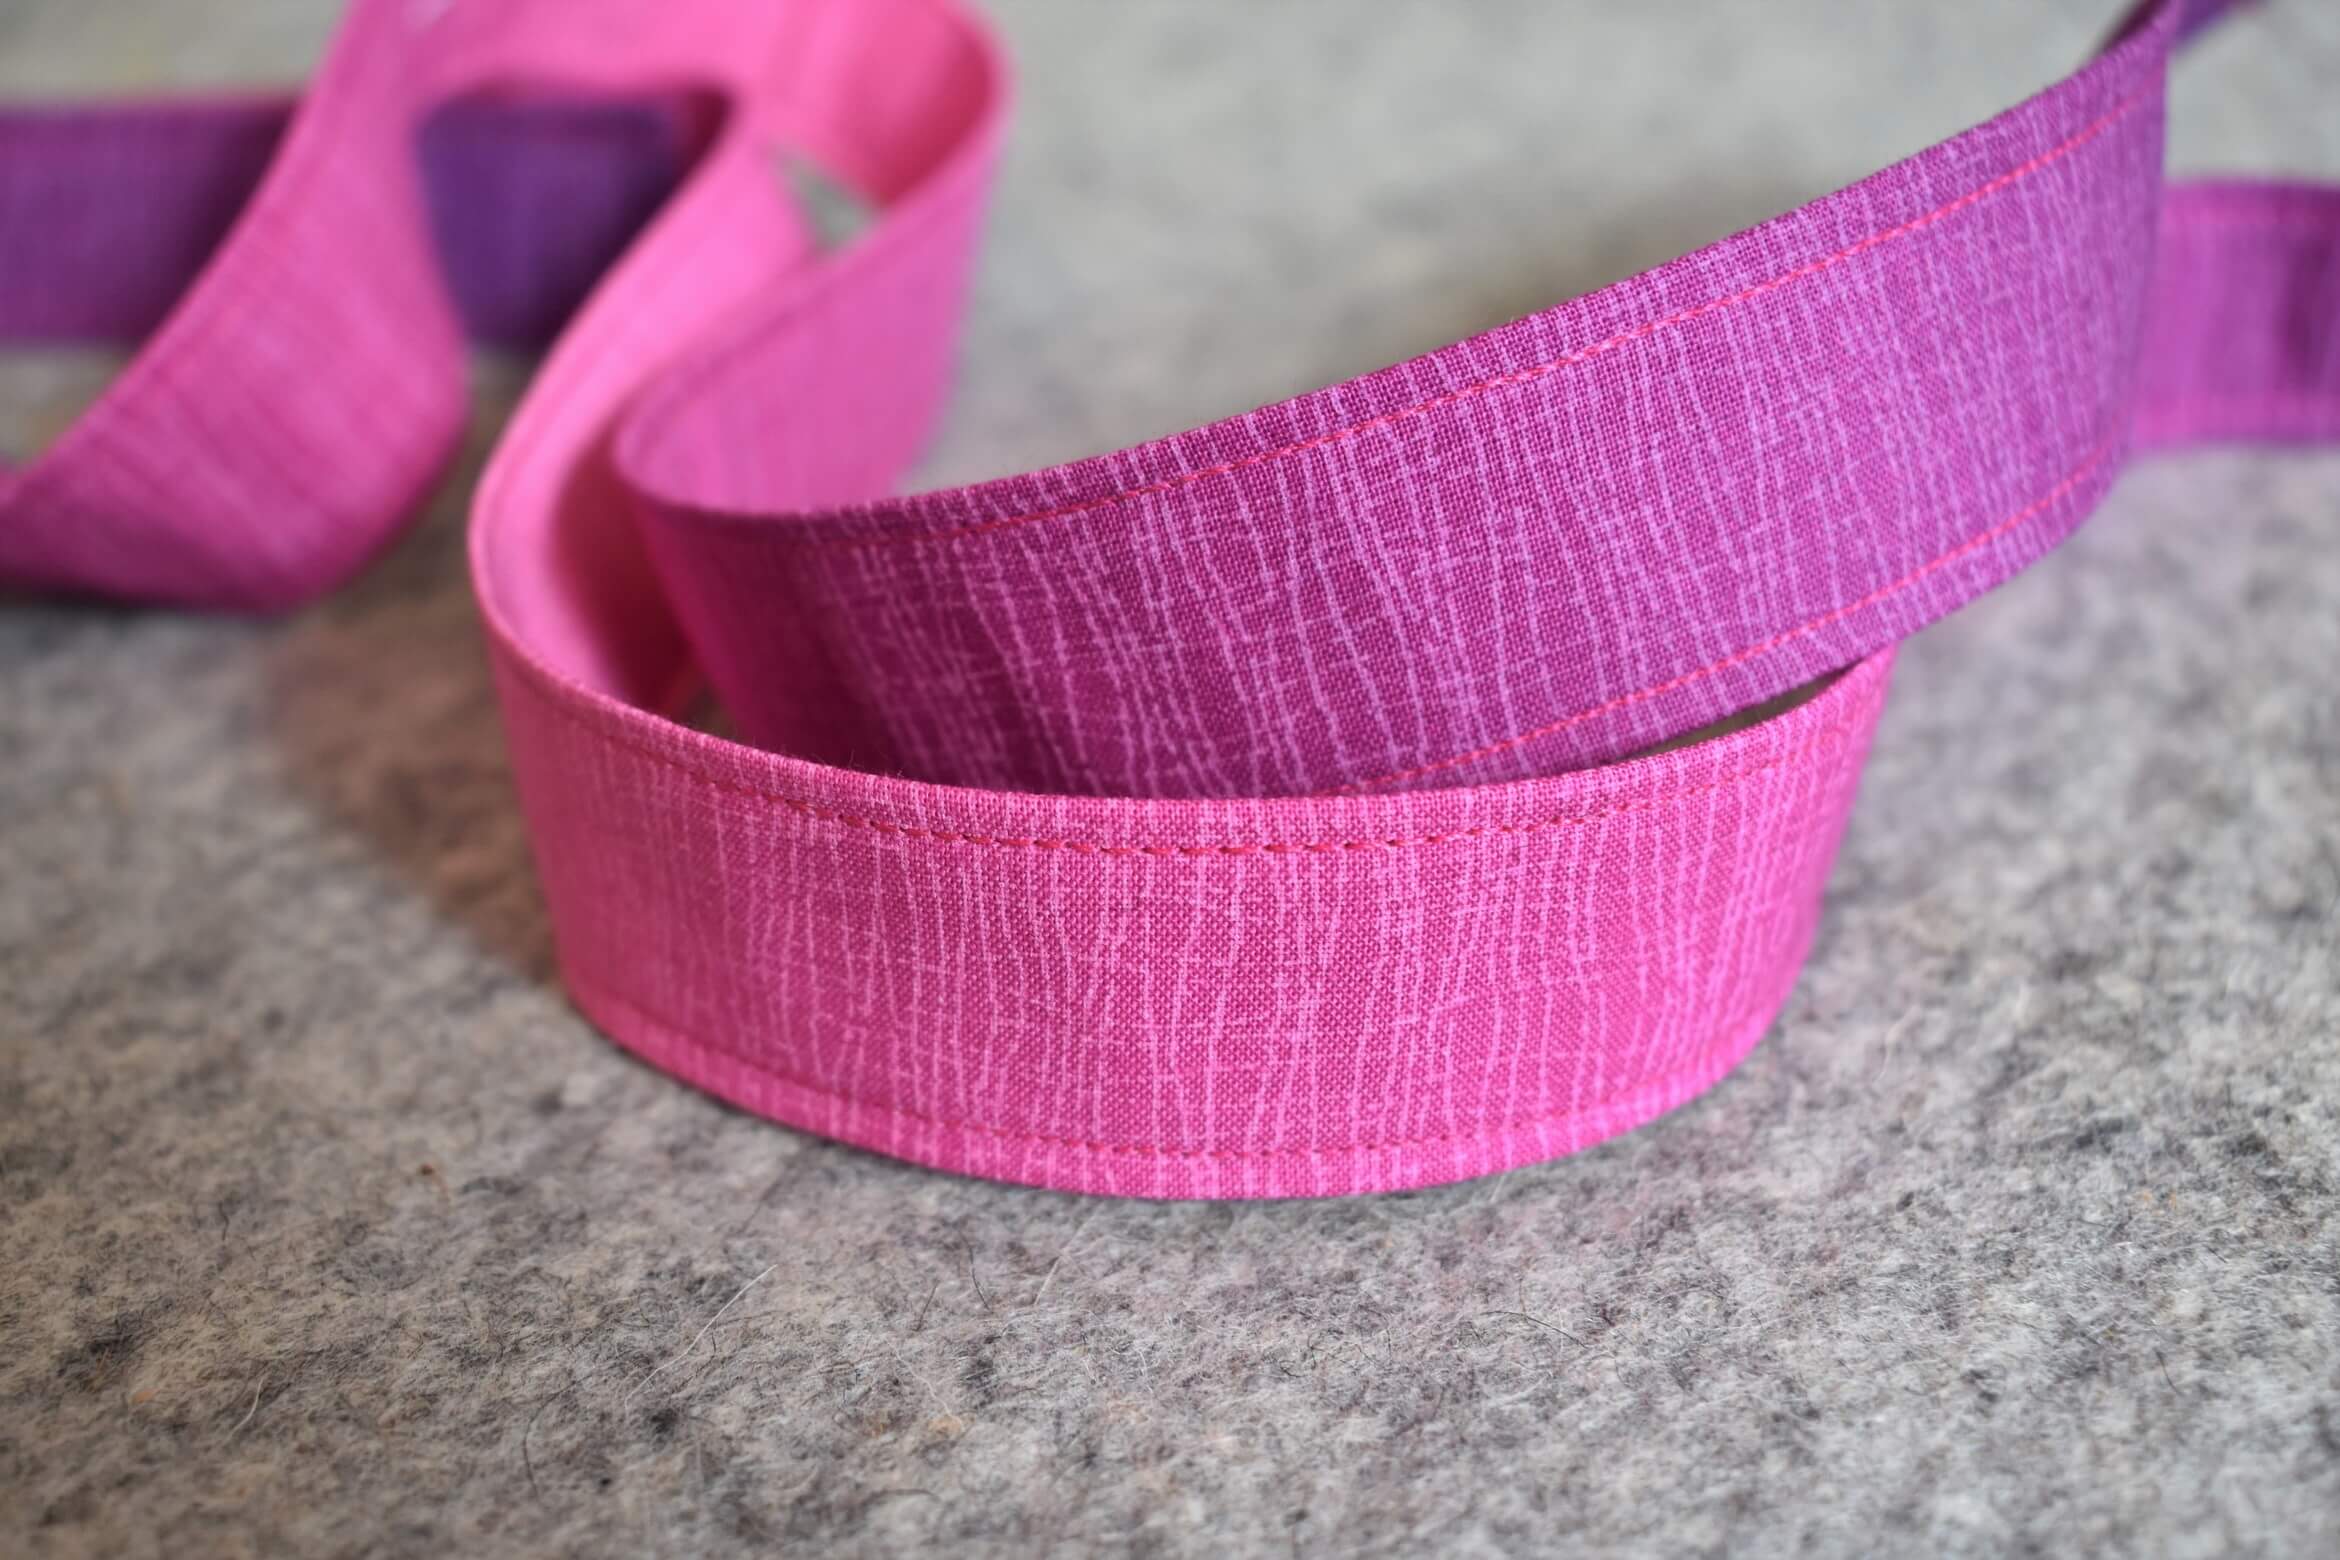
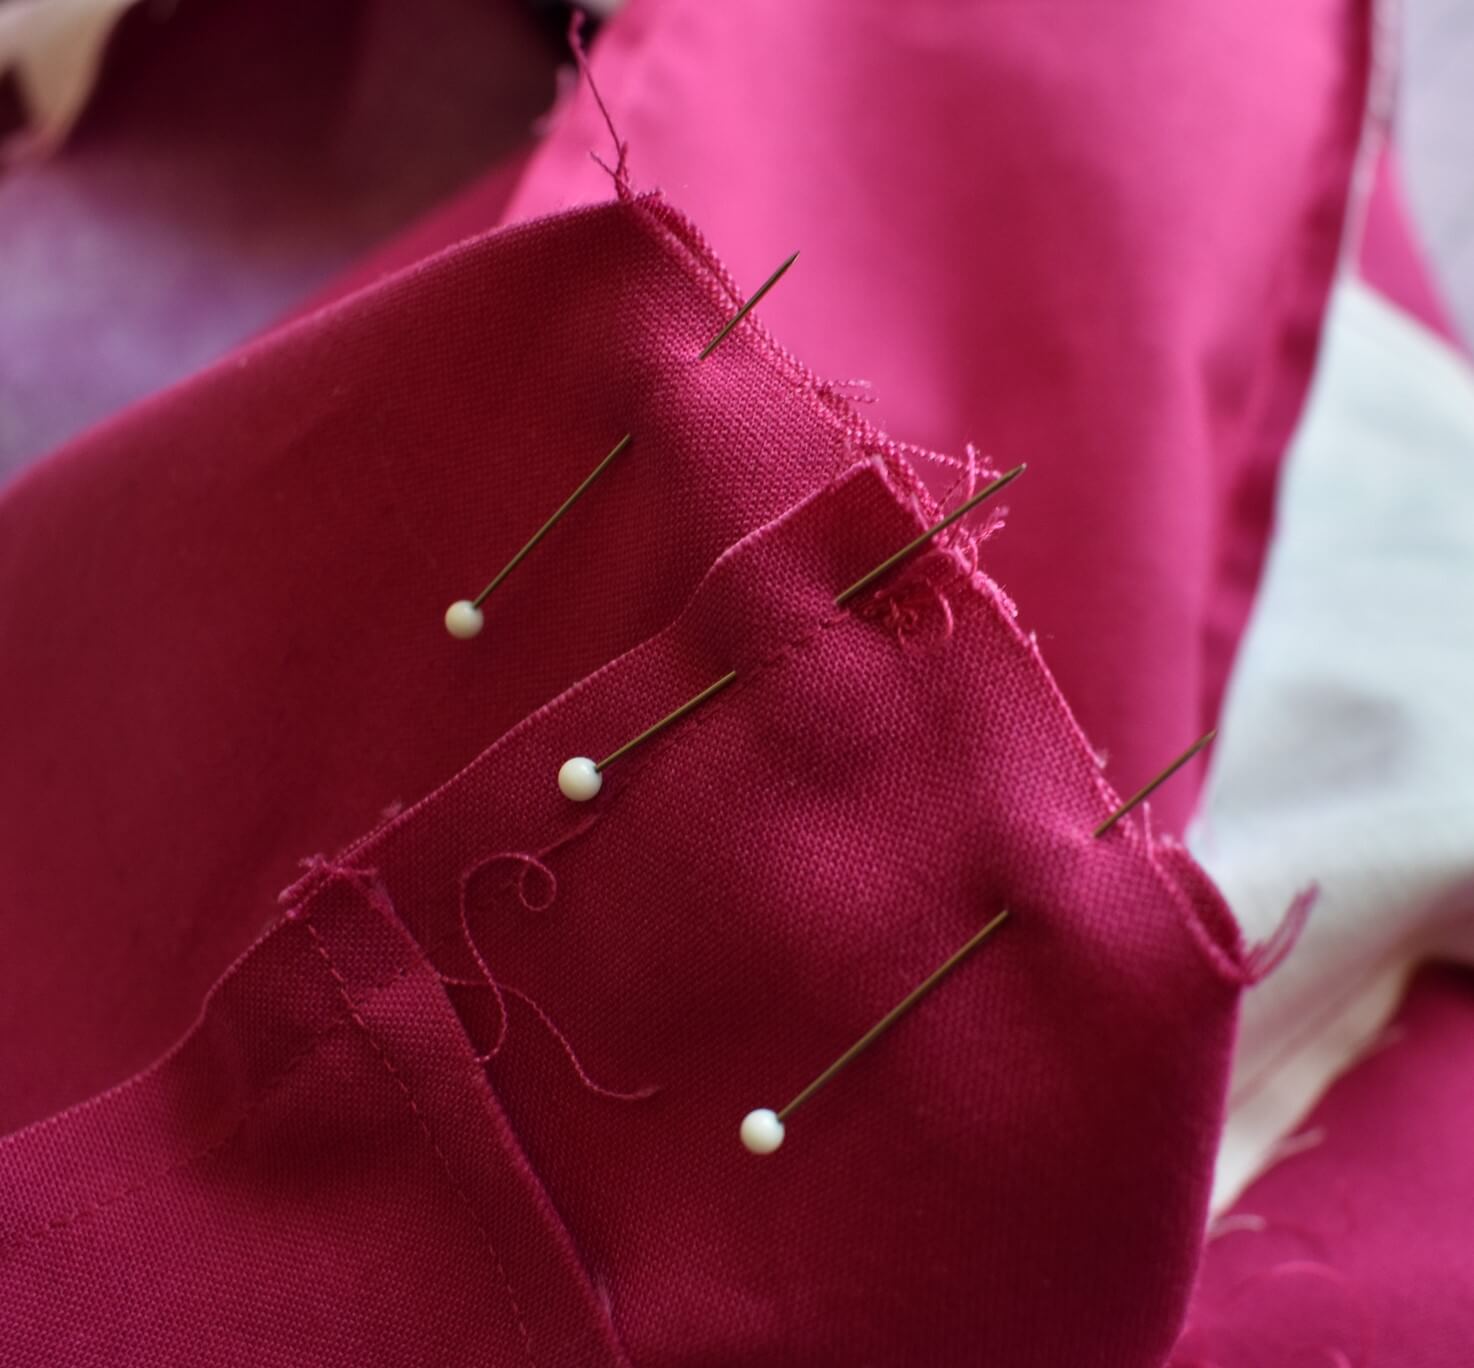


Sew the straps:

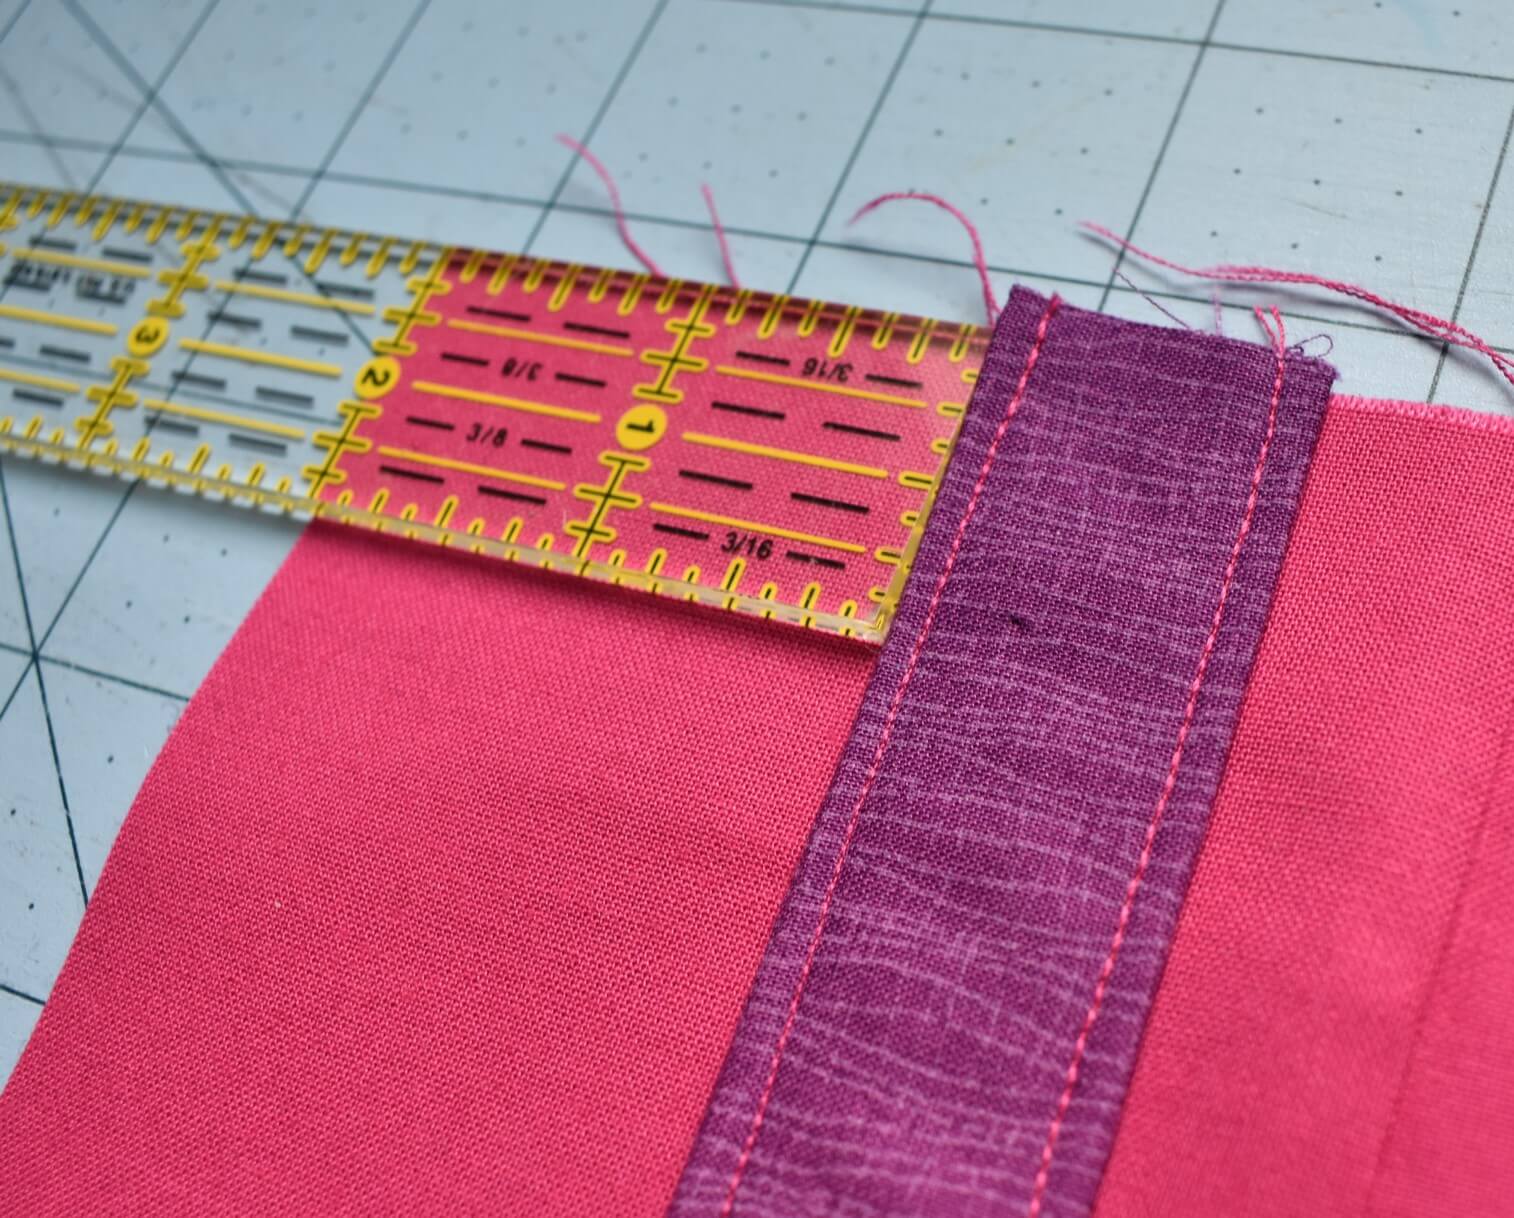
Fold your strip in half along the length and press to mark center point.


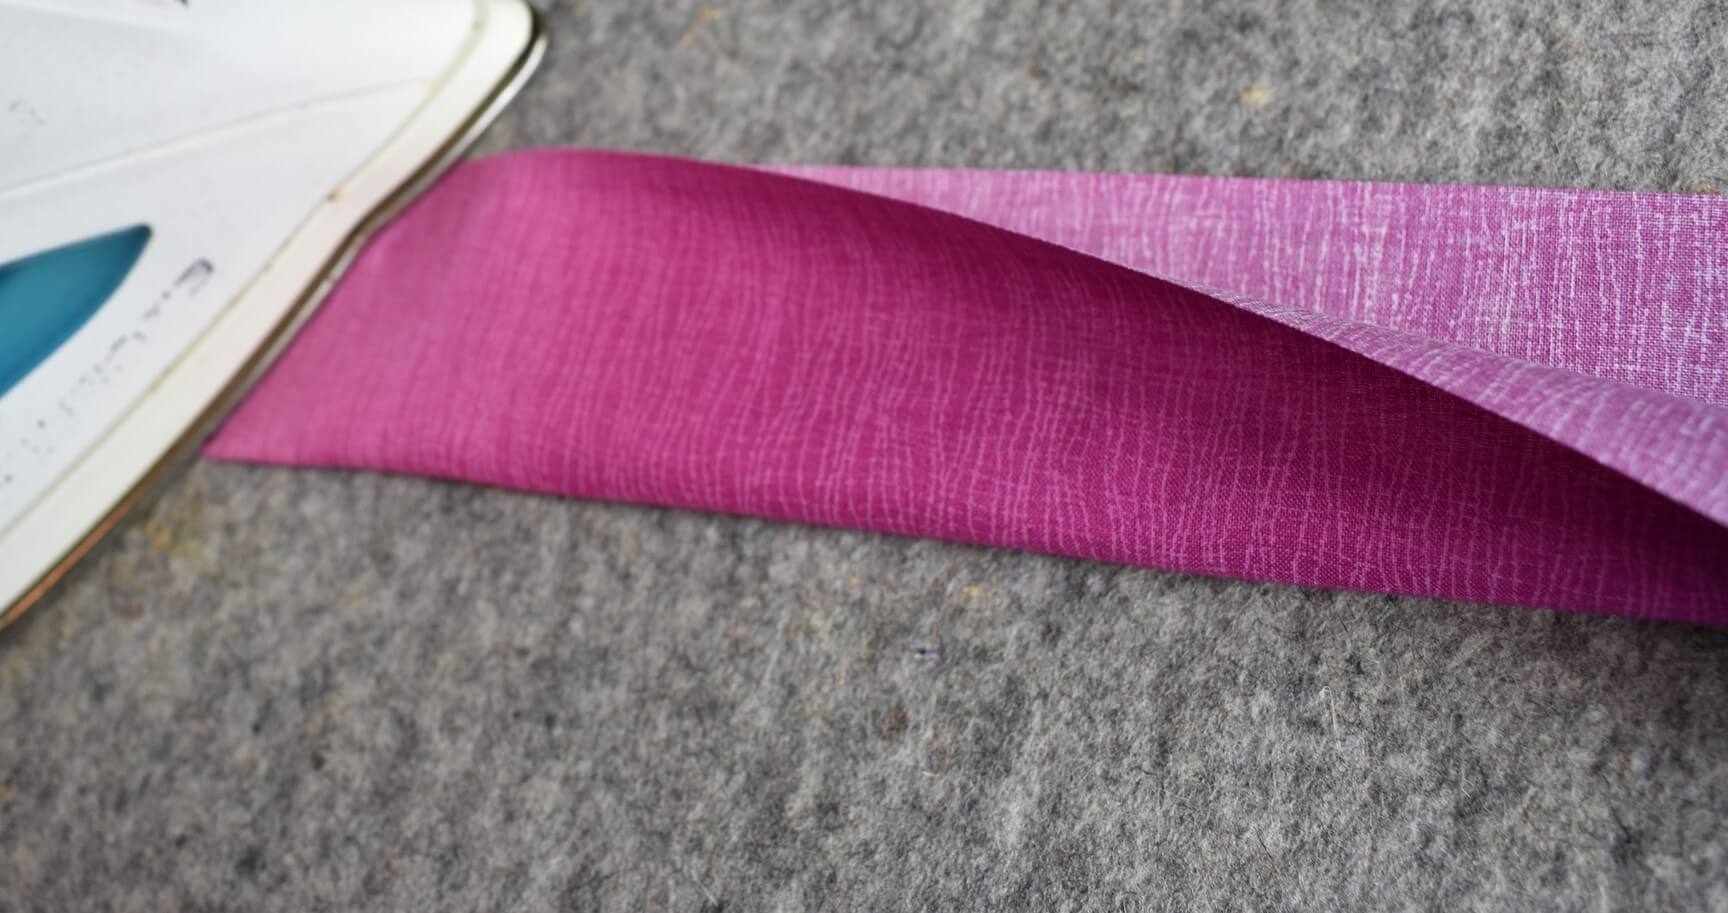
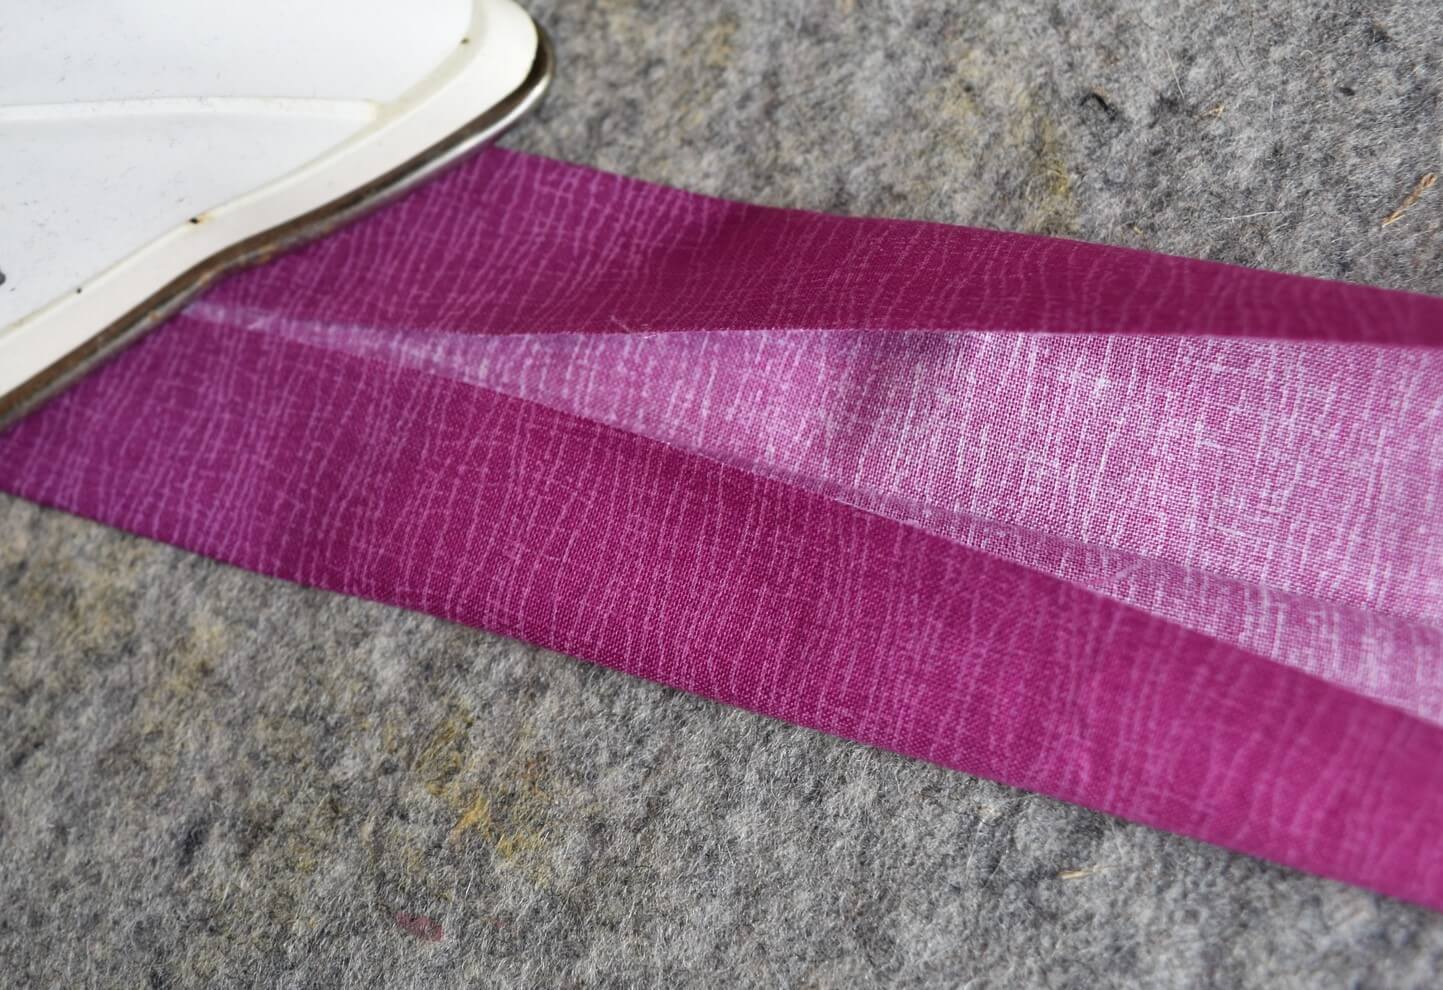
Fold the edges into the center and press along the length of the strap. Once this is done, you can fold again along that center line to make the final width of your strap.

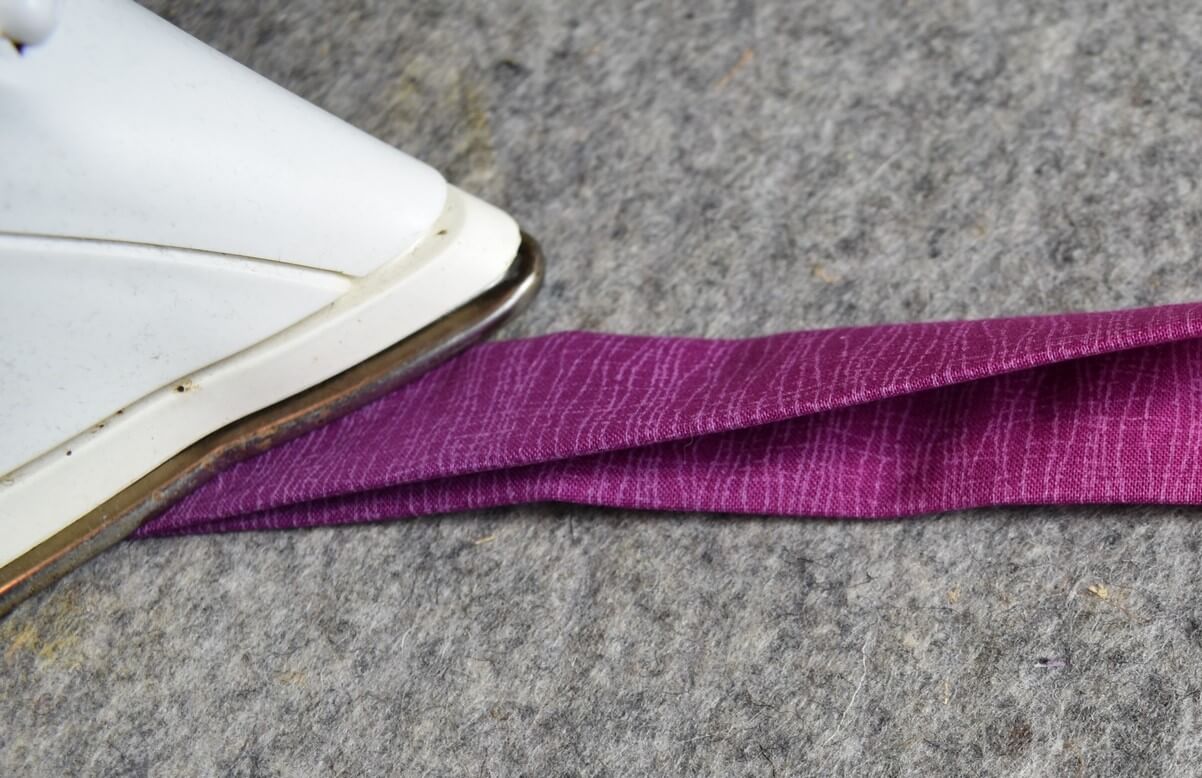
Sew the strap along the open edge to secure.

Sew along the length of the opposite edge to give our strap a nice, finished look.


Sew the front panel:

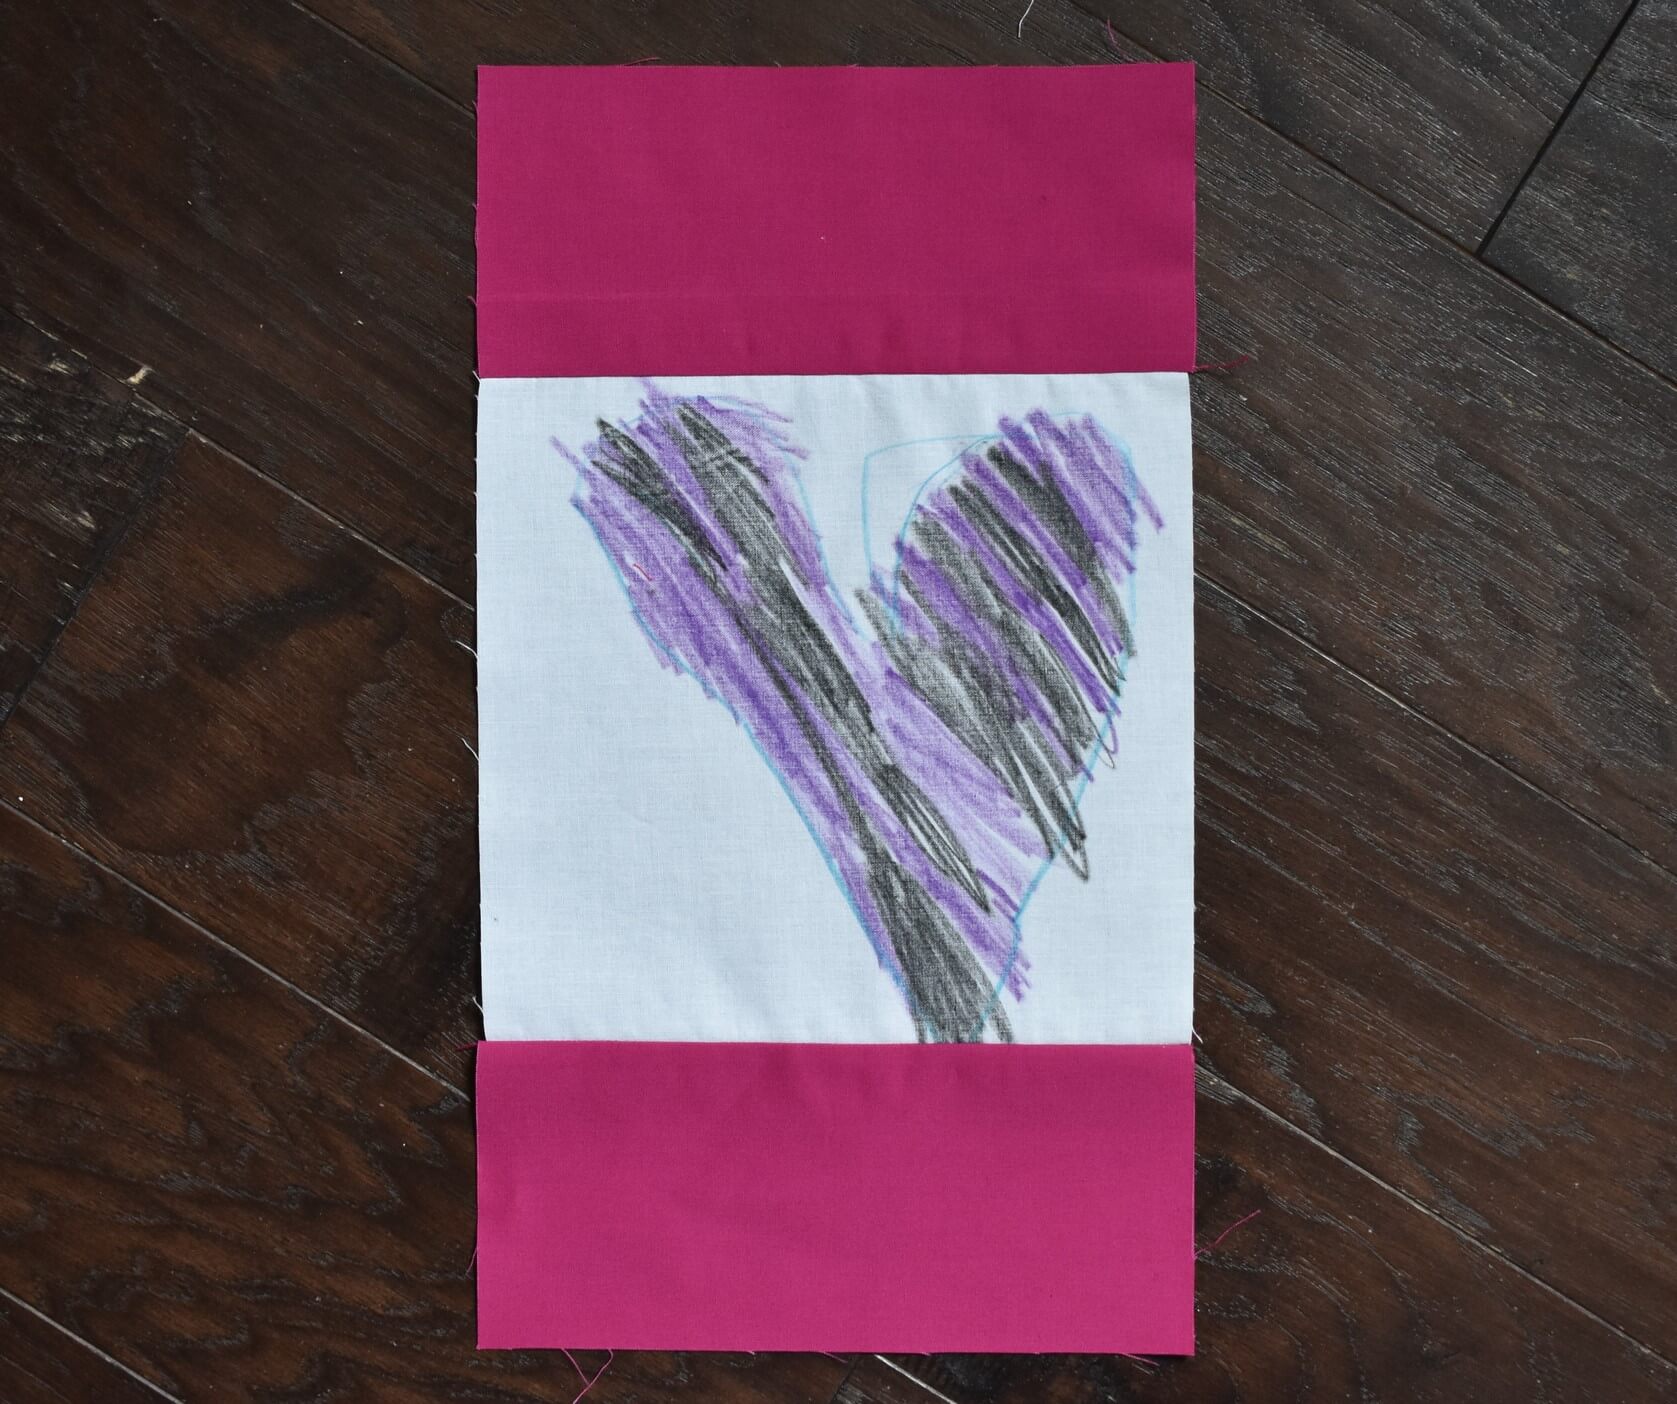
Sew your 4” x 8 ½” rectangles to the top and bottom of your colored square. Add your 4” x 15 ½” rectangles to each side. This panel unit should finish at 15 ½” x 15 ½”.


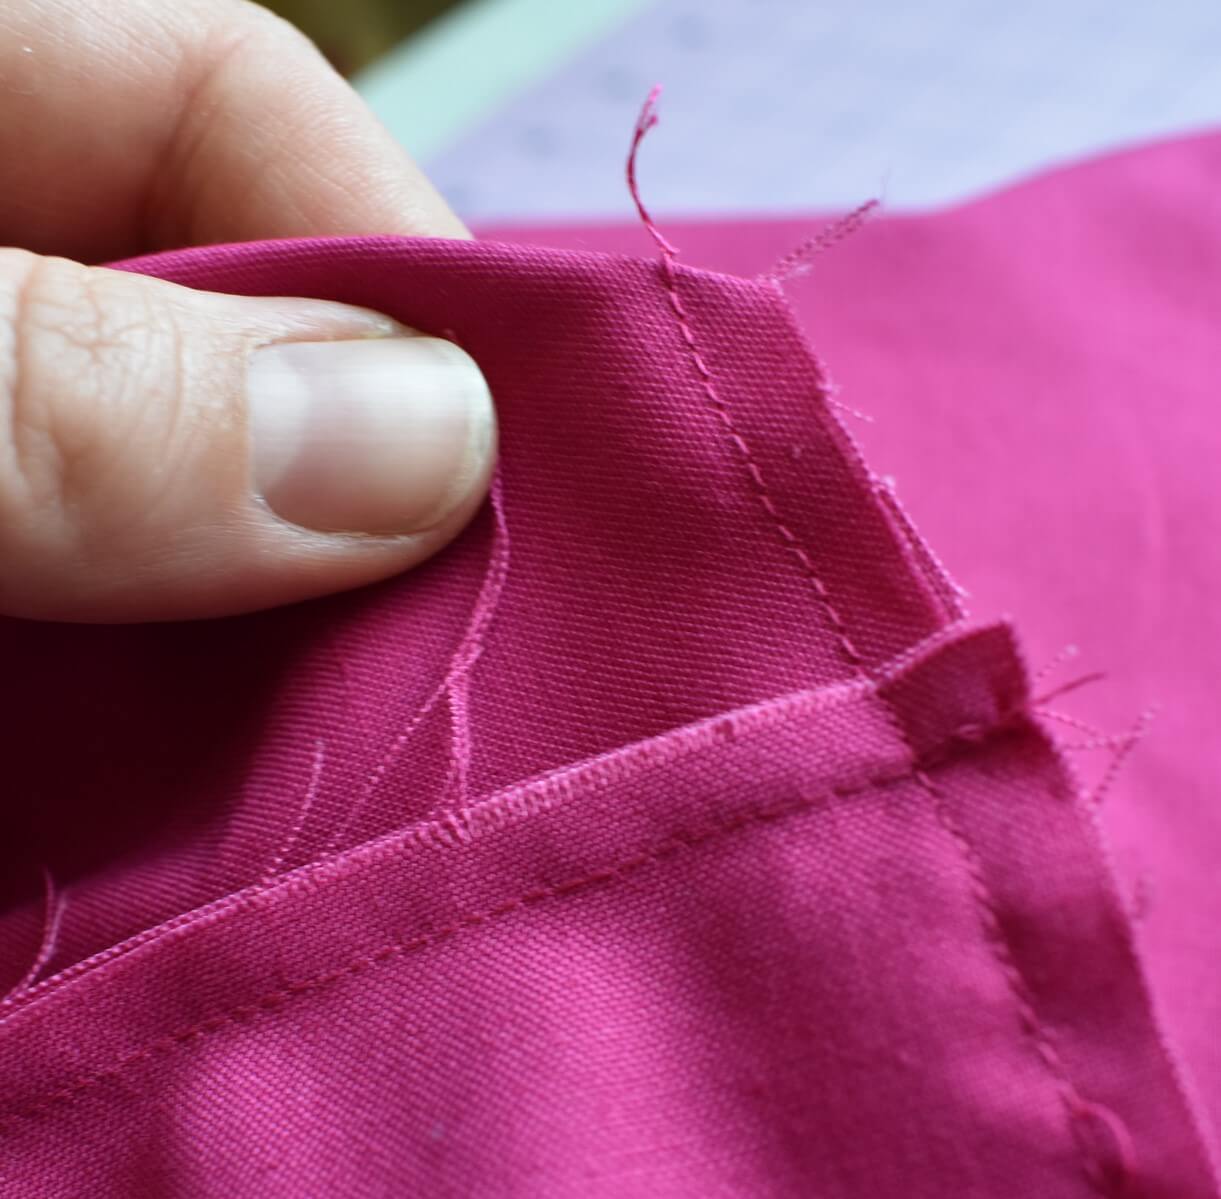
Cut out squares for the boxed edges:

To give your book bag some depth, you’ll want to add some boxed corners. We’ll cut out for them now and sew them later. Cut a 1 ½” square from the two bottom corners of the following:  your (2) 15 ½” x 15 ½” interior squares, your (1) 15 ½” x 15 ½” exterior back square, and your 15 ½” x 15 ½” front panel unit with the colored square.


Assembly:

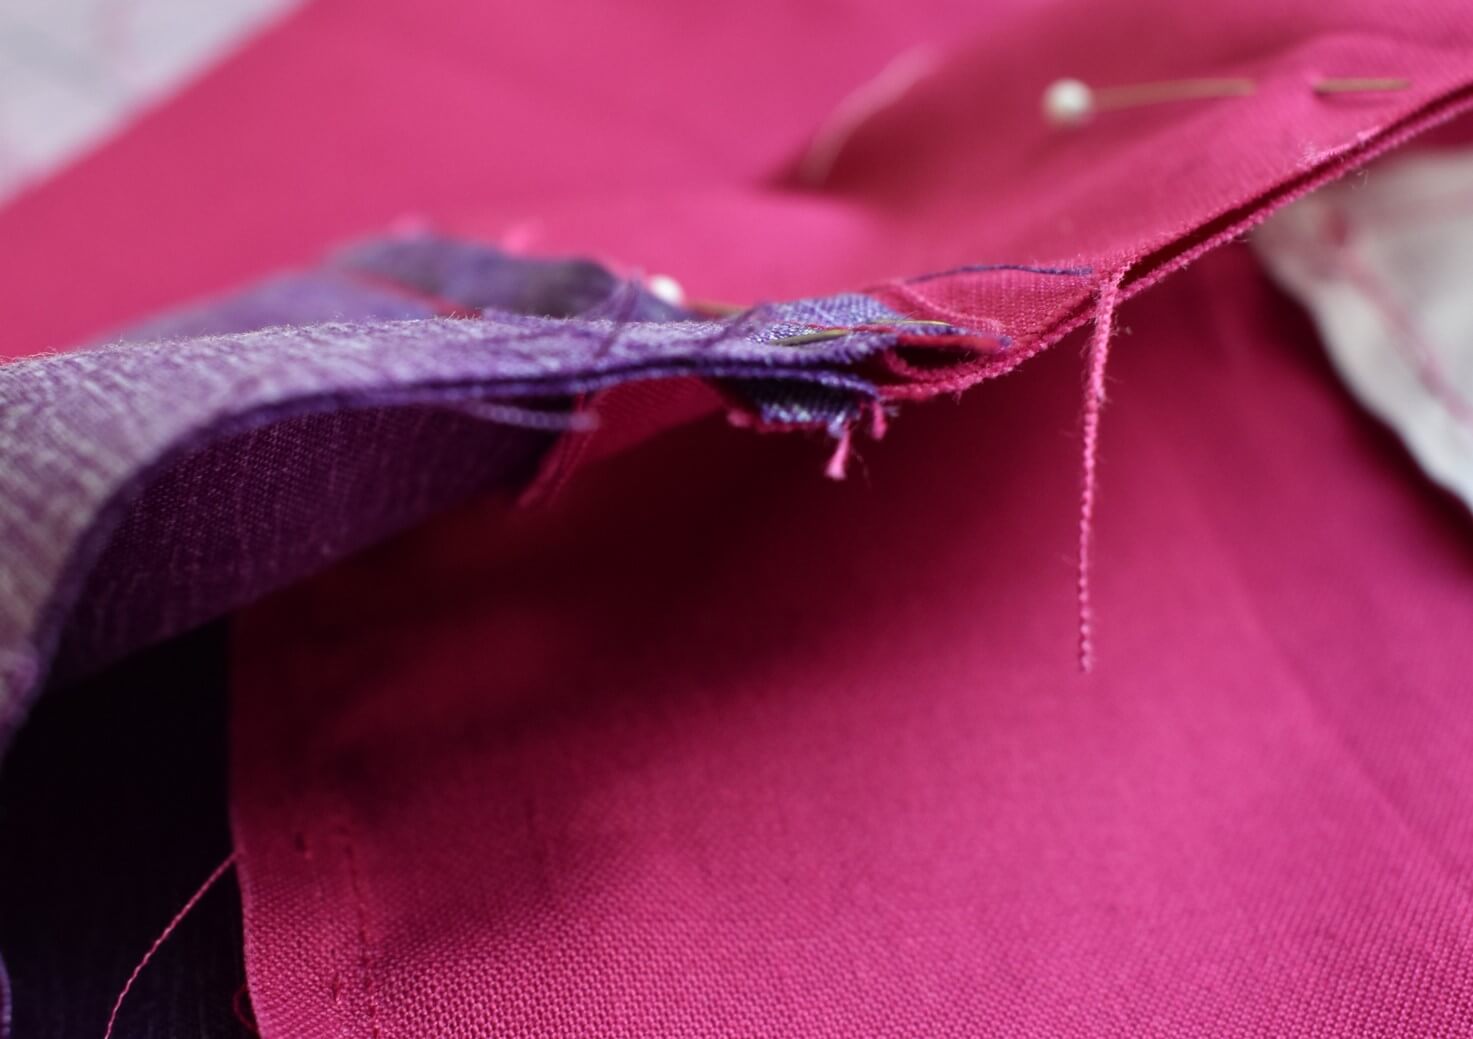
Put front panel of your bag on your work surface face up. Place a strap on top of the panel with the ends two inches from the edge as shown. You may adjust this measurement as desired, but it must be the same measurement on each side. It’s also important to make sure the strap isn’t twisted.

Place an interior fabric piece on top of your front panel and strap with right sides together. The loop of the strap will be between the front panel and interior piece. Pin and sew along the top, making sure the strap doesn’t shift.

Use the same technique to attach the back exterior to the second interior piece.


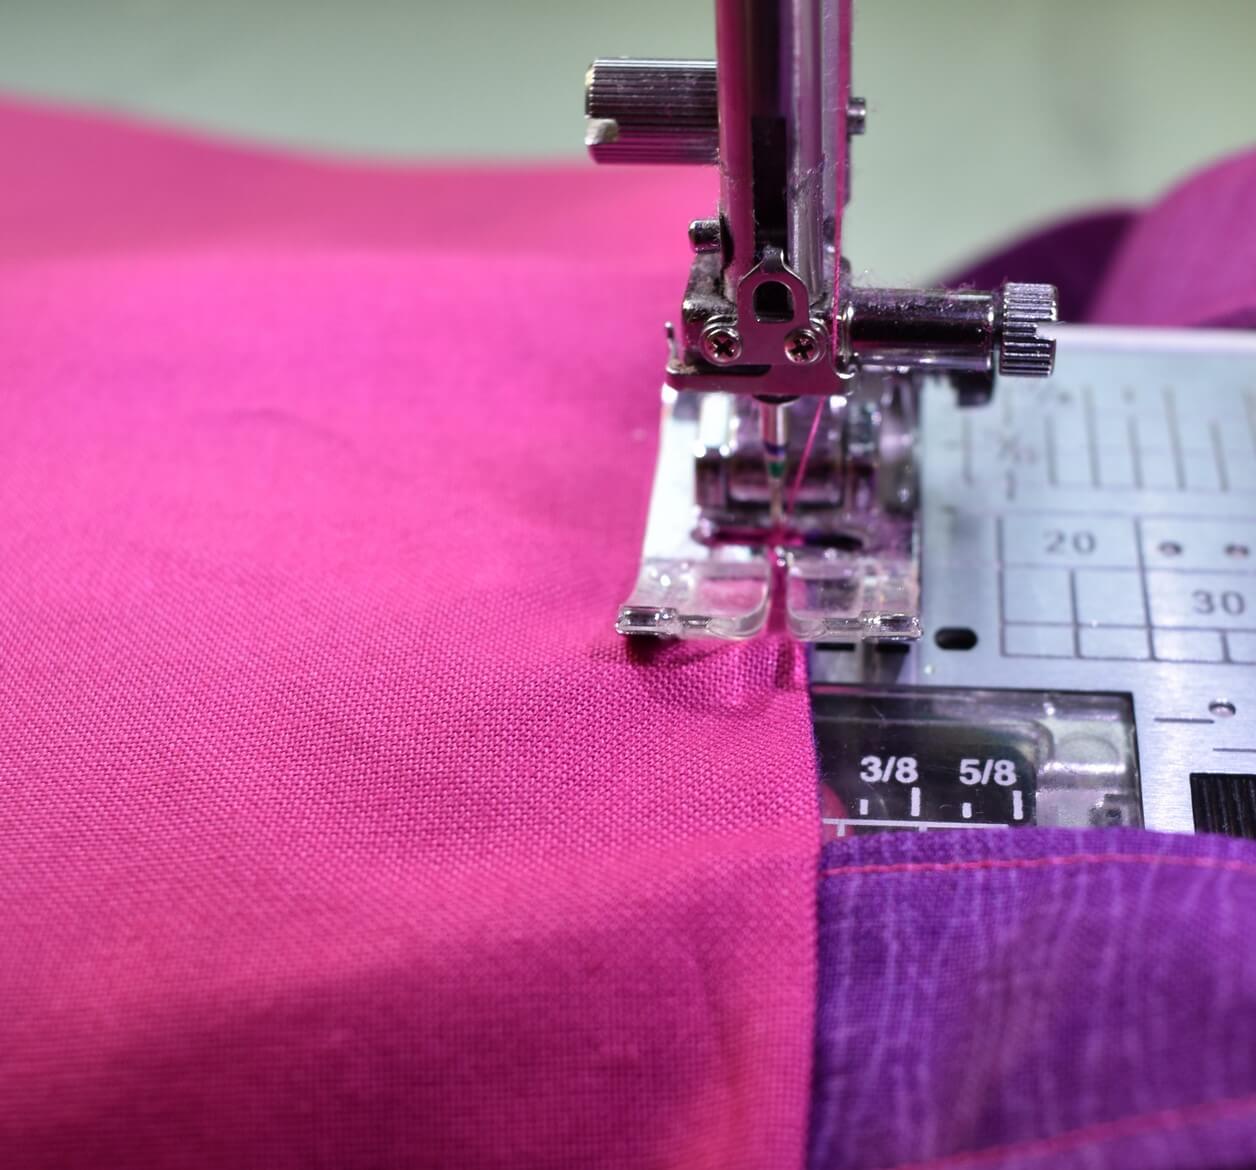
Open the two sewn sections and pin them along all the edges with right sides together, making sure to line up the seams where the exterior of the bag meets the interior.

Sew along both sides and the bottom of the bag exterior, leaving the cutouts for the boxed corners unsewn.

Next, sew a few inches on each side of the bottom of the lining, leaving an opening for turning the bag.

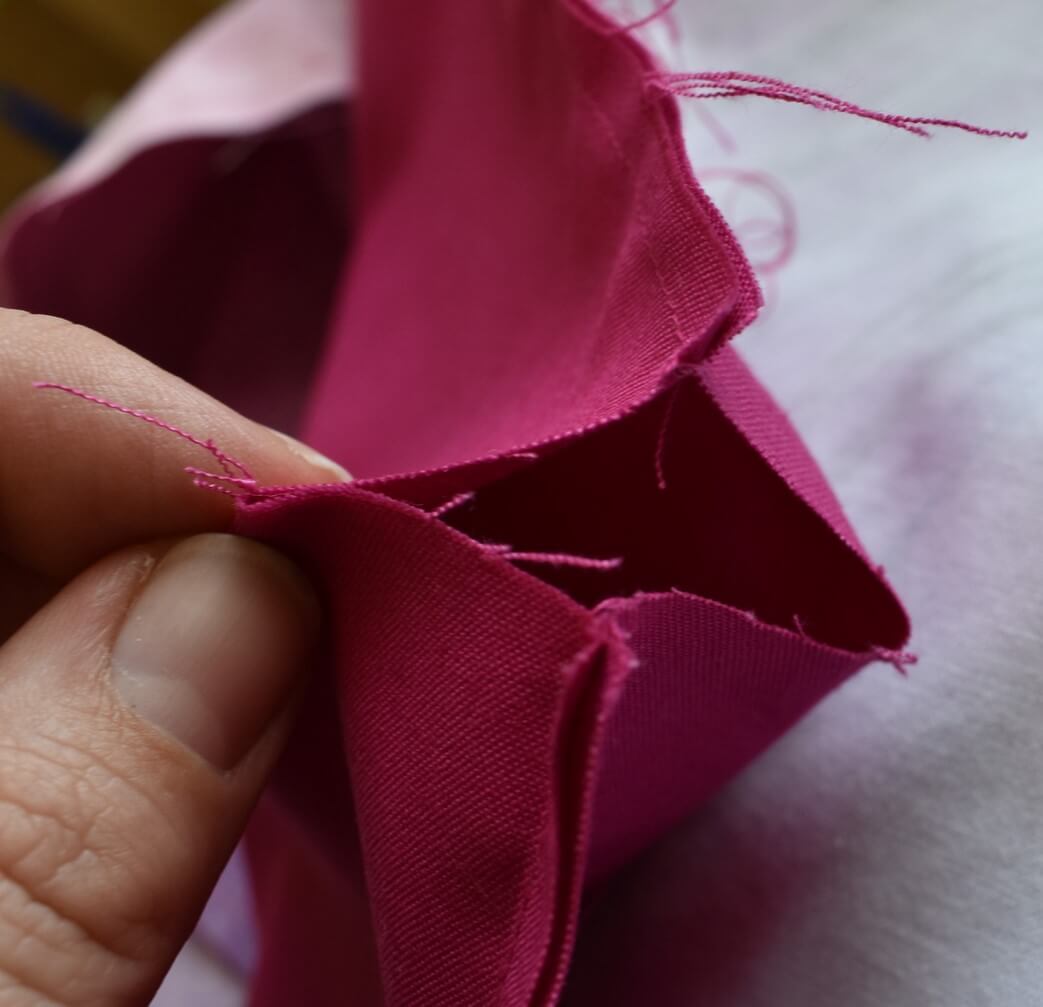
To sew the boxed corners, separate the layers of fabric and fold them back together as shown. Nestle and pin together the seams of the sides and bottom before sewing along the cut edge.

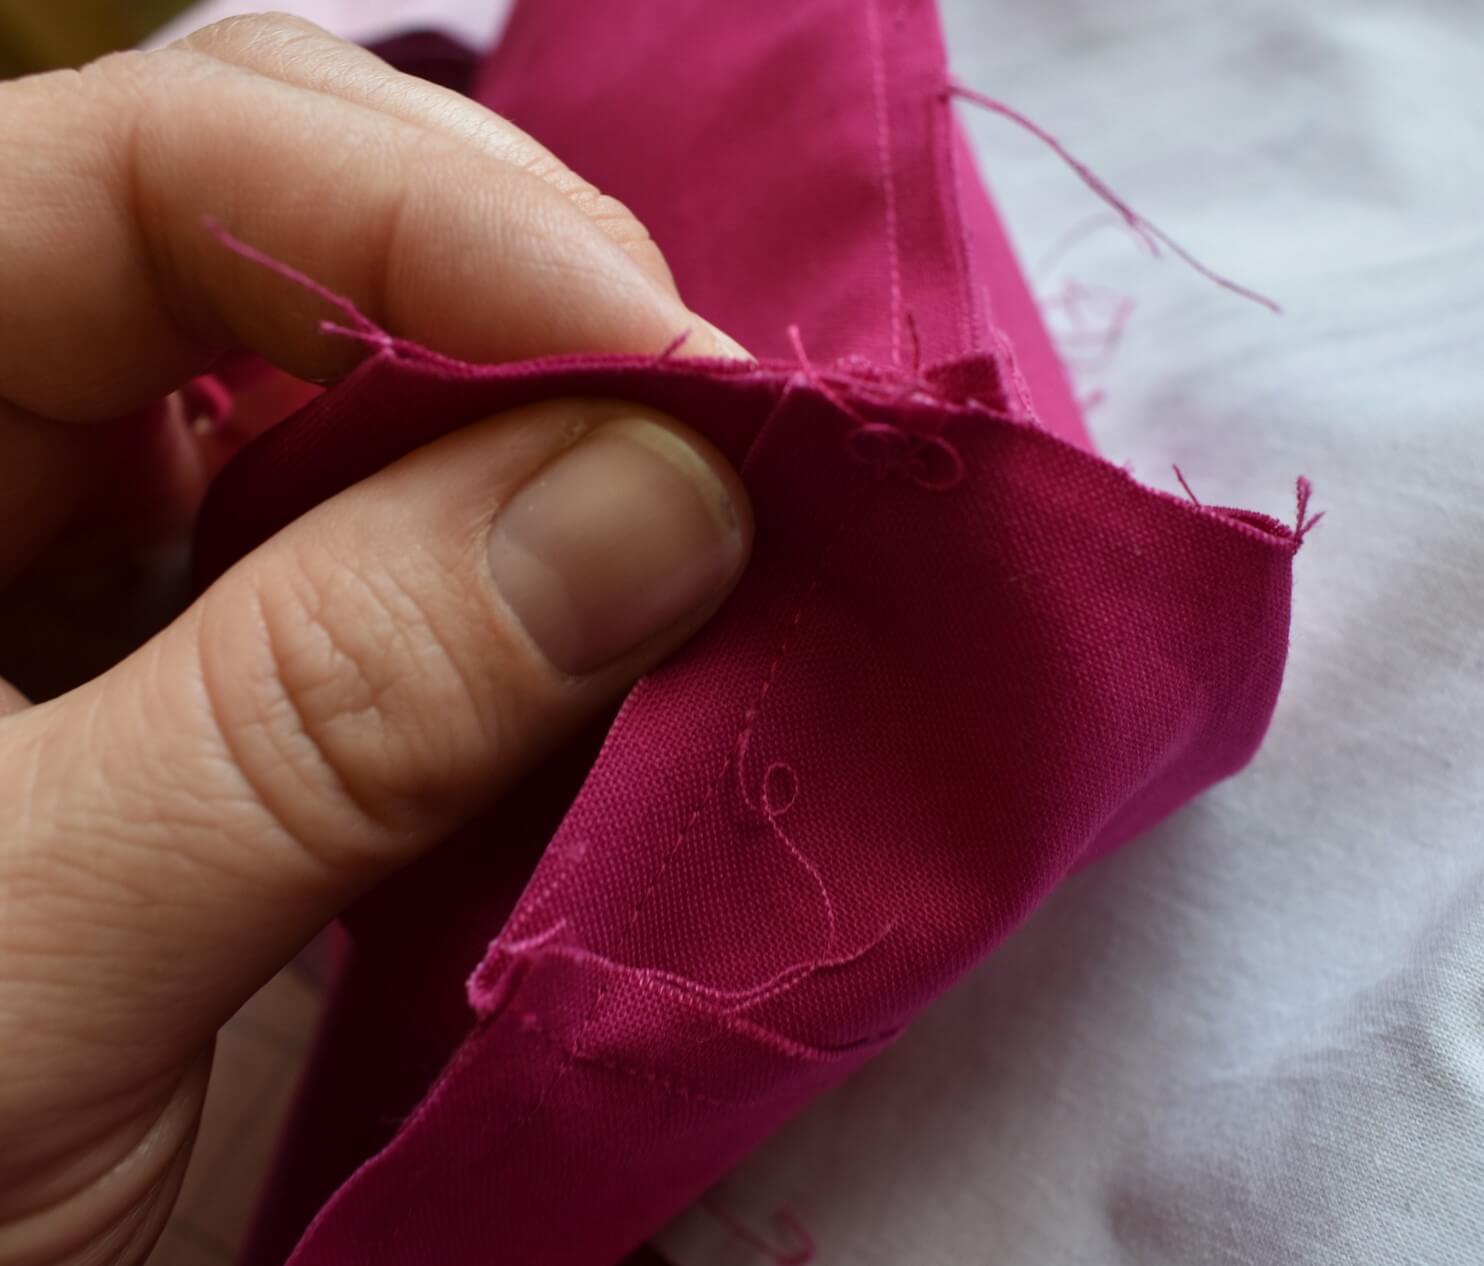
Turn the bag inside out using the opening left in the bottom of the bag interior. Make sure to fully turn the boxed corners for nice, clean lines!

Fold in the edges of the opening used for turning the bag and machine sew close to the edge. You can also stitch by hand for a less visible seam.

Push the interior inside the bag. Press and sew along the top opening.


Enjoy!

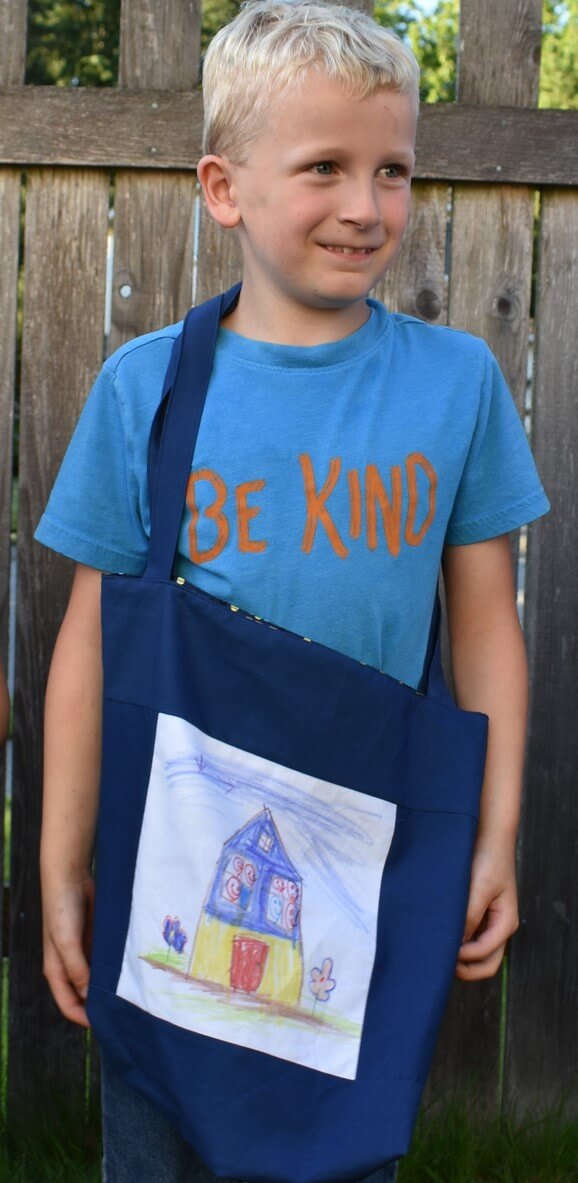
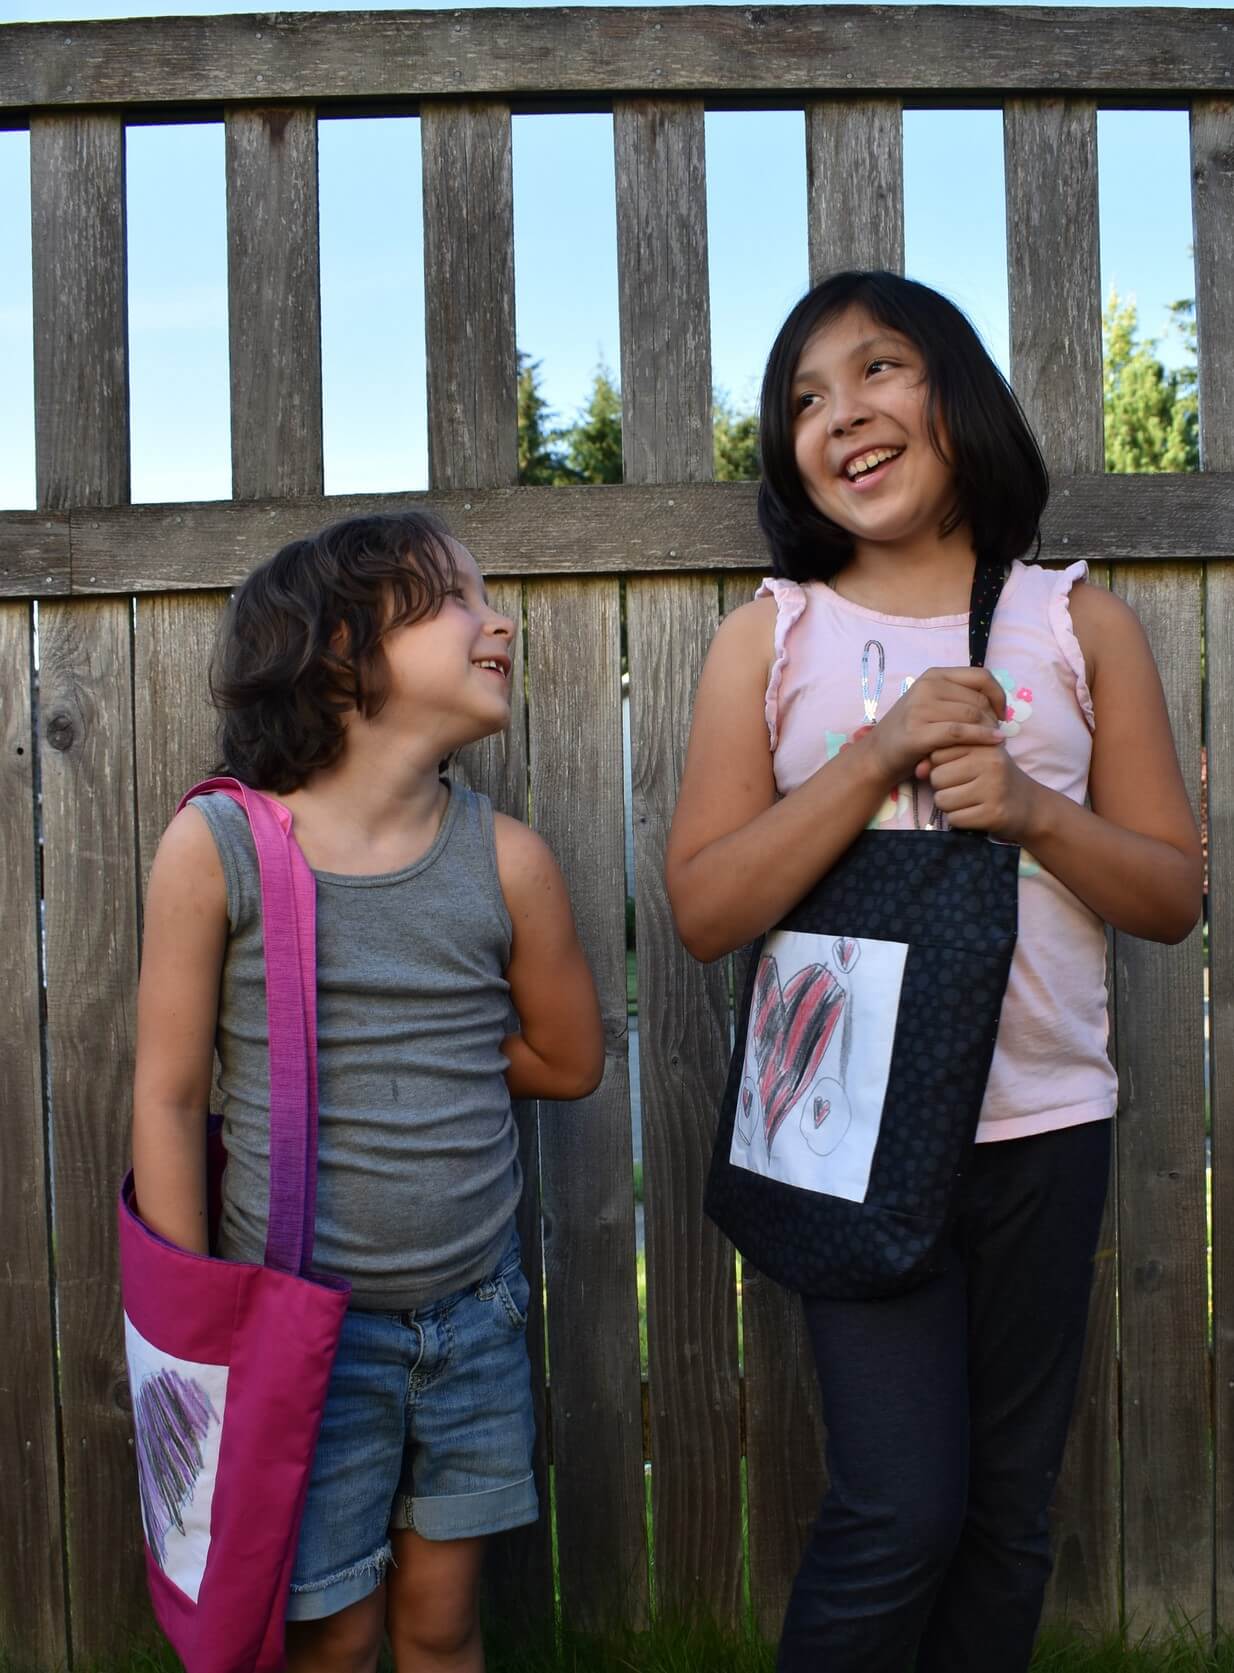
The kids were so excited when I arrived with their bags, so we did a fun little photo shoot to show off their artwork. They’ve also decided I need to make a tiny book bag for their baby sister!

Happy Sewing!  ~L

How to: Turning WIPs into FOs

It’s hard making time to make.

Often, it seems like our pile of WIPs (Works in Progress) far outweighs our FOs (Finished Objects). Quilt tops linger in closets and orphan blocks crowd our design walls. But taming the beast is possible! Here are a few tips for whipping those WIPs into shape:

1- List all your projects. Every. last. one. Go through every closet, shelf and drawer. Pull out every WIP at any stage, even if it’s just a pile of fabric that you have a vague plan for. Now list them out one by one. This is quite the reality check, but it gives you a very clear picture of what you have and helps you to prioritize and plan.

img_4064

2- Edit out what you’re no longer in love with. Maybe the fabric is dated. Maybe the intended recipient has changed their style. Maybe you’ve just fallen out of love. You might be surprised with how many projects you decide aren’t worth more of your precious time.  Find a friend or local charity that will take them off your hands. Some Project Linus chapters will take quilts at various stages of completion. Call your local coordinator to check.

img_2451

3- Prioritize. You can choose whatever criteria works for you to prioritize your WIPs. Maybe you want to get oldest projects done first, or those that are closest to completion. Or you could prioritize by the intended recipients… who has a birthday coming up? It’s really up to you. Just to remember that not everything matters equally. Your time is finite, and you should be spending that time on the things that are most important to YOU.

img_4060

4- Limit new projects. I know, I know… don’t yell at me! This one is so hard! I love shiny new things and starting projects is one of my very favorite things to do. I get it. But now that you have a handle on what needs completed, it’s a good idea to look at that list you made before starting something new.

Prioritize your potential project against that list… how does it compare? If it really is something important (like you just found out your best friend is expecting), yes, definitely add it in! But keep in mind that for everything you say yes to, you will say no to something else. Your other WIPs will move down the list, so make sure it’s worth it!

Often, we start a new project simply because we’re bored with what we’re currently working on. Instead, maybe we can add some excitement to our WIPs list by moving a current project one step closer to completion. I find that helps my need for something ‘new’ and novel without adding to my workload.

img_1782

5- Join a UFO completion group. Many local shops will have groups you can join that help keep you accountable to finishing a specific list of WIPs that you’ve chosen. Sometimes, there’s prizes to be won! If you don’t have a local group, there are several online ones. A popular challenge group is the All People Quilt UFO Challenge.  The 2019 Finish-a-Long is hosted by several quilty bloggers and is another great place to start. And The Crafty Quilter has a monthly UFO & WIP Challenge. There are lots more; find a group that you like and join in!

img_3620

6- Make the time. There is simply no way around it- if you want to finish projects, you have to set aside time to work on them. You’ll have to decide for yourself how that looks. You could block out 20 or 30 minutes a day, or set aside an entire day a few times a month. Look into registering for an open sew at a local shop if you want to socialize while you sew. Put sewing time on you calendar or add a reminder to your phone. Once you get a little momentum going, you’ll be surprised at how addicting it can be to advance your projects just one step further. And once you complete a project and get to cross that WIP off your ‘to do’ list, you’ll definitely be looking forward to your next FO!  

img_4961

7- Speaking of Finished Objects, track them! Keeping a record of the quilts you’ve completed and looking through it periodically is a really nice way to keep your motivation up. No doubt there are projects on your FO list that lingered. That you thought you’d never actually complete. Looking through the projects you’ve already completed gives you HOPE that yes, someday the WIP that’s driving you crazy will be done. There is light at the end of the creative tunnel. You are fully capable of getting those WIPs out into the world as FOs. You’ve got this.

Now let’s all finish some beautiful stuff!

Happy Sewing! ~L

Champions Quilt

Last month, I shared a quilt finish with you. I have another one to share that’s been done for quite some time.

DSC_0065 (3)

The pattern for the appliqued sphere is by Geta Grama and is called Windows into my  World.

This was one of the very first quilts I ever started. I wanted to try EPP, and this pattern was so visually striking. As I got further along, It also became the project that I used to learn hand applique and hand quilting (more on that later). It spent a lot of time being set aside. Like… a LOT lot. In the time I took to finish it, the intended recipient went from being a teenager to a married adult. I felt like it was too small to gift to a couple, so we decided to keep it. I will make them a quilt as a couple (hopefully before Christmas!) that reflects both of their styles.

I loved this pattern, but if I did it again I would probably use a fusible applique technique instead of EPP and hand applique. It would make for a much faster finish! 

dsc_0670

And for the hand quilting- you may have noticed that there is none on my finished quilt! When I started it, I was doing the hand quilting on the sphere section with embroidery thread. Turns out, I hate hand quilting with embroidery thread. I got about a third of the way done with the sphere and had to make a decision: keep going, or pick it out and machine quilt it. So I got out my seam ripper and scissors, because I honestly just couldn’t do it anymore!

I love the way the heavily quilted areas paired with unquilted spots creates fun little puffy bits in the sphere.

DSC_0074 (2)

It was so great to FINALLY finish this one and get another thing crossed off my WIPS list.

Happy Sewing,

~L

What I’m reading now

Here’s what’s been on my nightstand lately:

The One Thing

Ever had a book change your life? And then you apply the principles in the book and go around annoying everyone around you with the information? This is that book for me!

I first read through this a little over a year ago, and it totally rocked my world. I then skimmed through it one more time the same weekend underlining and taking more notes.

I am a super-distractable person, but the information presented here is really helping me to focus on what I want, define my priorities, and work on the most important things. I have spent a lot of time in the last year and a half reflecting and planning what I want my life to be. This book has really helped me take baby steps towards those goals.

I am reading it again to refresh and to learn things I may have missed a year ago. And it’s rocking my world all over again.

Ultimate Quilt Block Collection

A co-worker of mine bought this book and was saying how great it was, so of course I had to check it out! And I was not disappointed. Written by Lynne Goldsworthy, this baby has a ton of unique and beautiful skill-building blocks to choose from. It’s great for learning techniques as well as getting amazing inspiration.

I’ve only made one block from it so far, as I’m TRYING to finish WIPs before starting anything new. But I am looking forward to a possible sampler made with some of the blocks.

20,000 Leagues Under the Sea

I am a nerd; I admit it. I love classic literature and classic Sci-fi is really fun! I had read this on my kindle before, but then my daughter brought this copy home from school. Her English teacher was giving away old books…. yes, please! I like always having some fiction nearby as a diversion before going to sleep, so this ended up on my bedside table. Reading the paper copy is so much better- there’s something amazing about that old book smell!

Now that I’ve finished it- I need a new fiction novel to read! Any suggestions?

I’d also love to hear about your favorite sewing books- I’m always looking for new techniques or inspiration!

Happy Sewing, ~L

Finished: Scrappy Rainbow Quilt

I recently noticed that although I have been pretty active on Instagram, I haven’t been updating here with my finished projects! This one has been done for a while, but I hadn’t taken decent pictures of it. So today, my son and I went outside for a quick little photo shoot.

For this quilt, I shopped my scrap and FQ stashes to get lots of variation in my fabrics. I made random strippy panels (similar to a jelly roll race quilt) and then cut the blocks from them. It wasn’t the most efficient process to make the blocks, but I knew it would force me into a randomness that I wouldn’t get using foundation strip piecing. I know myself- I like controlling things too much!


This was my first project on the long arm, and I was happy with the way it turned out. I am definitely still learning, but with as many tops as I have to finish in the next few months, I should be an old hand at it soon!

I love laying this one out for BBQs and to relax in the back yard, but she is currently hanging in my studio opposite my design wall keeping my works-in-progress company. I love coming in each day to this view!


Happy Sewing, ~Lorinda

Linking up to:

sew-fresh-quilts-ets-bee-social     my-quilt-infatuation-needle-and-thread-thursday

Happy Valentine’s Day!

Whether you’re into the lovely-dovey stuff or think of today as another Hallmark creation designed to get our hard-earned cash, I think we can all agree that Valentine’s is at least a great excuse for a fun heart project!

img_5068

I totally got into the spirit of it this week, and decided to finally cut into the Essex Yarn Dyed Metallic fabric I bought recently. The sparkle in these metallics is so pretty!

img_5317

For my pattern, I decided on the I Heart You free mini quilt pattern from Cluck Cluck Sew.  I love it! The design is so cool, instructions are easy to understand, and the whole thing worked up really quickly.

img_5337

img_5343

I put this mini in the center of my dining table with a pretty little bouquet of flowers.

DSC_0168 (2).JPG

With all the WIPs I have right now, I really enjoyed just having a quick finish. What are your favorite quick patterns?

Happy Sewing, ~L

Turnabout Patchwork Blog Hop

thumbnail_turnaboutbloghop

I am so excited today to be participating in the Turnabout Patchwork Blog Hop! This new book was released by Teresa from Sewn Up late last year, and for the next week and a half, we will be celebrating with her!

thumbnail_sewnup-teresadownunder-banner-sml

In Turnabout Patchwork, Teresa uses simple blocks cut and turned different ways to create fun and easy quilts. I enjoyed looking through the book imagining the quilts done up in different color combos from my own stash.

Visit Teresa’s website and Instagram account to see all the fun things she’s up to!

For my project, I chose to do the Arrowhead quilt.

I decided it was time to start using all the indigos and purples I’ve been stashing lately. I love the way these colors blend together, but I needed some contrast for this quilt design as well. For that, I chose this amazing chartreuse from Alison Glass that’s been waiting patiently in my stash for just the right quilt.

dsc_1132

dsc_1129

The cutting on the accent color was a bit of a tight fit, and I chose not to do the border. If I was doing the quilt again, I might get a little extra of the accent color to be sure I had enough.

Another adaptation I made was to only do 11 rows instead of 12. With my particular set of fabrics, the gradient just blended better that way.

dsc_1126 (2)

I am so in love with this quilt! The design is really striking and I would love to see it made up lots of different ways. It was a really quick top to finish, so I may be making it again sometime soon.

As for quilting, I’m not 100% sure yet what I want to do. I will probably quilt heavily in the purple and blue areas and leave the green alone so it really stands out. I have a date with the long arm next month, so I have at least a little while to figure it out! dsc_1122


To purchase Turnabout Patchwork, visit Teresa’s Blog by clicking the button below and she will give you all the details for ordering!

thumbnail_sewn up badge


And what’s a celebration without a Giveaway?!

Teresa has been gracious enough to allow one of my readers to win an electronic copy of her book AND a PDF pattern of your choice from her shop. Entering is simple: just visit her etsy shop, take a look at all her great patterns, then come back here and leave a comment telling me your favorite.

I’ll be randomly selecting a winner at the end of the Blog Hop.  Giveaway is open to everyone over 18. I’ll notify the winner via email, so make sure you’re not a no-reply blogger or leave me your email in the comment in this format:  laurelpoppyandpine(at)outlook(dot)com

Good luck!


Last but certainly not least, be sure to stop by each blog in the hop to see all their gorgeous projects and to enter some more fun giveaways!

Blog hop schedule

January 30 – Quarter Snow Ball

Arrowhead

Sweet Bows

Tutti-frutti

Sun Dunes

February 1 – Modern Shoofly

Flying Rainbows

Flying Butterflies

Flying Flags

Flying Confetti

February 2 – Half Square Triangles (HSTs) and squares

Rose Garden Star

Swirl

Houndstooth

Diamond Star

February 4 – Striped Fabric Block

Shells

Xs and Os

Jaws

Arrowhead

February 6 – Coordinated Strips

Peaks

Diamond and Crosses

Knots and Crosses

February 8 – Double Disappearing Nine-Patch

Holiday Trellis

Stepping Stones

Two for One

Cross


Happy Sewing!  ~L


Christmas sewing projects

I mentioned a while back that I had been a naughty quilter and was starting lots of new projects without finishing what I’ve already started. Many of those fun distractions were Christmas projects that I just HAD to do!

I recently picked up some Swell Christmas fabric at work. I love this collection; it is so retro-cute I can barely stand it. I decided to make myself a Christmas table runner so I could really enjoy the cute fabric up close all season. Originally, I was going to do a checkerboard patchwork of the Santas alternated with other fabrics from the collection placed randomly.  I cut my Santa squares and then promptly changed my mind (don’t you HATE that?!)

Instead, I decided to use the Shimmer pattern from Cluck Cluck Sew to make a few blocks that I would make into a runner. Unfortunately, the Santas were already cut too small to be the centers of those blocks! I regrouped and made a new plan. Here is what I ended up with:

There is big stitch hand quilting on there, but not much. I figured I could get away with minimal quilting as it will only get washed a few times a year at most.  I used Aurifil 12wt thread, which I am in love with for super visible and cute hand quilting.

img_3622

It love it and think it ended up really cute.


But what to do with all the adorable Santa squares I had already cut out? I knew that my sister would love them as much as I did, so I decided she needed them in her life. I had enough of the red trees left over to add to the Santas and make a table runner for her too!

DSC_0661DSC_0821

The back has a little surprise- the table runner is completely reversible. On the back (or front!), I appliqued my wish for a joyous season for my sister.

DSC_0829

This was gifted mid-December so that she could have it out leading up to Christmas.

DSC_0814


In the midst of all that, I also made this improv present block. It only measures 6 inches square, and I don’t know what I’m going to do with it yet. Stay tuned!

img_3841

And last but not least for the Christmas creating: I decorated my boy’s tree this year in a lot of red, yellow, and teal and decided that their red and green tree skirt would just not do. This new tree skirt was a really quick and easy project using 12 wedges cut with a wedge ruler and sewn together.  My youngest says the tree ‘looks like the circus’. I am choosing to believe that was meant as a compliment!

img_3808

And a post about my Christmas season would not be complete without sharing a picture of this adorable little terror that my husband brought home. His name is Sparta and one of his favorite activities is playing in my trees. I think he loves that we’ve put up new ‘climbing toys’ all over the house for him with pretty lights and baubles to knock down. I have to admit, though: he’s pretty cute.

img_3791


Happy sewing, ~L